Hybrid-bike-black-orange-decathlon

REF: 8585010

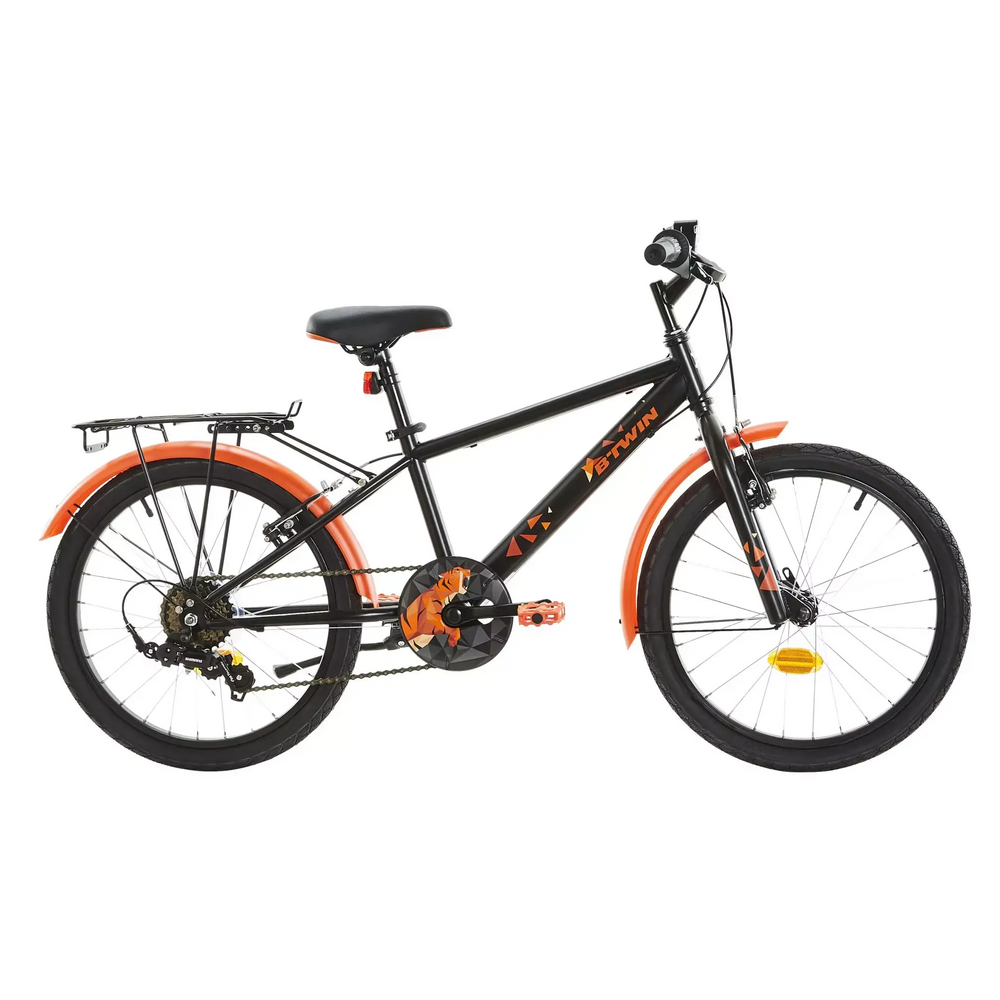
20" HYBRID BIKE 500 BLACK/ORANGE

We designed this hybrid bike for kids aged 6 to 9 years old (120 to 135 cm) wanting to go from riding around town to riding on uneven paths in any type of weather.

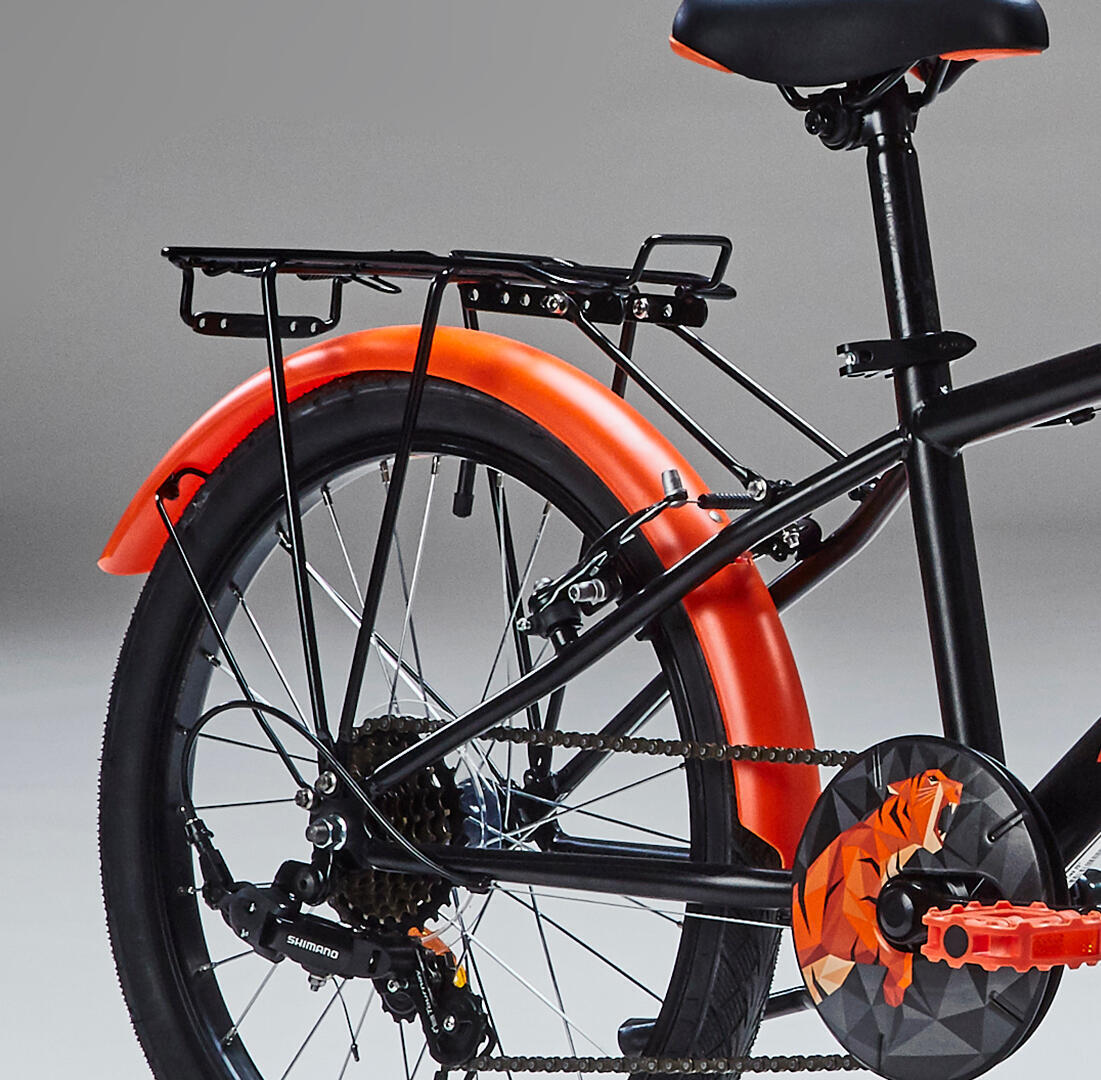
This 20" hybrid bike is fitted with a suspension fork, mudguards, a kickstand and a pannier rack, allowing you to go for a ride all year round.

Glossary

Brake barrel adjuster

There are two barrel adjusters for each brake, positioned on the brake levers. They help to adjust the tension of the brake cable. Make sure you find the best adjustment by turning the barrel. (The more you tighten the barrel, the more the cable is taut).

Derailleur barrel adjuster

This barrel adjuster is positioned on the rear of the of the derailleur. It helps to tighten up the derailleur cable more or less. If you are having difficulty with the bike chain going uphill, then the cable is not taut enough. You have to pull it tauter by loosening the barrel. If the chain is labouring downhill, the cable is too taut, and you have to tighten up the barrel. The right balance is often found with quarter of a turn.

Brake hose cable guide pipe

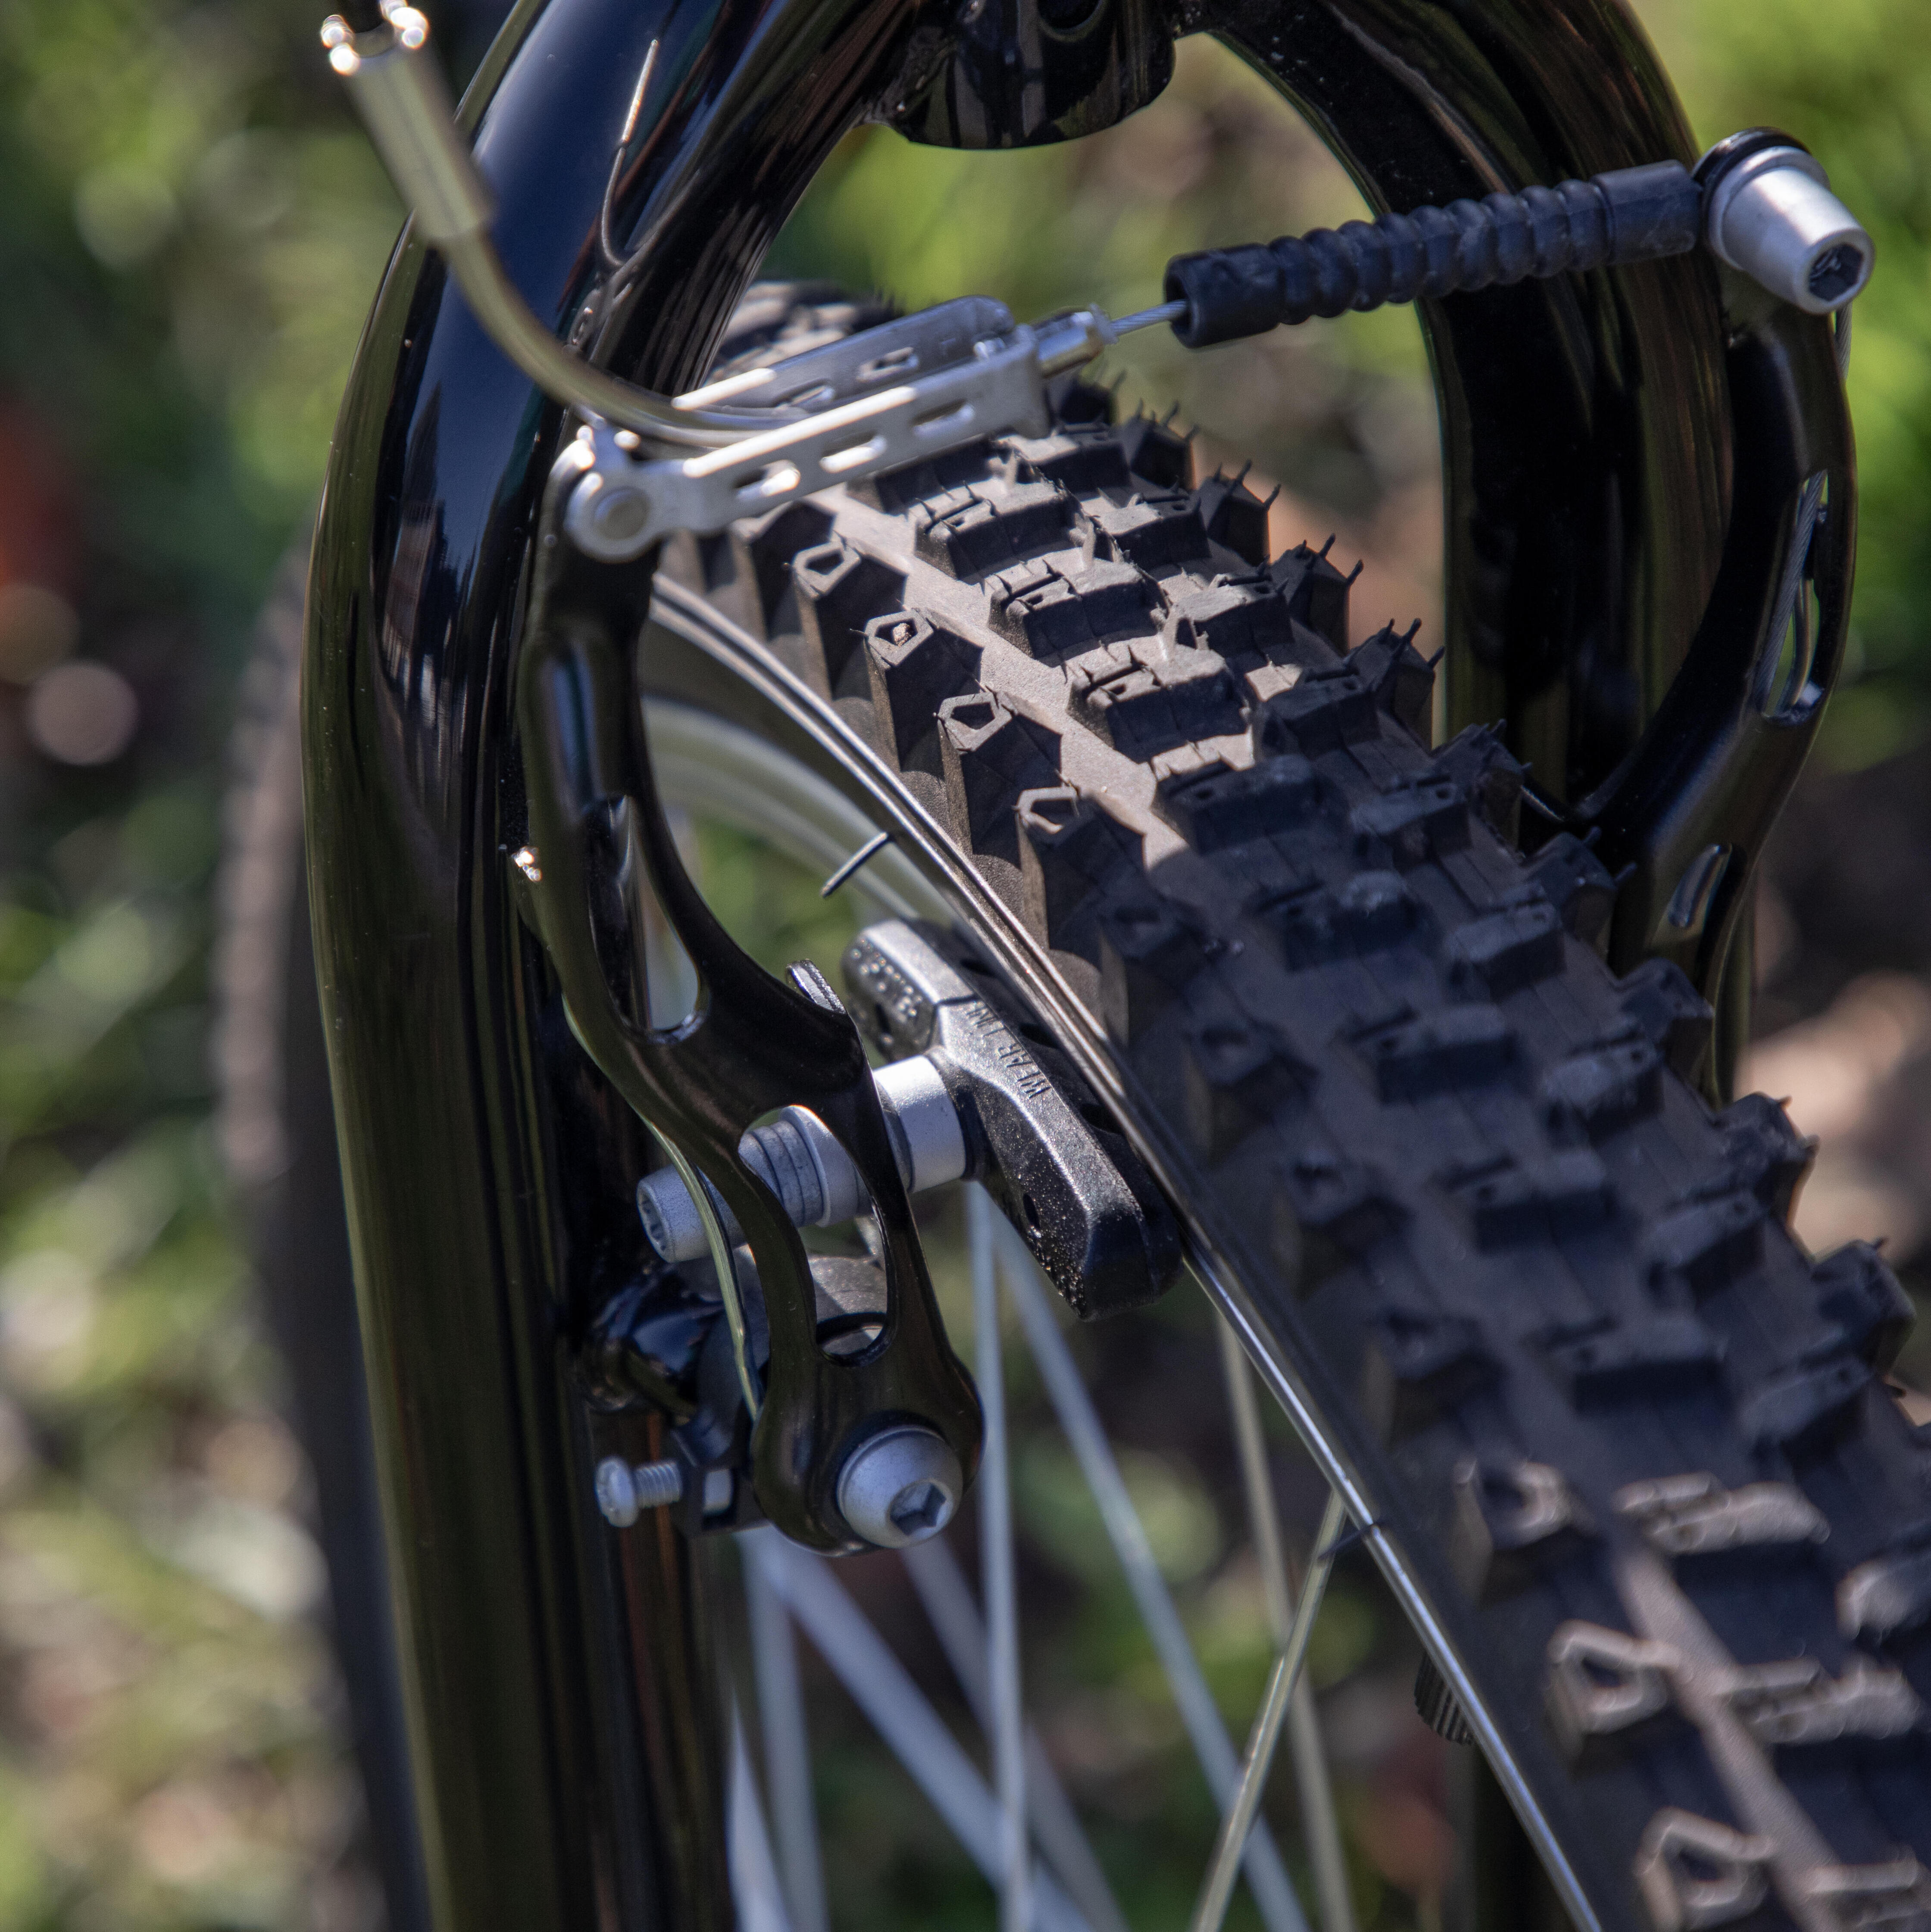
The brake hose cable guide pipe is a stainless steel part that guides the brake cable into the V-brake caliper. The angle degree of the cable guide pipe is selected to ensure the best angle for guiding through the cable for effective braking. It it possible to replace it should it get broken.

V-brake calipers

A V-brake has two calipers (a left one, a right one). These are linked at the level of the rubber overcoat.  You can disengage the cable guide pipe to release the calipers so as to easily to remove your wheel.

V-brake-caliper-brakes
Stem fastening bolt

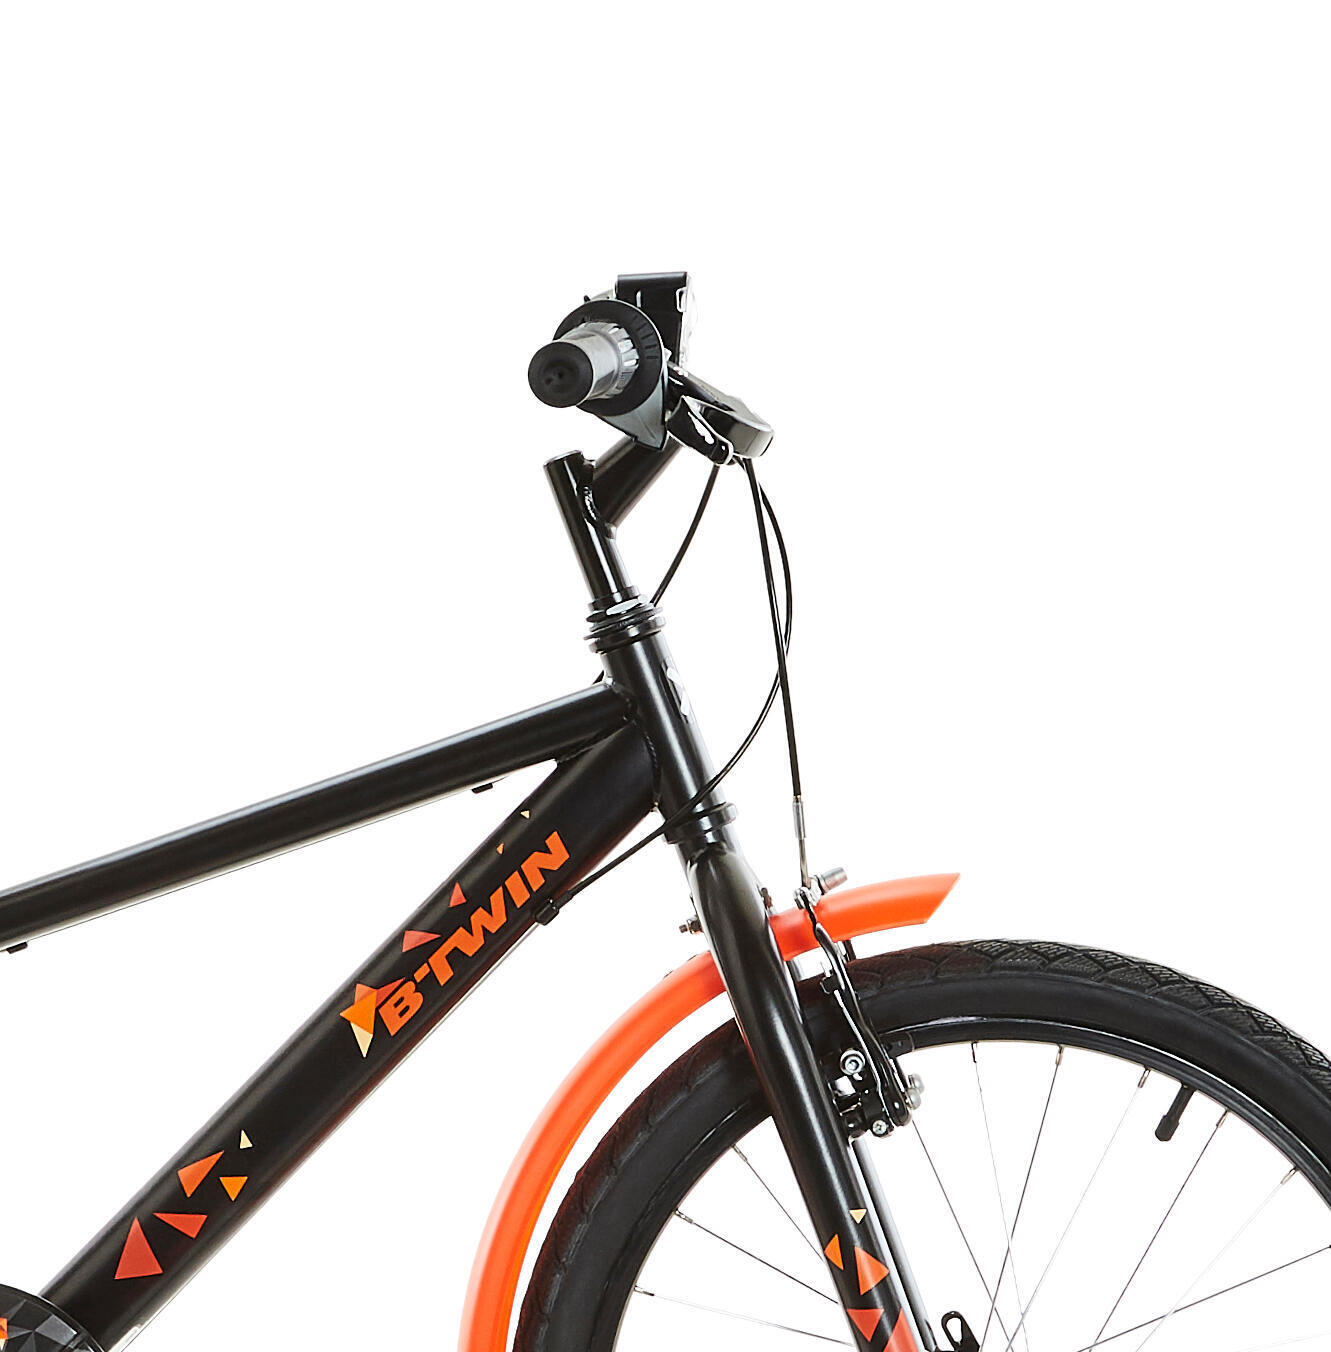
The handlebar is welded to the stem. This is fastened above thanks to a single bolt. Optimally fasten this bolt by using a torque wrench with a minimum tightening torque of 22 N.M (newton metre). 

stem-bolt

First use

How to best adjust saddle height before your first ride

It is important to adjust the height of the seat post and handlebar in line with the child's build. For safety purposes, the seat post and handlebar's minimum insertion marker must never be visible (make sure you never exceed this minimum insertion marker).  

To work out if the saddle height is well set up, place the heel on the pedal, with the crank arm in the 6 o'clock position: the saddle height is well positioned when the child's knee is straight. Also check, when the child is in the saddle that the tips of their toes are touching the ground. 

How to ensure brakes are well adjusted 

To test your brakes' effectiveness, roll the child's mountain bike forward holding it by the handlebar. Squeeze the right-hand lever for the rear brake and the left for the front brake. The tested wheel must stop after you pull the lever. The brake pads must not rub against the rim sidewalls.


If you notice the braking is not effective or the wheel is rubbing, here is what you can do: There is a barrel adjuster positioned in front of the brake lever. If you turn the barrel clockwise, this will tighten the brake more (= stronger braking). If you turn the barrel adjuster anticlockwise, this will loosen the brake (= less powerful braking and loosening up brake pad clamping on wheel rim)


It is important to regularly check the brakes are well adjusted.

Adjustment-brakes-kids-hybrid-bike-decathlon

What is the correct tyre pressure for the 20" hybrid bike? 

The recommended tyre pressure is always indicated on the sidewall of each bike tyre. We recommend inflating the tyres up to the tyre pressure indicated on the tyre sidewall. This can vary according to the type of tyre. 

To check if the tyres are sufficiently inflated, you just have to get your child to sit the bike when stationary. The pressure is correct when the tyre slightly sags under your child's weight. 


Compatible accessories

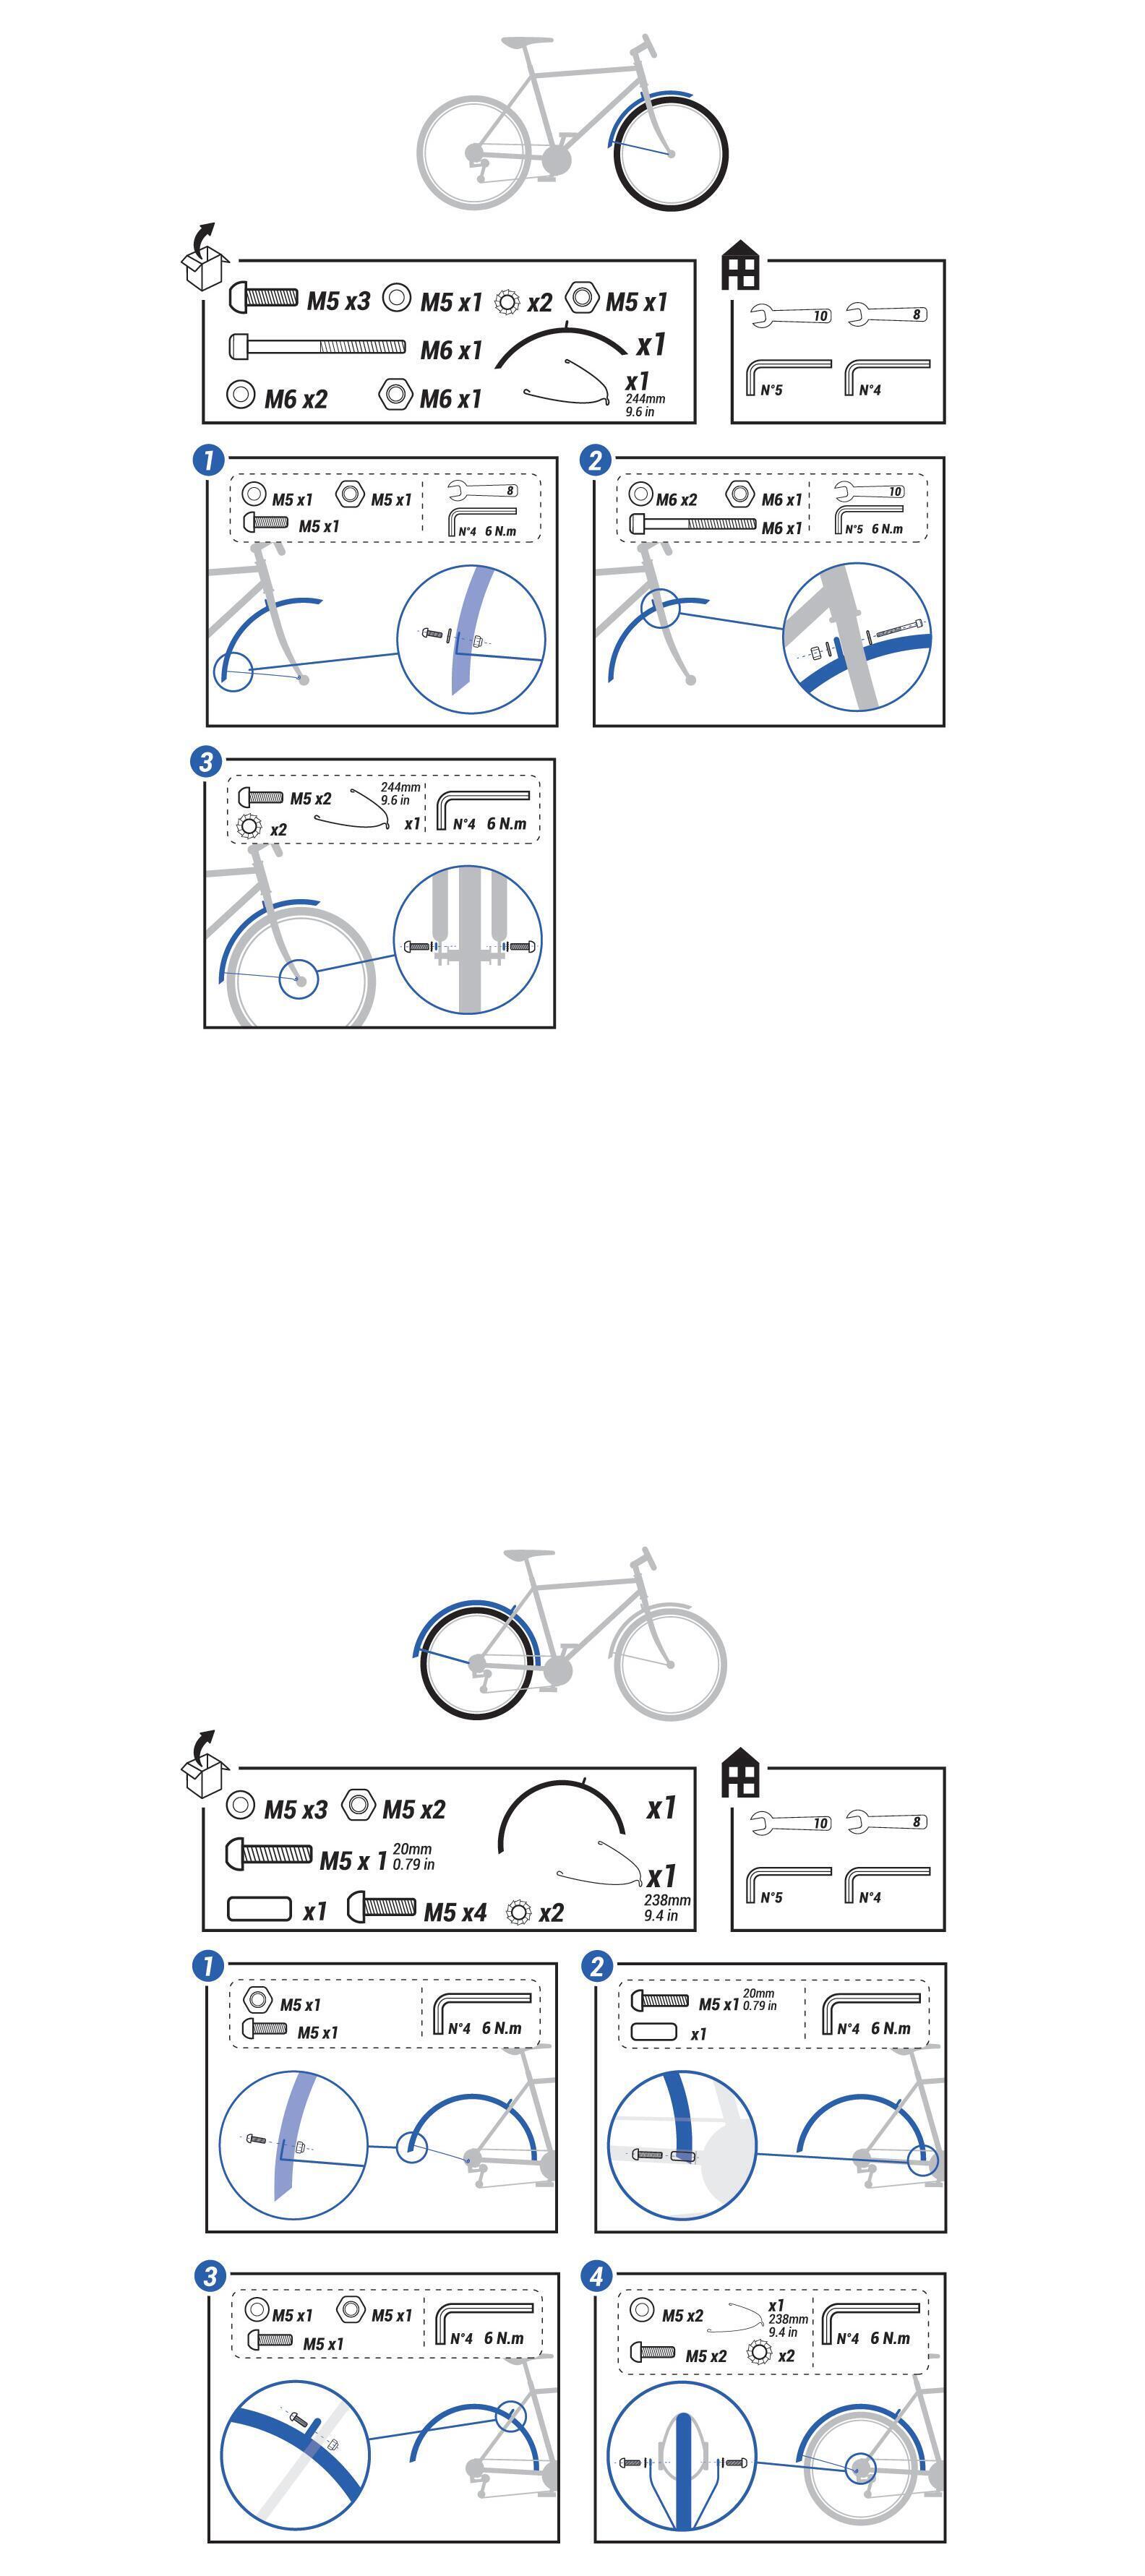
1. The front and rear mudguards
How to mount hybrid bike mudguards
how-to-mount-hybrid-bike-mudguards

Maintaining the 20" hybrid bike

How to lube kids' hybrid bike chain

You can use a product like the "All-in-One" to free up, clean, lubricate and protect your child's bike parts (product available in Decathlon stores). It's a very handy all-in-one product. To lube the child hybrid bike's chain, turn it round by turning the pedals, spraying the whole of the chain"".  Then leave it to dry for a few minutes. If the bike chain is very dirty, give the whole chain a clean with a brush and/or a cloth, and spray it once again with the "All-in-One".   Our advice: avoid any contact with brake pads and braking surface areas on your wheel rim.   Long-lasting bike protection: regular application prevents the risk of corrosion.

How-to-lubricate-the-24-inch-hybrid--bike-chain

How to wash the kids' hybrid bike

If you notice that the child's bike is dirty after several bike rides (mud, rain, dust...), feel free to give it a quick clean when necessary.   If the bike has dust on it, you can just use a dry cloth to clean it. If there is mud or slightly more persistent forms of dirt, you can clean it with a sponge (or a wet cloth)  and a bucket of warm water mixed with bike cleaner. You can clean the bike's dirty parts (frame, fork, handlebars, wheels).   DID YOU KNOW? We strongly advise against cleaning the child bike with a high-pressure hose: you could be damage the working order of certain components (headset, bottom bracket...), making it unsafe for your child to ride the bike.    All that's left to do to finish off is to wipe it with a dry cloth to prevent it from rusting. Don't forget to grease up your bike's moving parts (bike chain, headset, bottom bracket) 

How to replace the brake pads

V-Brake brake pads are available to buy as spare parts. To replace them, look through the steps described in this video tutorial. 

how to change brake pads

How to check your tyres are in good condition

It's vital before each bike ride to inspect the state of your bike tyres.  If it's flat, check it is not punctured. Do this by inflating it as much as possible. If it deflates quickly, you have to remove the wheel, then remove the tyre to be able to replace or repair the inner tube.  If it slowly loses pressure, you have to inspect the tyre's surface for any sharp points or bits of glass. Then you have to remove the wheel, and afterwards dismantle the tyre to change or repair the inner tube, making sure you carefully remove the sharp point or bit of glass.    If it's is not flat, we advise you to check the tyre is correctly inflated (see the section above).    DID YOU KNOW? Rubber's lifespan also depends on the conditions of use and storage. If small cracks are visible when inspecting the tyre, then we recommend replacing them with new tyres. 

How to store the bike

We recommend storing your bike in a dry place. It is important to ensure you prevent it from getting damp. The child bike's lifespan depends on the way it is used, maintained and stored. The more exposed the bike is to damp and sea air conditions, the greater the likelihood of it rusting and it having a shorter lifespan.   It is therefore important to store it when it is clean and dry, in a place that is not damp.    DID YOU KNOW? It is not advisable to store bikes with a telescopic fork by suspending them with the front wheel. Hanging them up by the rear wheel helps to preserve the fork's lifespan. 

Troubleshooting

What do you do when you have a puncture? how do you replace the inner tube?

Should you get a puncture, stop as soon as you can in a safe place so as not to damage the wheel rim.  Turn you bike over on to the saddle and handlebars. You have the release the brakes to remove the wheel. Do this by squeezing the V-brake calipers and disengaging the guide pipe.  For the front wheel, you just have to remove the fork and then replace the inner tube (watch the explainer video).  For the rear wheel, position the derailleur on the smallest cog. Loosen the wheel and replace the inner tube (watch the explainer video).    As a last resort, you can always use the puncture sealant spray that lets you repair a punctured inner tube tool-free (not suitable for inner tubes with tearing). 

How to replace your child's hybrid bike inner tube

Trouble with gear shifting. what can you do? 

If you are having trouble changing gears on your hybrid bike, it's due to the rear derailleur not shifting the bike chain properly on cogs.    Inspect cables and housing: Wrongly positioned crimp ends can hinder derailleur cable pull, disrupting gear shifting. If a crimp end is wrongly positioned, put it back in its place manually. If the derailleur no longer moves, even after twisting the grip shifter, then the cable and its housing have probably seized up. It is then necessary to replace the cable and housing.   There is the possibility that the derailleur hanger is bent, due in large part to an impact. It subsequently becomes impossible to change gears. In this case, we recommend popping into the workshop of the nearest Decathlon store to straighten the hanger.    There is also the possibility the derailleur is malfunctioning. In this case, turn the bike over on to its saddle and handlebars to release the pedals (or even better mount it on a work stand). Activate the derailleur shifter to put the bike chain on the smallest sprocket. The barrel adjuster is located at the back of the derailleur. It helps to tighten (lift the derailleur) or loosen the derailleur cable (lower the derailleur). Adjust the barrel until gears shift properly. 

The brake lever is touching the handlebar. what can you do?

When the brake lever is too loose, too spongy, and touches the handlebars too easily, adjust the brake cable's tension with the help of the barrel positioned on the brake lever as shown in the video below .   Loosen up the barrel and the locknut until you have suitable brake cable tension for firm, but not too hard, brake lever set up. Once you've found tension you want, tighten locknut thoroughly up against the brake lever to lock this adjustment tight. 

20" Hybrid Bike 500 black-orange

Haven't been able to fix your problem or find what you need?

Please contact one of our technicians who will be happy to help

20" Hybrid Bike 500 black-orange

Our btwin guarantees

ROCKRIDER offers a lifetime warranty on your hybrid bike's frame, handlebar and stem (under normal conditions of use).

The other parts come with a 2-year warranty.

After the first bike rides, certain components can slightly budge.That is why we offer to service your hybrid bike free of charge within six months of your bike's purchase.