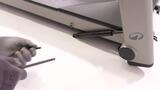
ASSEMBLING AND SETTING UP
Thank you for purchasing a Domyos product. To help you get your equipment up and running, click on the video to see the different set-up steps.
REF: 8800625
2024
In stores: November 2024
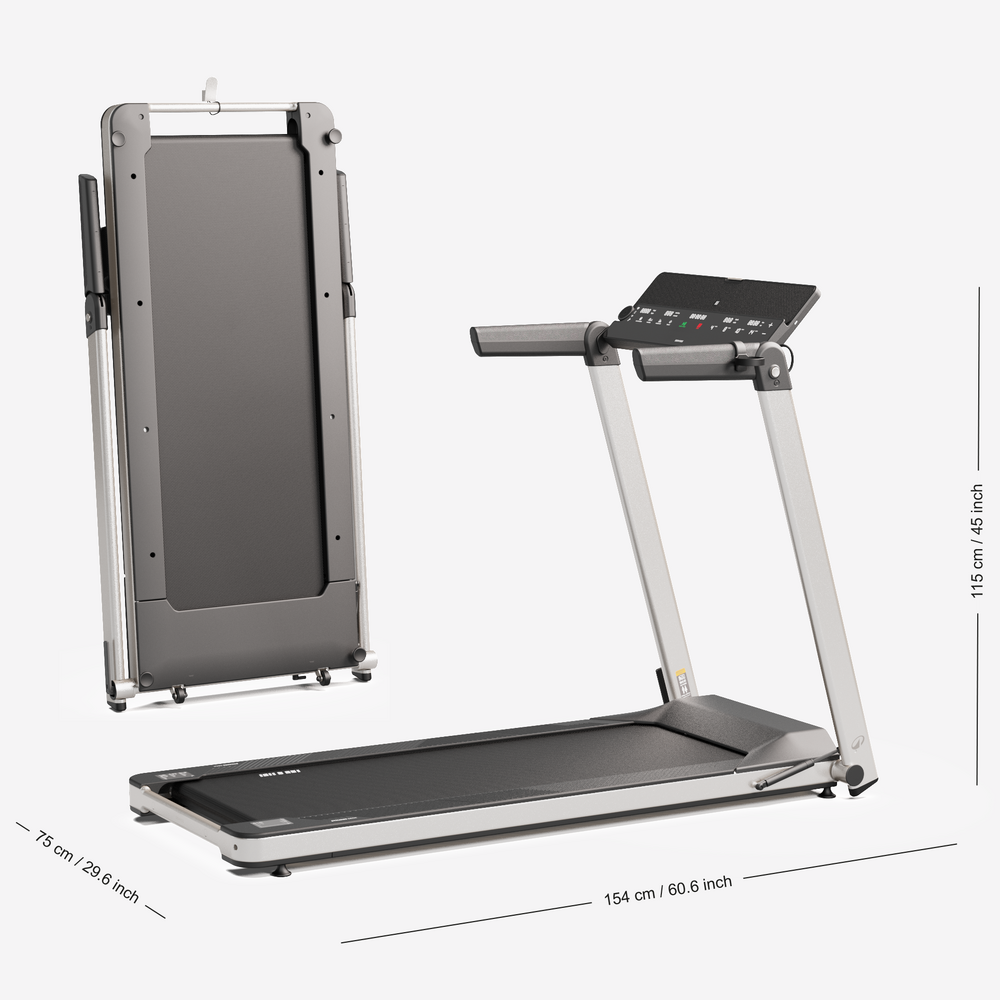
On this page we give you all our advice on how to assemble your treadmill, how to maintain it and how to repair it. You can also find the spare parts compatible with your COMPACT RUN100 treadmill
Features:
VERSATILITY: Speed from 1 to 14 km/h to vary your workouts, 4 shortcut keys.
USER COMFORT: Running area: 45 cm wide and 120 cm long for comfortable running.
COACHING: 30 pre-recorded adjustable programmes, "target " mode, Bluetooth connection.
CONNECTIVITY: Compatible with Domyos E Connected as well as Kinomap and Zwift third-party apps.
COMPACT DESIGN: Compact folding for easy storage, folded treadmill is 13 cm thick.
Thank you for purchasing a Domyos product. To help you get your equipment up and running, click on the video to see the different set-up steps.
COMPACT RUN 100 VIDEO ASSEMBLY
Are you still having issues with your equipment even though it's properly set up? You can find all our FAQs here.
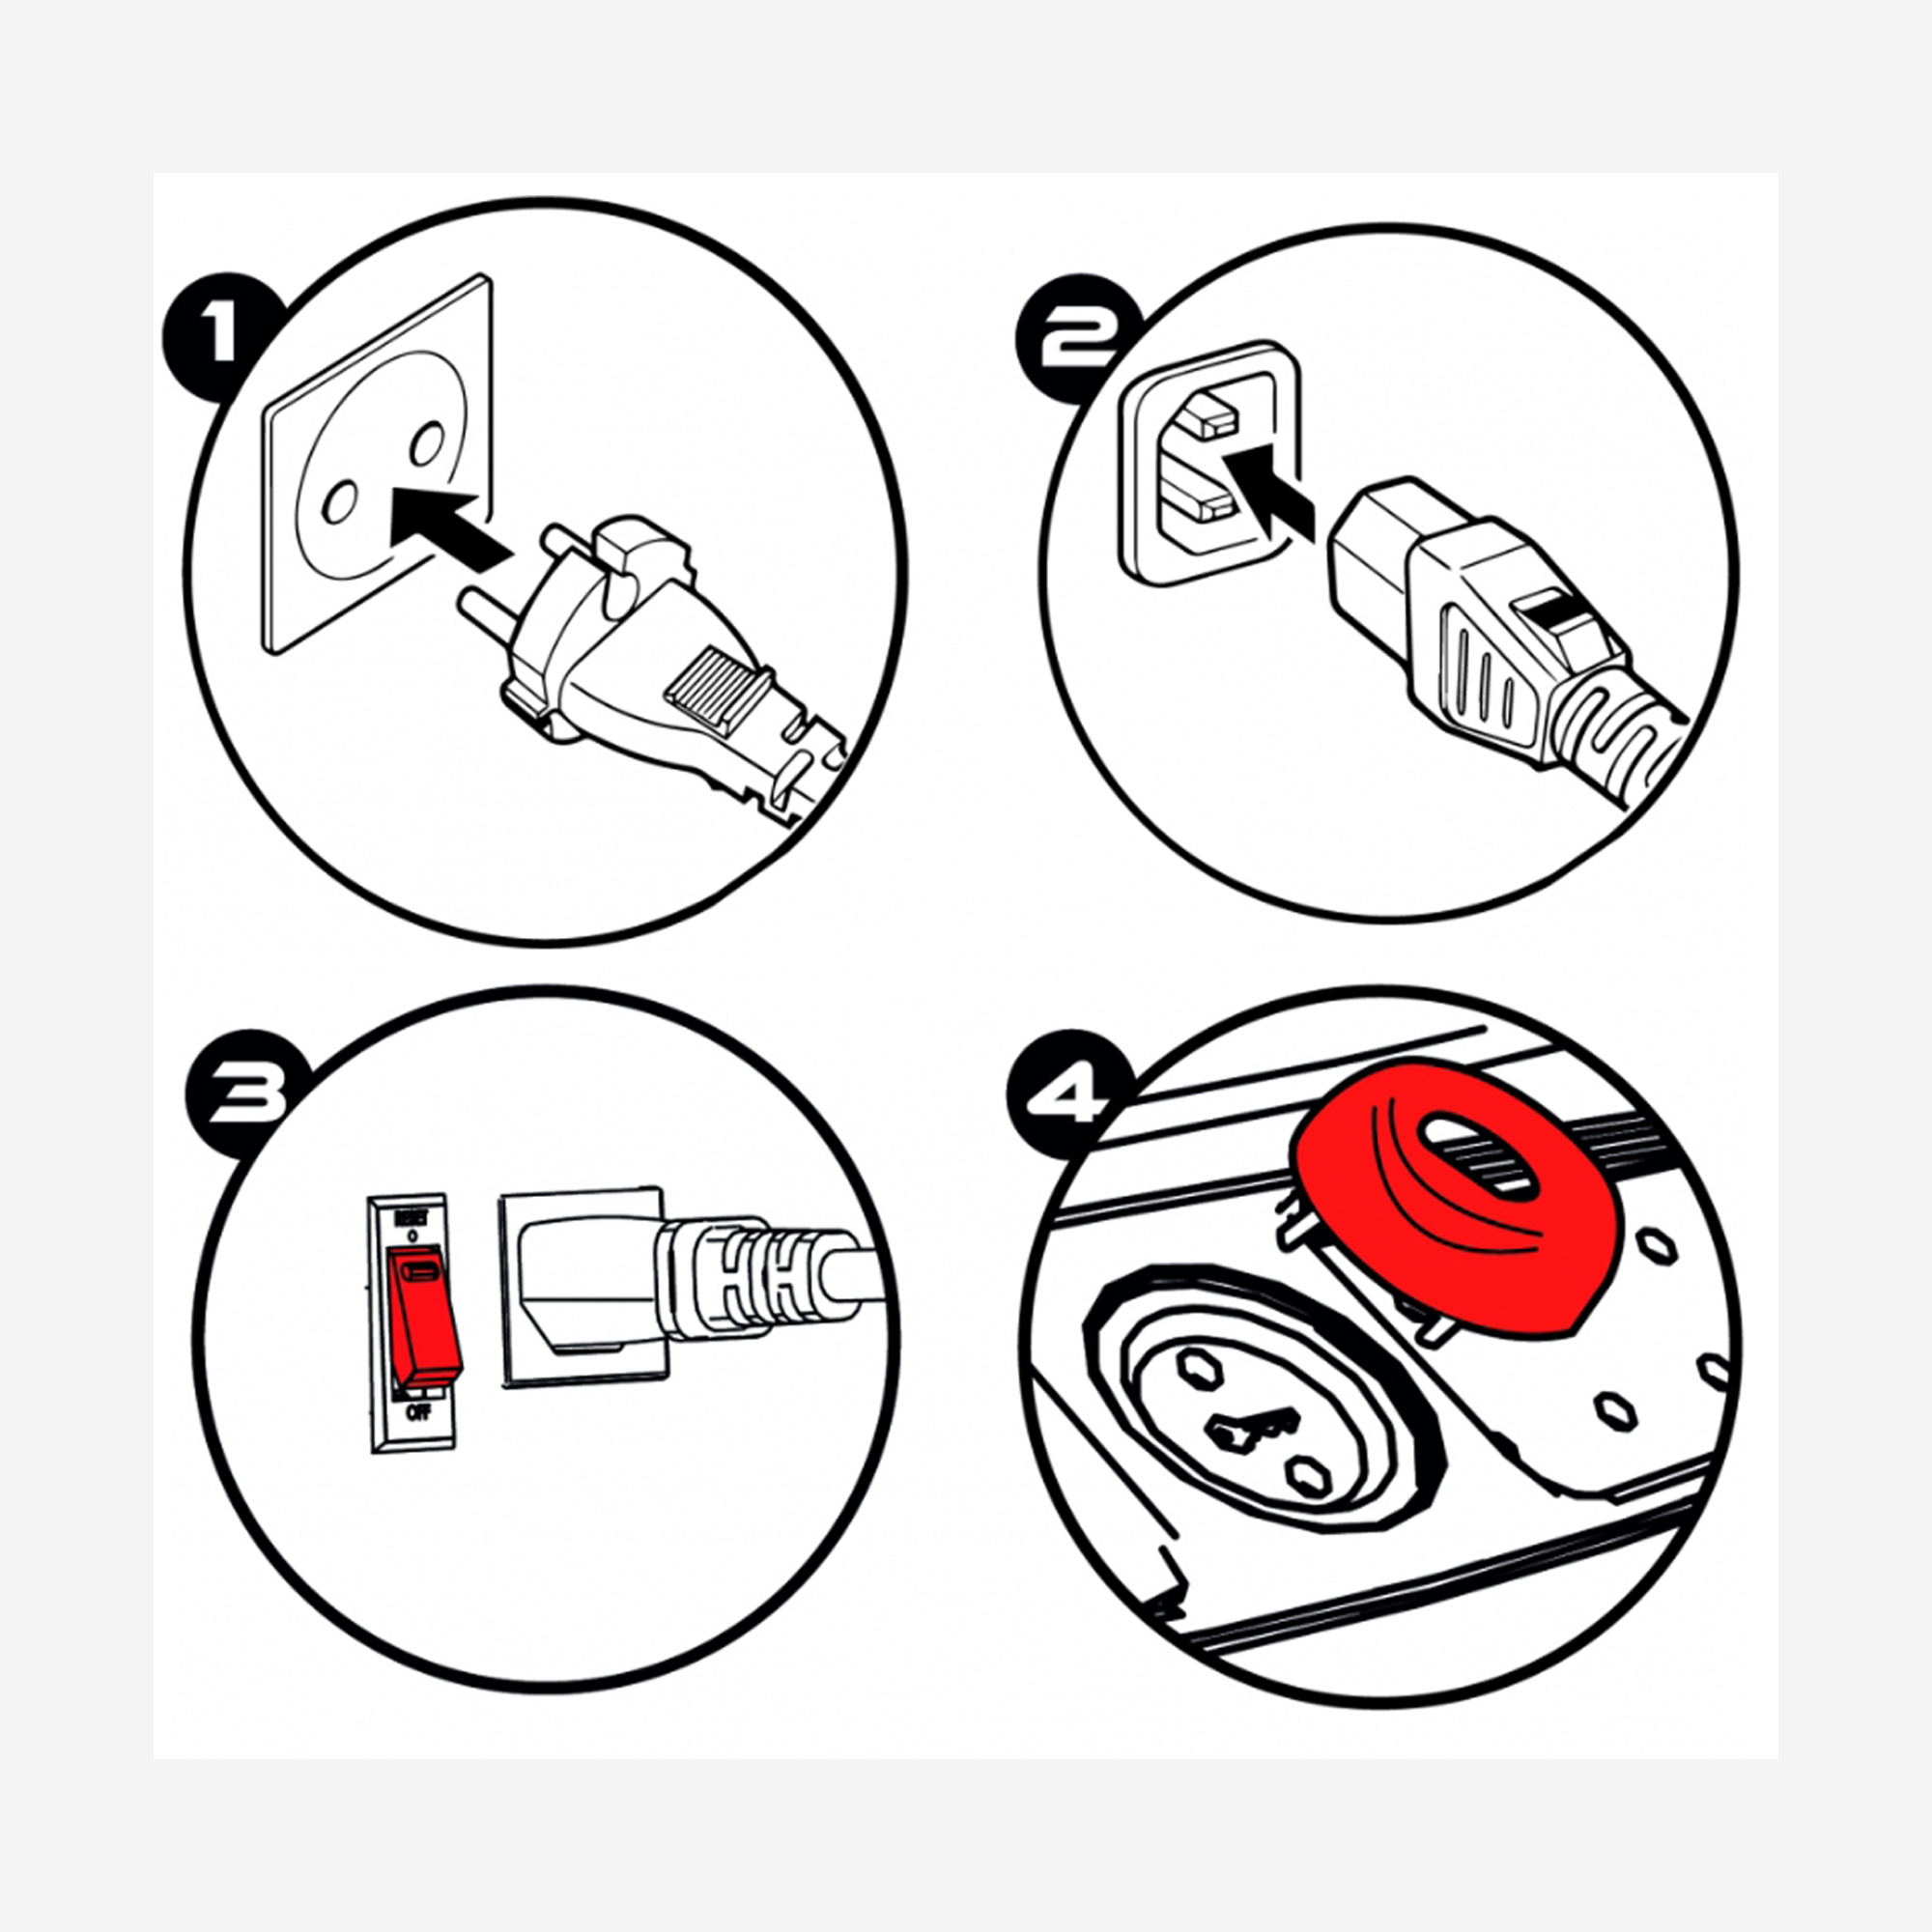
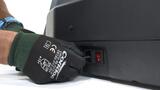
1. Check that the power cord is plugged into a working mains socket (to check if the wall socket is working, plug in a lamp or other electrical device).
2. Check that the other end of the power cord is connected to your treadmill.
3. Check that the safety key is pushed fully into the console.
4. Check that the main switch near the power cord is set to I.
5. Check if the I/O switch lights up, if it does not light up change the fuse:
https://players.brightcove.net/3415345270001/DOHosj6Wy_default/index.html?videoId=ref:p1786030_1
The treadmill belt is slack:
=> Choose the tab "How to check if your running belt is correctly tensioned" in the SERVICING YOUR PRODUCT section.
1. Shoes:
=> The noise you hear could be the sound of your shoes on the running belt. To check that the noise isn't coming from your shoes, please see the video below
2. The screws are loose:
=> Tighten all of the screws.
3. The running belt is wonky:
=> Select the "Centring the running belt" tab in the SERVICING YOUR PRODUCT section.
4. The running belt is not lubricated:
=> Click on the "Running belt lubrication" tab in the Servicing your product section.
5. You hear a click when the running belt is turning and it gets louder as the speed increases:
This is due to the heat welding of the running belt as each roller passes over it (see video below)
Once you've used it a few times the heat welding will soften and the noise will fade.
Running belt tension is too high:
=> Choose the tab "How to check if your running belt is correctly tensioned" in the SERVICING YOUR PRODUCT section.
PLEASE NOTE: the heart rate monitor belt is not supplied with purchase !
You can buy the Bluetooth heart rate monitor belt (BLE = Bluetooth Low Energy or Smart) with the product reference number 8334795 from our website or your local Decathlon store.
*Once properly set up, your heart rate monitor is automatically detected, and your heart rate, in beats per minute, will appear on the console's display.
PLEASE NOTE:
Your heart rate monitor must not be paired with any other device such as a smart watch, smartphone, etc.
If not, the belt will not connect to the treadmill.
*Compatible with other BLE heart rate monitors.

Your equipment is working normally, but you're having problems with the app?
Check out our solutions by clicking on the "MY APP" button.
- It lets you connect a BLE heart rate monitor.
(BLE = Bluetooth Low Energy or Smart)
-It allows you to connect to applications (Domyos E-connected, Kinomap and Zwift....)
Before starting the operation, make sure that you have connected your treadmill to the mains and that your safety key is removed.
1. Hold down the "STOP" and "+" speed buttons for 3 seconds at the same time.
(The "SOUND" message appears)
2. Press the START/PAUSE button "twice" to scroll and display "bt".
4. Press the "+" or "-" speed button to change the function to ON or OFF.
5. Press "STOP" to confirm the changes,
6. You can now use your treadmill.
The "USB-C" port can only be used for plugging in your tablet or smartphone and keeping it charged.
Every 200 km the word «SERV» appears on the home screen.
(SERV = SERVICE)
This message is an important reminder to service your equipment by lubricating the treadmill deck.
*To see how to lubricate the treadmill deck, refer to the FAQ "RUNNING DECK LUBRICATION" in the "SERVICING YOUR PRODUCT" section.
Use the following lubricant only: https://www.decathlon.co.uk/p/treadmill-lubricant-kit-150-ml/_/R-p-119636?mc=8326425
To clear the message:
When the safety key is plugged in and the SERV message appears, hold down the "STOP" and "SPEED +" buttons for 3 to 5 seconds.
Before starting the operation, make sure that you have connected your treadmill to the mains and that your safety key is removed.
1. Hold down the "STOP" and "+" speed buttons for 3 seconds at the same time.
(The "SOUND" message appears)
2. Press then "START/PAUSE" button to display "UNITS".
3. The unit will be displayed: UNIT MI for (Miles) or UNIT KM for (Kilometres).
4. Press the "+" or "-" speed button to change the unit.
5. Press "STOP" to confirm the changes,
6. You can now use your treadmill.
Before starting the operation, make sure that you have connected your treadmill to the mains and that your safety key is removed.
1. Hold down the "STOP" and "+" speed buttons for 3 seconds at the same time.
(The "SOUND" message appears)
2. Press the START/PAUSE button "three times" to scroll and display "time".
"time" = the total number of hours of use.
3. Press the START/PAUSE button "four times" to scroll and display "dist".
"dist" = the total number of kilometres covered.
5. Press "STOP" to exit.
6. You can now use your treadmill.
Before starting the operation, make sure that you have connected your treadmill to the mains and that your safety key is removed.
1. Hold down the "STOP" and "+" speed buttons for 3 seconds at the same time.
(The "SOUND" message appears)
2. Press the "+" or "-" speed button to adjust the volume.
- OFF = No beep
- 1 = 25% of max volume
- 2 = 50% of max volume
- 3 = 75% of max volume
- 4 = 100% of max volume
PAIRING:
1- Insert the safety key.
2- Hold down the "+" and "-" buttons on the remote control simultaneously for 3 seconds.
Remote control pairing
When the battery is < or = to 1%, the power button in the centre of the remote control lights up and flashes red for the last few seconds before going out.
Changing the battery on the RUN500 remote control
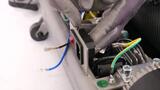
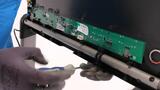
E1: Communication problem between the console and the control board.
1. Turn the treadmill off by holding the on/off button for one minute, then restart it.
> If the problem continues go to step 2
2. Turn the treadmill off using the on/off switch and unplug it.
3. Check that the console cable is correctly connected to the console and the control board.
4. Check that the pins on the console cable connectors are not bent or broken.
5. Check that the console cable is not damaged, crushed or cut during assembly.
> If the problem persists go to step 6
6. The damaged part (cable, console or control board) needs changing. Contact the technical support .
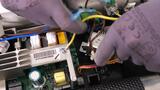
E2: Training motor blocked.
1. Turn the treadmill off by holding the on/off button for one minute, then restart it.
> If the problem continues go to step 2
2. Start the treadmill without anyone being on the running belt.
3. If the belt turns, start training.
> If the problem continues go to step 4.
4. Check that the drive motor cables are correctly connected to the control board and that they are not damaged.
> If the problem continues go to step 5.
5. Contact technical support.
E3: Motor sensor failure.
1. Turn the treadmill off by holding the on/off button for one minute, then restart it.
> If the problem continues go to step 2
2. Switch off the treadmill using the on/off switch and unplug it from the socket.
3. Check that the drive motor sensor cable is correctly connected to the control board and that it is not damaged.
> If the problem persists go to step 4
4. The damaged part (motor or control board) needs replacing. Contact technical support.
E4: Damaged control board safety relay.
1. Turn the treadmill off by holding the on/off button for one minute, then restart it.
> If the problem continues go to step 2
.
2. The control board needs replacing. Contact the technical support .
E5: Motor surge protection.
1. Turn the treadmill off by holding the on/off button for one minute, then restart it.
> If the problem continues go to step 2
The damaged part (motor or control board) needs changing. Contact the technical support .
E7: Home electrical network overvoltage or undervoltage protection.
1. Turn the treadmill off by holding the on/off button for one minute, then restart it.
> If the problem continues go to step 2
2. Check that the treadmill is not plugged into an extension lead or multiple socket, but rather plugged into an earthed wall socket.
3. Have a professional check that your socket outlet voltage is between 135 VAC and 279 VAC.
> If the problem persists go to step 4
4. The damaged part (control board) needs changing. Contact the technical support .
E11: Control board overheating.
1. Turn the treadmill off by holding the on/off button for one minute, then restart it.
> If the problem continues go to step 2
2. Check that your treadmill is not placed in an environment that is too hot (veranda, in front of a patio window or door…). The treadmill needs to cool down.
Please contact one of our technicians.
It takes care of you, so you should do the same for it!
Regular maintenance is necessary to preserve the performance of your equipment and extend its service life.
1- Turn off then unplug your treadmill from the mains.
2. Apply a little gentle cleaning product to a pure cotton cloth.
Do not spray cleaning product directly onto your treadmill and do not use ammonia- or acid-based cleaning products.
3. Wipe down the console and screens.
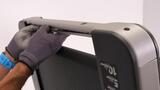
4. Wipe any dust and marks from the handrails, footrests, frame and motor cover.
You should also wipe the platform alongside the belt.
Regular maintenance is necessary to preserve the performance of your equipment and extend its service life.
This action is recommended when the message "SERVICE" appears on your console.
1. Lubricate the deck after 200 kilometres of use.
Please see the FAQ on "RUNNING DECK LUBRICATION".
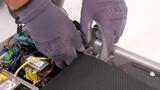
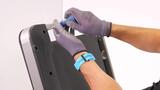
2. Unplug the power cord and open the motor cover to gently vacuum the interior.
Please see the section on: "REPAIRING YOUR PRODUCT" to remove the motor cover.
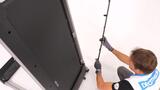
3. Inspect and correctly tighten all the external parts of the treadmill.
You can refer to the assembly video or the product manual.
W900
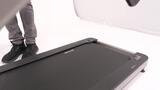
Do not leave in a damp place or outdoors, nor in direct sunlight.
Place a standard floor mat (Domyos Training Mat) under your treadmill.
For home use only.
Maximum user weight: 130 kg.
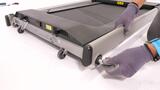
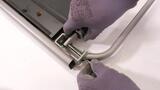
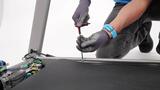
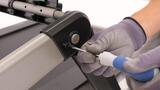
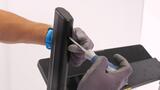
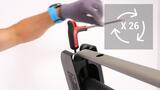
You will need the Allen key (BTR) that came with your treadmill:
1. Switch on your treadmill and set it at a low speed (4 km/h).
2. Insert the key into the bolt on the side where the running belt is off-centre.
3. Turn it a quarter turn clockwise (wait 30 seconds between each quarter turn) until the belt is back in the correct position.
The tension of the COMPACT RUN100 running belt must be between 0.40 and 0.49 ideally.
The motor current tension needs to be set at no load and when cold.
(A hot setting will no longer take into account the correct value, as the running belt relaxes when hot).
PLEASE NOTE: This tension is a guide for an optimal setting, however it is not necessary to tighten it if the value is lower and if in use your treadmill belt runs smoothly (no slipping, no jerks).
An excessively tight belt can cause premature wear of the rollers or motor.
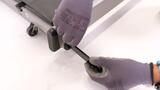
After checking the tension on the console:
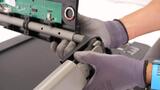
- If the figure is too low, you need to tighten the running belt.
(Tightening is done by turning the roller's two rear screws clockwise).
- If the figure is too high, you need to loosen the running belt.
( Loosening is done using the 2 screws on the rear roller in an anti-clockwise direction).
*Half a key turn= 0.03
For adjustment:select the "Running belt tension" tab in the MAINTENANCE section.
How to check the tension on the console:
1. Stand on the footrests.
2. When the safety key is removed, press and hold the" START "and" STOP" buttons for 3 seconds.
3. The console will display the word "start". Press the "START" button and insert the safety key.
4. The treadmill will start at 5 km/h and display the running belt tension. (Make any adjustments necessary).
5. Press the "STOP" button.
Checking the running belt tension
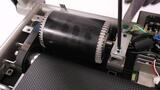
To extend the lifespan of your treadmill, you should lubricate it every 200 km of use.
Please use Domyos lubricant only (Ref: 8326425). You can order it from your Decathlon store or from our website by clicking the "DOMYOS LUBRICANT" button below.
1 & 2. Simply spray twice underneath the running belt on the right and on the left.
3. Then set your treadmill off at 5 km/h for 5 minutes, without standing on it.
Running deck lubrication
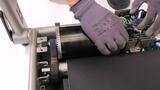
1. Check the motor and the drive belt every 600 hours of use or every 3,600 km*
2. Replace the running belt every 500 hours of use or every 3,000 km*
3. Replace the running deck every 700 hours of use or every 4,200 km*
4. Replace the rollers every 600 hours of use or every 3,600 km*
*To find out the number of hours of use or the total distance run, go to the FAQs and read" HOW TO FIND OUT THE DISTANCE RUN AND HOURS OF USE ON YOUR TREADMILL" in the PROBLEMS section.
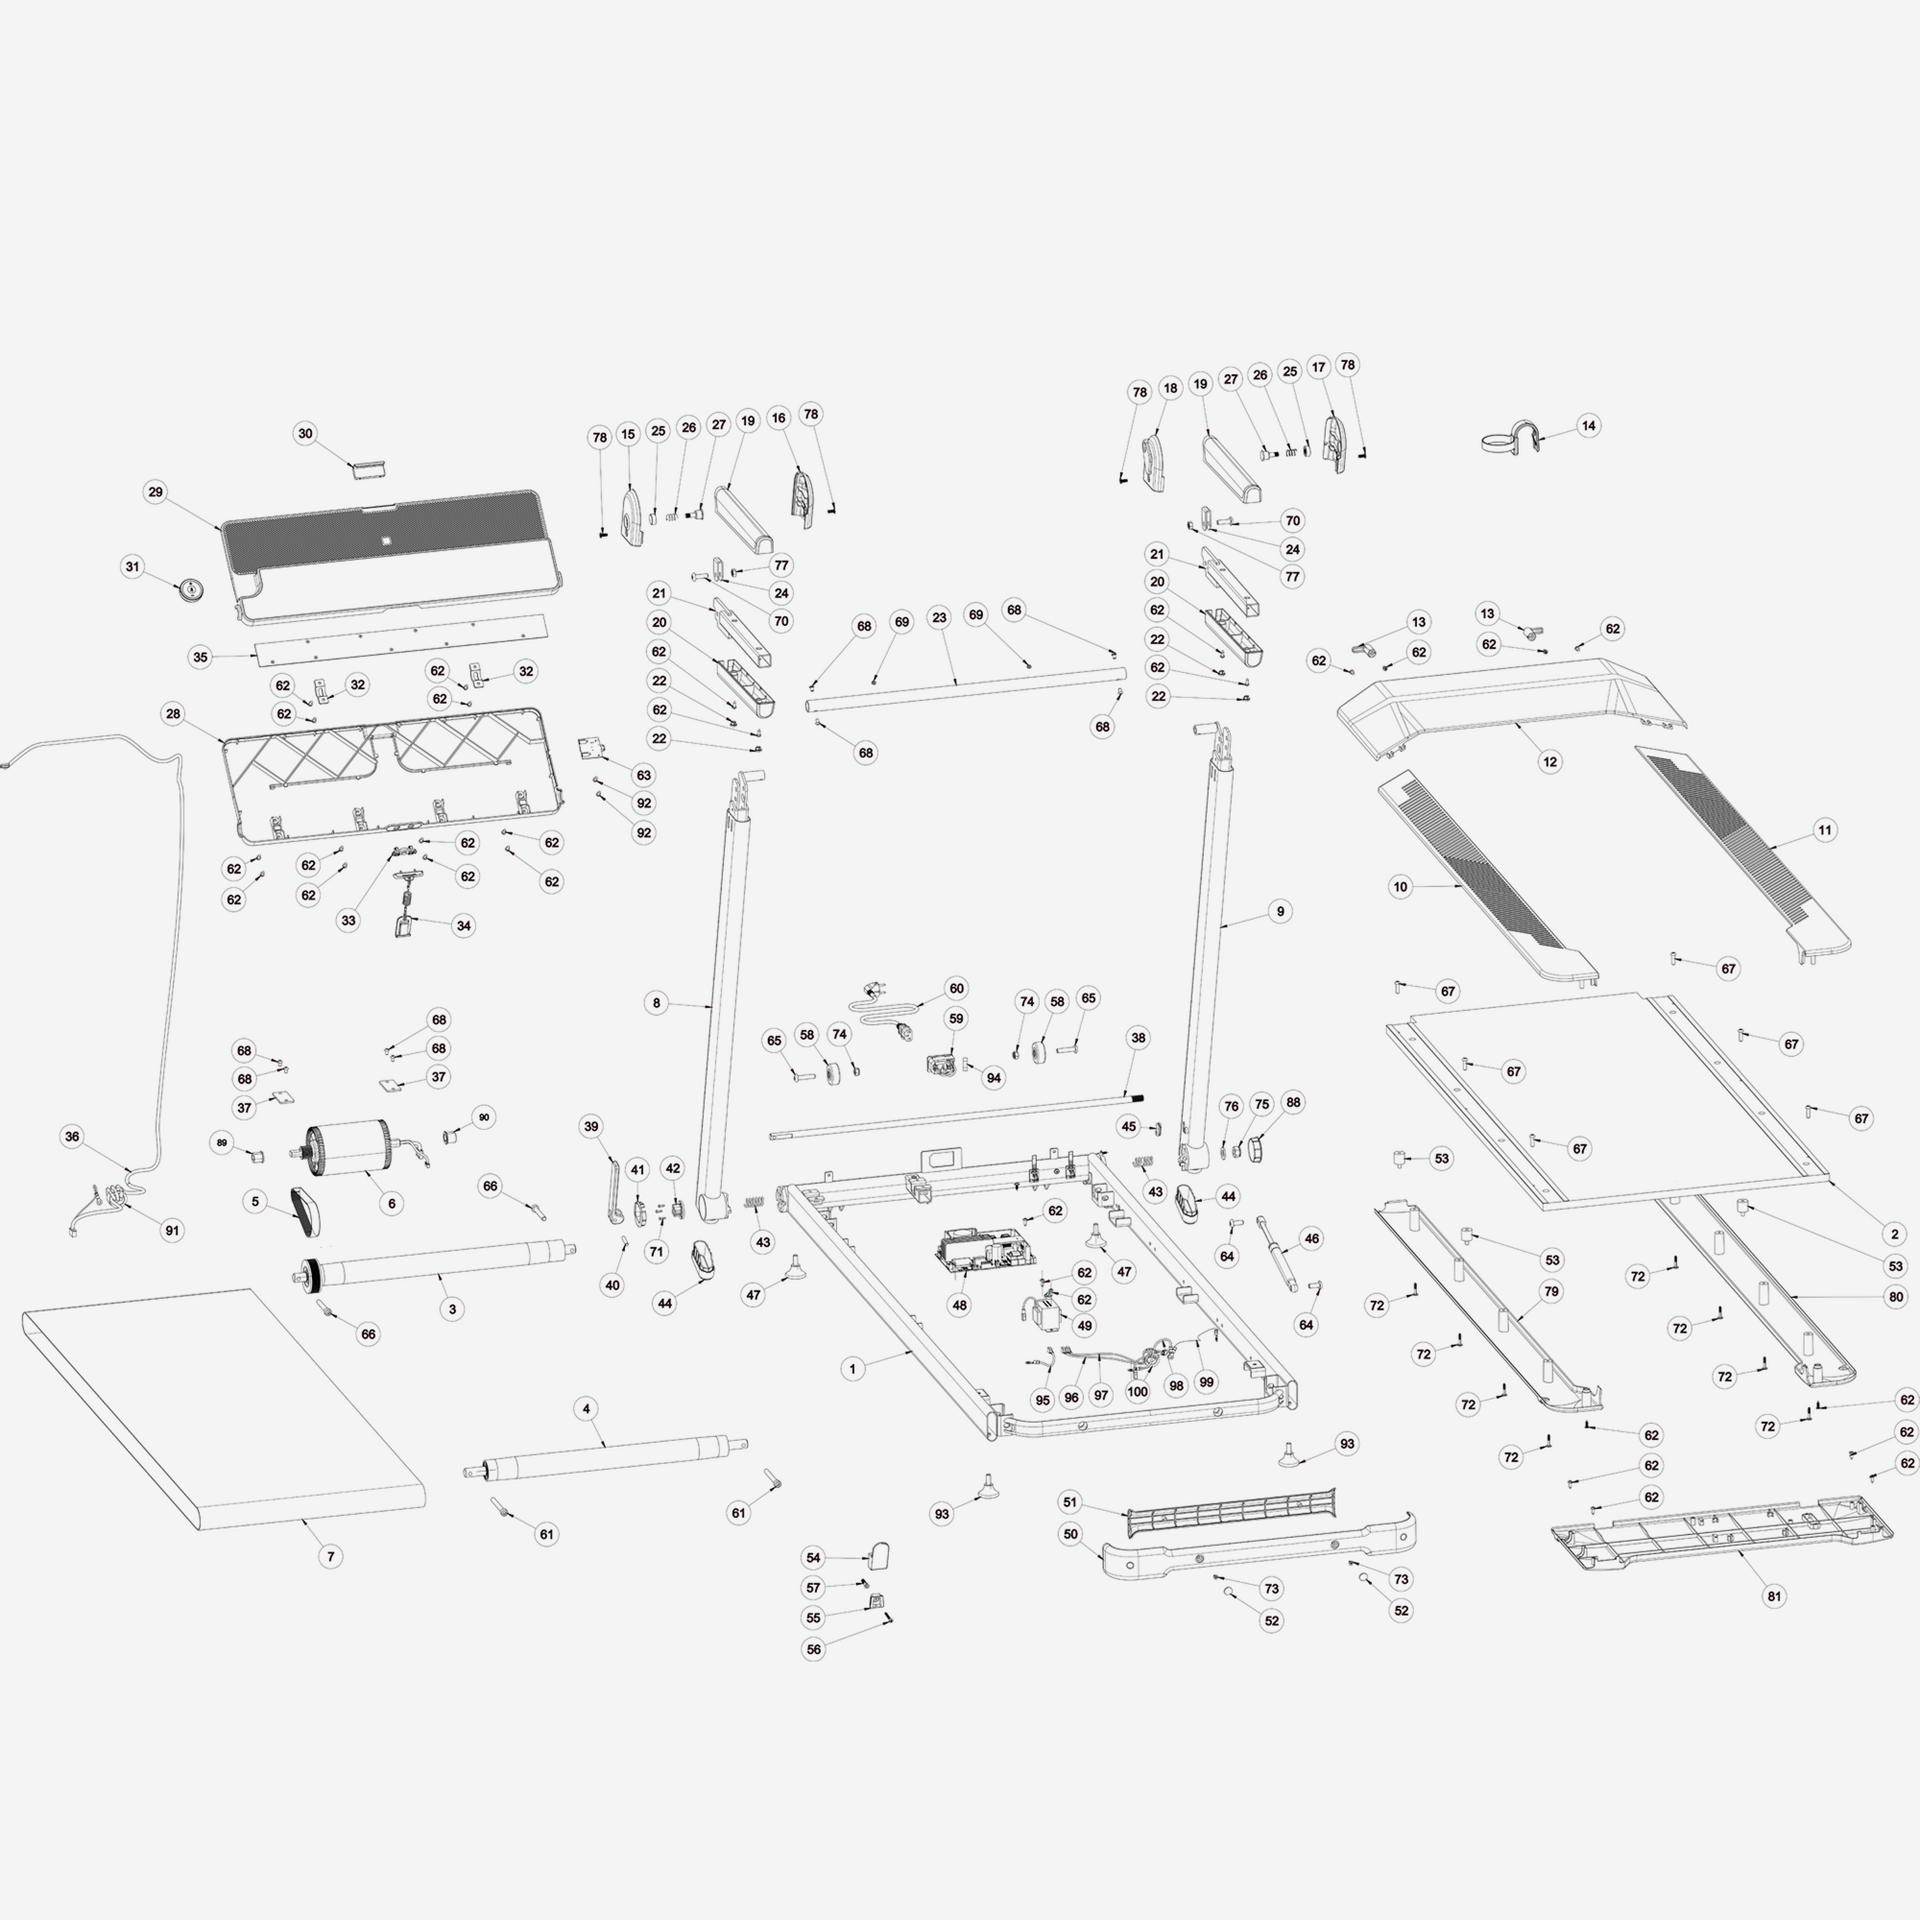
Want to repair your product yourself but not sure how? Get all our tips and videos here.
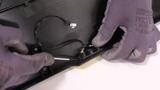
Replacing the fuse
Replacing the fuse

Replacing the upper motor casing
Replacing the safety key connector
Replacing the power cord
Replacing the tensioning mechanism
Replacing the console

Replacing the console casing
Changing the console structure bar
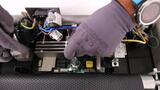
Replacing the control board
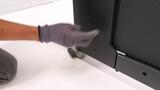
Replacing the lower motor casing
Replacing the locking system

Replacing the left handrail

Replacing the right handrail
Changing the locking handle
Replacing the drive belt
Replacing the front roller
Replacing the rear roller
Changing the footboard (L&R)
Changing the footboard (L&R) casing
Changing the rear structure casing
Changing the folding cylinder
Replacing the running belt

Replacing the running deck
Replacing the motor
Replacing the console cable
Changing the plastic cover (L/R)
Changing the handrail's plastic cover
Changing the side bar lock
Changing the rear roller screw

NEED SPARE PARTS FOR YOUR TREADMILL?
Discover the options* available for servicing and repairing your treadmill.
*Our rates include labour only (parts not included) and may vary depending on the store.
If the store does not provide services on site, the products are sent to the nearest Regional Workshop, which could lead to an additional charge. Please contact your Decathlon store for a quote.
Need the product's user guide?
Click to download.

Installation and safety manual
Sales warranty
Domyos guarantees this product under normal conditions of use for five years for the structure and two years for other parts and labour from the date of purchase shown on the receipt.