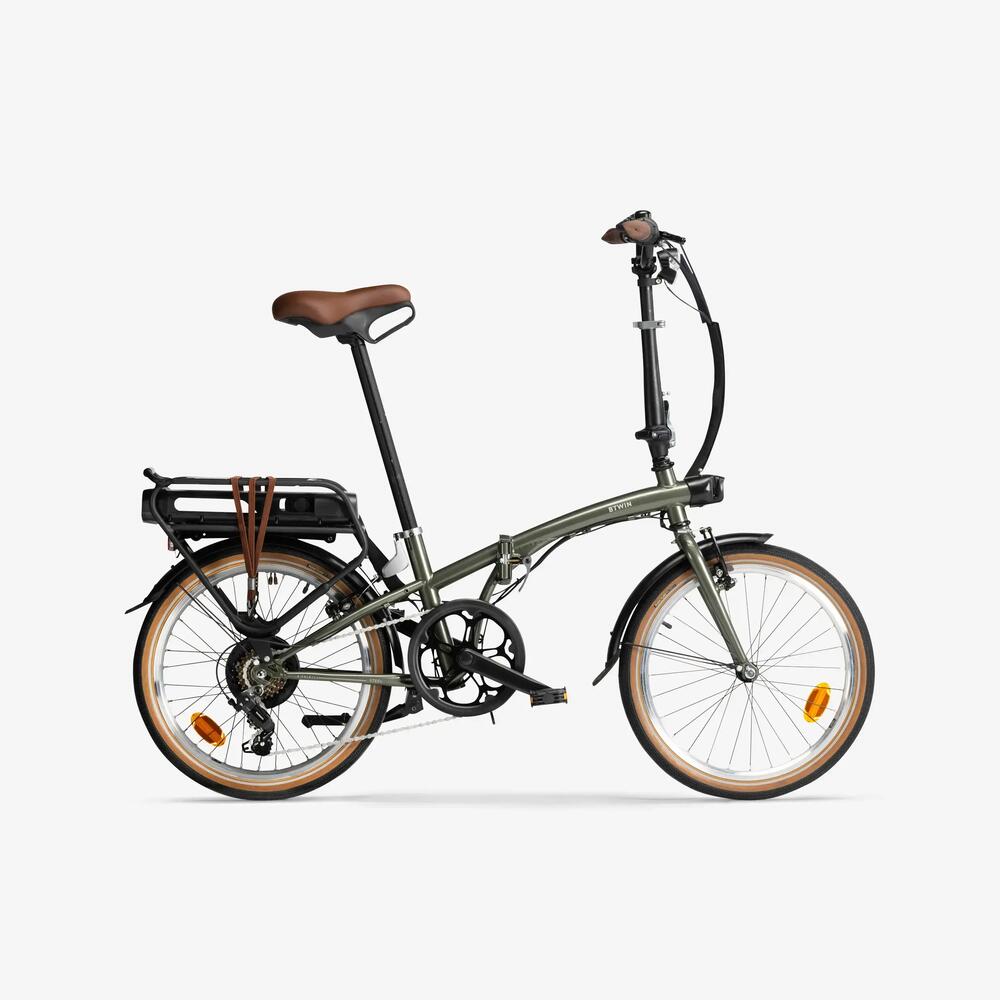
NEED HELP?
We're here to help you find a solution.
Ref: 8615468, 8654724
2022
Designed for commuters who want an ultra-compact bike so that they can take it everywhere and switch from walking to cycling in 1 motion and 1 second!
Find the answers to all of the questions you might have the first time you use your bike.
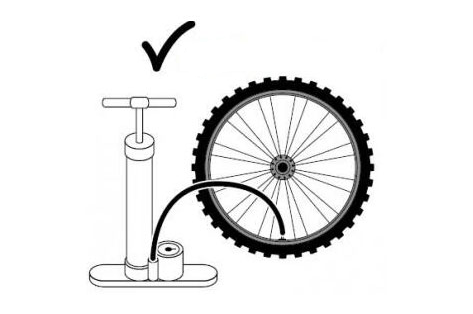
Ready to head out on your bike for the very first time? Before you step outside, there are a few bits and pieces to check ;)
Here's our guide to getting started:
Unboxing:
Folding and unfolding:
Before using your bike for the first time, check that:
- the hinges on the frame and stem are correctly locked in place
- the brakes are working properly
- there is no unusual play in the stem and frame
- the tyres are inflated to the right pressure
- the gears are changing correctly
- the display isn't showing any errors
- the battery has plenty of charge
To reduce the risk of getting a puncture and to make your pedalling as efficient as possible, we recommend inflating your tyres to 4.5 bar (maximum pressure).
NB: check your tyre pressure every three weeks.
To keep you as comfy as possible in the saddle, we recommend adjusting it so that it is at hip height when you are standing next to it. (See video)
The seat post has markings on it so that you can easily identify the correct height each time you adjust it.
The saddle can be adjusted to fit cyclists from 1.45 m to 1.95 m tall. There are markings on the seat post to help you. There are limiters to stop you raising the saddle too high. In the interests of safety, we advise against removing them.
To change gear, simply twist the right-hand grip. When it's on 6, that means you're on the smallest cog, which is the hardest gear. When it's on 1, you're on the biggest cog. In this gear, you'll find it easier to push off from stationary and to climb steep hills.
The lights can be charged via a double USB cable that comes with the bike.
The front light (10 lux) clips onto the mount on the handlebar.
The rear light (5.4 lumens) clips onto the seat clamp.
It can be handy to be able to adjust the length of the stand:
- when the ground isn't flat / you're on a slight slope
- when your bike is more heavily laden than normal, for example, when you're carrying extra bags
To find out how to adjust it, we recommend watching this video:
Each pedal can be folded by simply pulling it forwards and pushing it down.
Something not quite right with your bike? Don't panic!
Whether it's the hinges, gears or even a punctured tyre, our FAQ is sure to have the answer to your questions!
We recommend using our All in one lubricant (ref: 8650988).
Use it to lubricate every moving part of the hinges that's accessible.
Open and close the hinge three or four times to distribute the product.
Wipe away any excess product with a dry cloth.
We recommend adjusting the hinge's screw. If that doesn't get rid of the play, please visit your local Decathlon workshop.
You'll need a 6 mm spanner to hold the connecting rod and an 8 mm spanner to tighten the nut.
We recommend getting a technician at your local Decathlon workshop to do this for you.
In the interest of safety, it's important that the hinge locks.
This issue should be resolved by a professional. Please get in touch with your local Decathlon workshop.
We recommend using our All in one product (ref: 8650988) to lubricate the hinge. Once you have done this, fold and unfold the bike several times.
To replace your bike's strap, please visit the spare parts department on our website.
Here's what to do to resolve this problem:
1/ Clean the seat post with a damp cloth to remove any dust and other residue that has built up.
2/ Grease the inside of the clamp, making sure not to get any lubricant on the seat post itself.
3/ Put the clamp and saddle back on. Tighten the clamp to 4 Nm.
If you've got a puncture, you can either apply a patch to the inner tube or replace it.
Important: Remember to unplug the motor cable before removing your bike's rear wheel.
This should be done by a professional.
The wheel needs to be adjusted to a very precise torque using a special spanner.
Please get in touch with your local Decathlon workshop.
Use this video as a guide or visit your local Decathlon workshop and our technicians will be happy to help.
There could be several reasons why your brakes aren't working:
- your brake pads are starting to wear out. Remember to adjust your brakes regularly so that they keep working efficiently.
- your brake pads are completely worn and need to be changed
1 - Check that the battery is correctly inserted and locked in place.
2 - Check that the battery is active and charged (the LEDs should light up when you press the battery button).
3 - Check that all of the cables are properly plugged in.
You can make a copy of your key at any locksmith.
If you've lost both keys to your bike, please visit a Decathlon workshop to have the lock on the bike changed and your keys replaced.
1. Check that there isn't any dirt in the way of the connection. Your battery and charger connectors should be clean and there should be no dirt inhibiting contact between the charger and battery
2. Check the battery > charger > mains socket connection. Check that the charger you are using is the one provided by Decathlon. Plug the charger into the battery and a mains plug.
Steady red LED: battery is charging
Steady green LED: battery has finished charging
Flashing LED: there's a problem with the battery or the charger
It takes about 6 hours to fully charge the battery from empty.
3. One of the LED indicator lights on the battery may be defective.
We recommend taking your bike to a Decathlon workshop to have it repaired.
If the problem persists, please contact us via the help form, or visit one of our Decathlon workshops.
1. Make sure you follow the recommendations for using and storing your battery.
Your electric bike's range depends on a number of factors:
> THE BIKE’S LOAD: The range will be reduced if the bike is overloaded
> THE TYPE OF ROUTE: The range will be reduced on hills
> TYRE PRESSURE: The battery life will be better with tyres inflated to between 3.5 and 4.5 bars.
> THE OUTDOOR TEMPERATURE: The range is reduced in colder weather (by up to 50%).
> THE POWER ASSIST MODE: We recommend reducing the assistance mode when the battery is running low.
> YOUR PEDALLING CADENCE: You have to pedal in order to move.
An e-bike is still a bike, so you'll need to pick the right gear to suit your ride (e.g. gear 1 on steep slopes, gear 6 on flat ground).
> FOLLOWING THE INSTRUCTIONS FOR CHARGING AND STORING YOUR BATTERY:
Follow best practices to ensure your electric bike achieves its full range.
2. An old battery can have reduced performance.
The distance you can travel will therefore be reduced. Visit your Decathlon workshop to give your battery a check-up.
The electric assistance starts after several pedal strokes, and only if the assist mode has been activated.
If the electric assistance still doesn’t start, follow these instructions:
1. Check that the battery is fully charged:
> Press the battery button.
> Check that at least one LED is lighting up.
> If one of the LEDs is flashing, recharge the battery by connecting it to its charger and a socket.
2. Check that the battery is clean, properly attached and locked in place.
> Check that the battery connectors and holder are clean and in good condition.
> The battery should be fully pushed into its holder.
When you push it in, it will click to indicate when it is correctly in place.
Lock the battery and remove the key.
3. Check all of the bike's connectors: brakes, motor, console, pedalling sensor, controller (controller = central processing unit of the electrical kit. It is located just behind the battery, on the pannier rack).
Most of the connectors can be accessed by opening or sliding off the neoprene covers that protect the electrical cables. The motor's connector is the only one that is not covered.
HOW TO CHECK THE BIKE'S CONNECTORS:
There are two types of connector on your bike: "screw-in" connectors and "push-in" connectors.
"Screw-in" connectors:
For "screw-in" connectors (which can be recognised from the two metal rings), you will need to unscrew both rings in order to disconnect the cables. Be careful not to lose the small plastic washer between the two rings when you unscrew them.
Once undone, check that each connector is clean, then reconnect it.
To do this, position the male and female connectors opposite each other. Make sure you line up the indicator arrows before pushing them in.
Screw the two metal rings as far as they will go to secure the connector.
"Push-in"connectors
The male connector is simply inserted into the female connector. Check that both connectors are fully inserted, and push them back in if necessary.
4. Test the electrical assistance:
> Turn on the screen by pressing the ON/OFF button.
> Get on your bike and pedal (you'll need to turn the pedals several times to trigger the electrical assistance).
If the problem persists, submit a support request or visit a Decathlon workshop.
Check that the cables are properly connected.
You should also check that your battery is securely locked onto the pannier rack.
> The first LED is flashing: The battery is almost empty and needs to be charged. Plug it into its charger and connect it to a mains socket to charge it.
> The second LED is flashing: The battery is in "undervoltage" protection mode due to improper handling or a long period without recharging. Plug it into its charger as soon as possible and connect it to a mains socket to charge it and take it out of its protection mode.
> If there is another flashing LED or several flashing LEDs, the battery is faulty. Take your battery to a Decathlon workshop for full testing.
We recommend visiting a Decathlon workshop so that we can diagnose the fault.
Got a question about your e-bike?
Here are the questions most frequently asked by our users.
See video:
Due to UK shipping laws, you can only buy a new battery in person from your local Decathlon workshop.
When your battery wears out, take it to your local Decathlon store. We'll send it to a specialist facility to be recycled.
You should store your battery somewhere cool (between 10°C and 25°C) and dry, out of direct sunlight.
To avoid deep discharge, which may cause it to malfunction, do not store the battery when empty (1 flashing LED).
You should charge the battery (even if it's not being used) at least once every three months to prevent deep discharge and loss of the battery's capacity.
If you can't charge your battery regularly, put it into standby mode (even though it automatically goes into standby mode after 2 hours).
The warranty on your battery is for 2 years or 500 charge cycles (1 cycle = 1 full charge + 1 full discharge).
No. Lithium-ion batteries have no memory effect and can therefore be charged at any time.
We recommend charging your battery regularly to keep it working well.
We strongly recommend against leaving your battery plugged in when unattended, for example overnight.
For your information: once the battery is fully charged, the charger will automatically shut itself off (the LED indicator on the charger stays on).
No, it doesn't have a dynamo.
Some systems let you charge the battery as you ride or brake. But this doesn't generate much power. You'd have to ride several dozen kilometres to generate 1 km of additional power.
The bike provides electric assistance, but you can still ride it without the assistance.
Of course, the extra weight of the motor system will make cycling a little harder.
The battery is equipped with a standby mode that allows it to be stored without having to be charged regularly.
Once set to standby mode (hold down the battery's on/off button), the battery can be safely stored for up to 1 year without being charged and without this affecting the capacity.
A battery stored without being set to standby mode needs to be charged at least every 3 months to prevent the battery capacity deteriorating.
The battery is designed to be used when it's raining, but it shouldn't be submerged in water or washed with a pressure washer.
The same is true for the display and the other components and electrical cables.
Nevertheless, we recommend sheltering your bike as much as possible when you're not riding it.
You can find spare parts for your folding bike in our workshops and on our website.
To keep your bike working reliably, it's important to service it regularly!
Regular maintenance is important if you want to keep your bike working efficiently for as long as possible, so we've put together some tips to help you service your bike.
1. Before each ride, make sure your tyres are inflated to between 3.5 and 4.5 bar.
2. Clean and lubricate your bike's drivetrain.
3. Regularly check the brake pads and tyres for wear.
4. Clean it regularly in accordance with the instructions
We strongly recommend lubricating your drivetrain regularly so that it runs smoothly.
The easiest way to do this is by using a workstand.
Put your chain onto the small cog and apply the lube along the entire length of the chain, between the links and on the inside.
Next, use your hand to turn the pedals as you shift through the gears. With each gear shift, the chain will move from one cog to another and distribute the lube over the entire drivetrain system, including the derailleur.
Lastly, use a microfibre cloth to remove any excess lubricant from the chain. Your bike is now ready to go again!
Another solution is to put lubricant on a toothbrush and then hold it under the chain as you turn the pedals.
You can then use the toothbrush on the cassette and derailleurs if you feel they need a bit more lube.
This technique stops you using too much lubricant, which would be wasteful and lead to dirt building up on the drivetrain more quickly.
Clean your seat post regularly with a damp cloth so that it keeps sliding smoothly.
It's important to check your tyre pressure regularly.
When the tyres are inflated to the right pressure:
- the bike is more efficient
- there's less risk of you getting a puncture
We recommend inflating your tyres to 4.5 bar.
Over time, the brake pads will wear out. For this reason, we recommend adjusting the brakes every three months.
Explore all of our accessories for making your commutes easier!
Accessorise your bike and get from A to B hassle-free. Enjoy!
See video:
No, this bike's geometry means that you can't install a child seat. And the pannier rack isn't designed to take the extra weight.
No, our bikes are not compatible with child trailers.
You can change the saddle if you don't like the one it comes with.
All of the saddles sold by Decathlon are compatible with this bike.
However, if you change the saddle for one you find more comfortable, you won't be able to use the ergonomic handle under the saddle.
We're here to help you find a solution.