Rockrider E-ACTV 500 Hybrid Bike

REF: 8854079, 8751855, 8751856, 8751862

Rockrider E-ACTV 500 Electric Hybrid Bike

2024

Need help with assembling, maintaining, repairing or finding an accessory for your bike?

Here you will find tutorials and videos that will show you how step by step!

First use

Finishing your bike's assembly

If you purchase your bike in a Decathlon store or have it delivered to a Decathlon store, the sales assistant will give you the bike 100% assembled. 

If you order your bike on the Decathlon website and have it delivered to your home, you'll need to finish a few very simple assembly steps described in the user guide below.

Checking the condition of your bike

Remember to check the condition of your bike before each ride.

Connecting your phone to your e-bike

You can connect your smartphone to your electric bike via Bluetooth. This gives you the full e-bike experience, including:

- Assistance mode usage stats
- Better battery range management
- Your route map and all your ride metrics (downloadable straight to Strava)
- Updates for your electronics
And much more!

To connect your phone to your e-bike, you'll need to download the DECATHLON RIDEapp.
The process is explained in the app.

The DECATHLON RIDE app is compatible with the following operating systems:
- For Apple devices: iOS 8 and greater
- For Android devices: Android 7 and greater

First use
INFLATING YOUR TYRES

Having the right tyre pressure is particularly important on an electric bike.
The wheels have a lot of weight on them because of the combination of the motor and bike.

To minimise the risk of punctures and ensure optimal battery life, we recommend inflating your tyres between 3 and 4 bars

If you're looking for greater grip and comfort, you can decrease the pressure. If you're carrying more weight and are riding on a smoother road, you can inflate your tyre a bit more.

Take care not to exceed the maximum OR minimum pressures displayed on the sidewall of your tyre.

An under-inflated tyre can cause the inner tube to get pinched and can damage the rims when riding over obstacles, while an over-inflated tyre can explode the inner tube or tyre, or deform the rim over the long term.

A well-inflated tyre is essential for cycling. So remember to frequently check your tyre pressure.

BEDDING IN YOUR BRAKES

When your bike leaves the shop with its shiny new brake pads and discs, their braking power is weak. A sharp prolonged braking action (for example, during a descent) with brakes that have never before been used can cause the pads to overheat and to "glaze over".

To ensure that your brakes perform, we recommend that you bed them in. This takes about 10 gentle braking actions per brake. For each braking action, apply a single brake to slow the bike down from about 25 km/h to 5 km/h without fully blocking the wheel. Repeat with the other brake.

BEDDING IN YOUR BRAKES
ADJUSTING THE HEIGHT OF YOUR HANDLEBARS

Your handlebar has a tiltable stem. You can adjust it to choose your degree of incline from -10° (dropped) to +60° (raised).

With an Allen wrench, raise the stem for a more upright back position. Lower it for a more athletic position.

ALIGNING YOUR HANDLEBAR

Proper handlebar alignment will prevent arm and shoulder pain as well as improving your biking experience. Check out this video to learn how to align your handlebars.

POSITIONING YOUR BRAKE LEVERS

Properly positioning your brake levers is important for safety and comfort on your bike. Check out this video to learn how to orient your brake levers.

ADJUSTING THE HEIGHT OF YOUR SADDLE

Adjusting the height of your saddle will improve your comfort and performance on the bike.

Check out these video tips to learn how to adjust the height of your saddle.

ADJUSTING THE TILT OF YOUR SADDLE

Adjusting the tilt of your saddle will improve your comfort and performance on the bike. Check out this video to learn how to adjust the tilt of your saddle.

CHANGING YOUR PEDALS

Check out this video to learn how to replace your pedals.

GET STARTED WITH YOUR FIRST BIKE TOUR

Setting out on a casual ride or a longer tour with your hybrid bike?

Here are our tips:

1- FOR YOUR SAFETY

Wear a certified helmet, purchased recently; remember that the head is impacted in one out of every two falls!
GOOD TO KNOW: Helmets have a limited effective lifespan, even if they haven't been involved in a crash! Get more information when purchasing.
- Set off with a bike that is properly adjusted and well maintained
- Take along a mobile phone to be able to make a call should you need help.
- Map out your route ahead of time so you can take bike trails and paths that are free of cars as much as possible.
- Take a first aid kit (in a bag under the saddle, for example)
- If you will be riding in the dark, make sure you have front and back lights with you

2- FOR YOUR COMFORT

- If you're just starting to cycle: Start with one-hour rides and gradually lengthen them as you gain experience.
- Wear clothing that is appropriate for the length of your ride, plus gloves.
- Don't try to push hard on the pedals. Instead, switch gears so you can pedal more easily and faster. You'll be able to go further for longer, and you'll make the most of your motor if you have an electric bike
- Depending on the weather, bring along clothing to protect you from the cold or rain
- Don't forget to stretch after your ride

3- ALWAYS REMEMBER TO TAKE A PUNCTURE REPAIR KIT WITH YOU

- A pump. Some pumps will fit onto the frame's bottle cage bolts.
- 3 tyre levers, one inner tube: which you can fit into a saddle bag. 

 4- DRINK REGULARLY

- Attach a water bottle holder to your bike and bring a bottle along so you can drink as you ride, or carry a water bottle in a backpack.
- Remember to drink water regularly (every 20 minutes and at least half a litre per hour).

5- REMEMBER TO EAT

- Take some energy bars with you (you can carry them in a saddle bag or handlebar bag)
- Don't wait until you feel hungry to eat. Eat every hour to fuel your muscles.

Rockrider E-ACTV 500 Electric Hybrid Bike

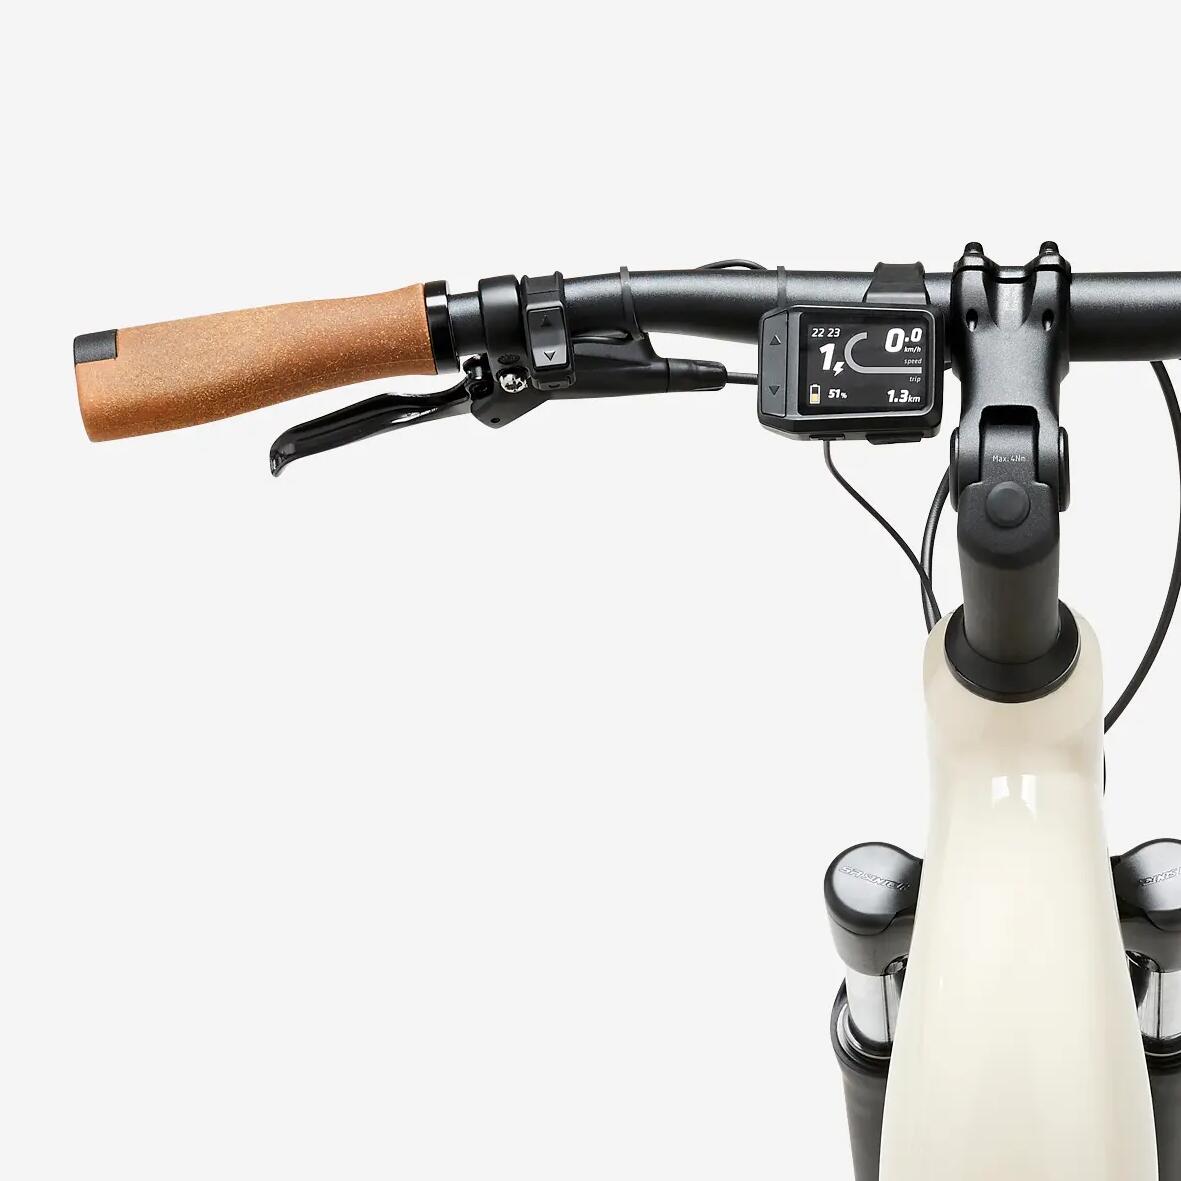
Operating the screen

The start/stop button located above the display turns the screen on and off. Use the up arrow ˄ and the down arrow ˅ on the remote control to switch between the different assistance modes. Mode 0 is where the motor is deactivated and mode 4 is the most powerful mode, with 280% assistance.
In other words, if you generate 100W with your legs, the motor adds 280W for a total of 380 W!

In each assistance mode (except mode 0), you can hold down the ˄ button to launch walk mode, which helps you to push your bike along while walking.

The button under the remote control corresponds to Boost mode: as long as you keep the button pressed, the mountain bike switches to the most powerful assistance mode to help you get through a temporary difficulty.

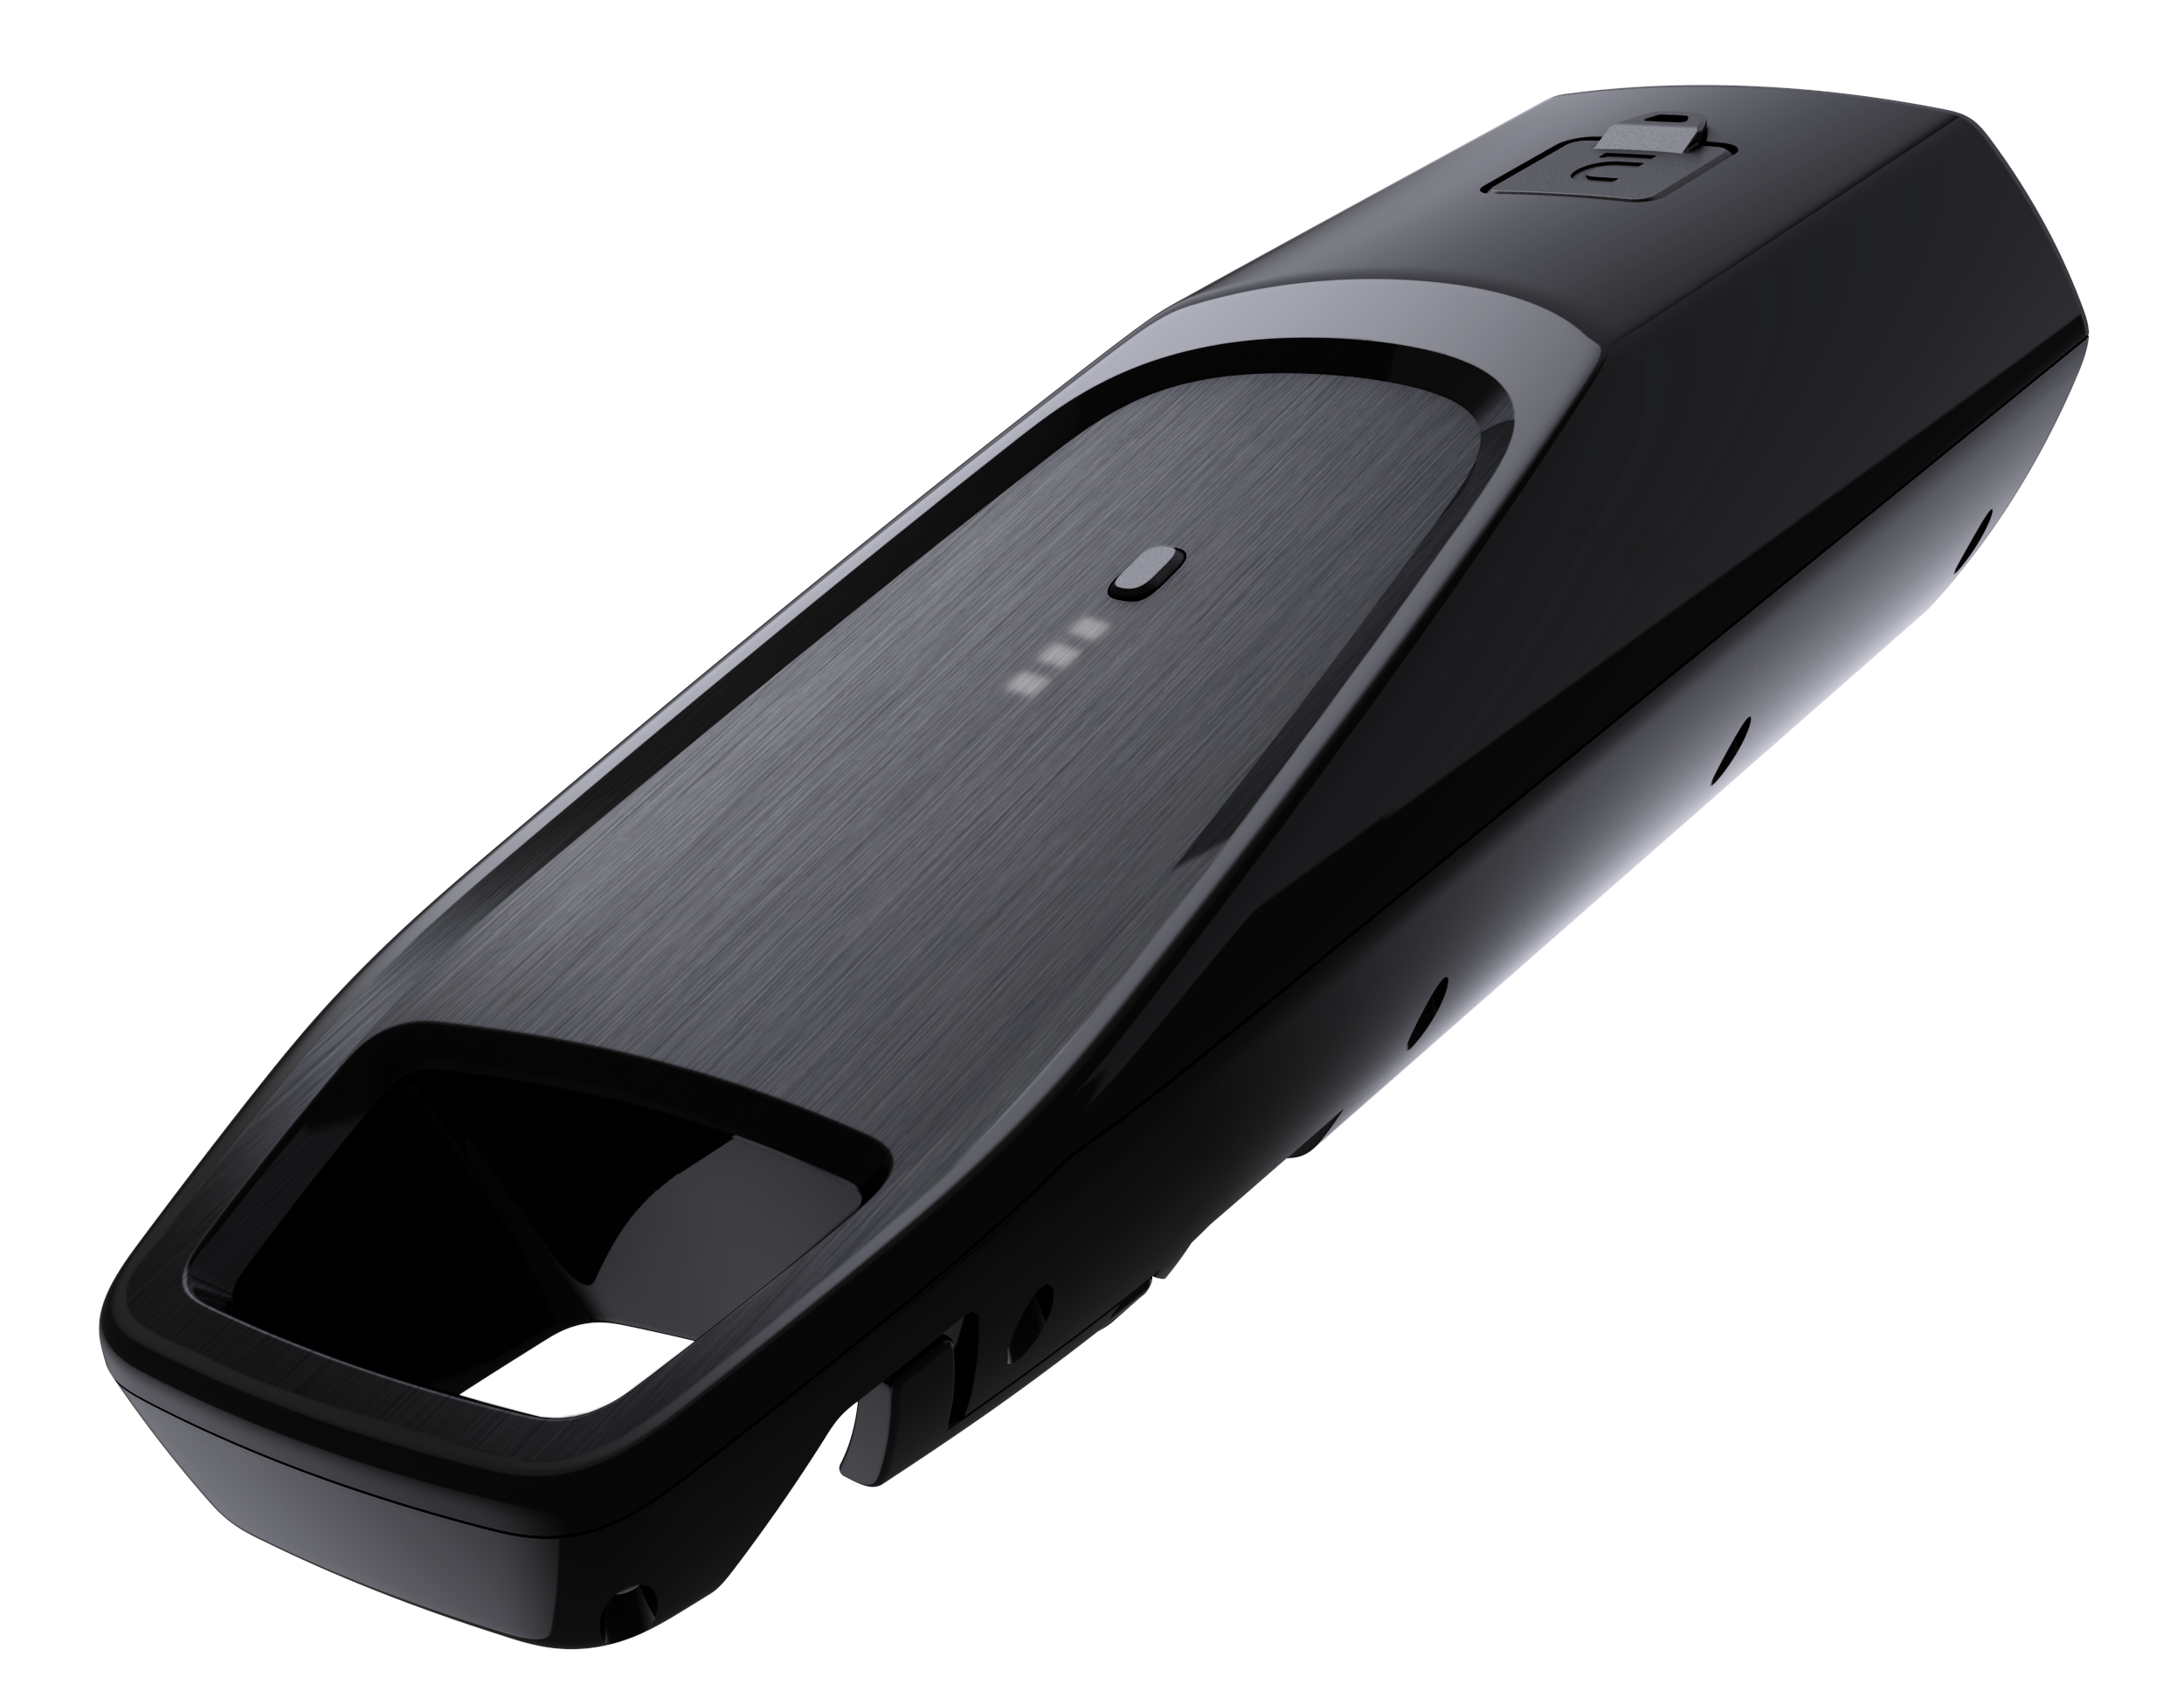
Press the up arrow ˄ and down arrow ˅ on the left of the screen to scroll through the different information: distance covered, total distance, ride time, cadence, estimated remaining battery, electric power and user power.

You can charge your phone or GPS computer by plugging it into the screen with a USB A cable.

The button under the screen opens up the settings menu.

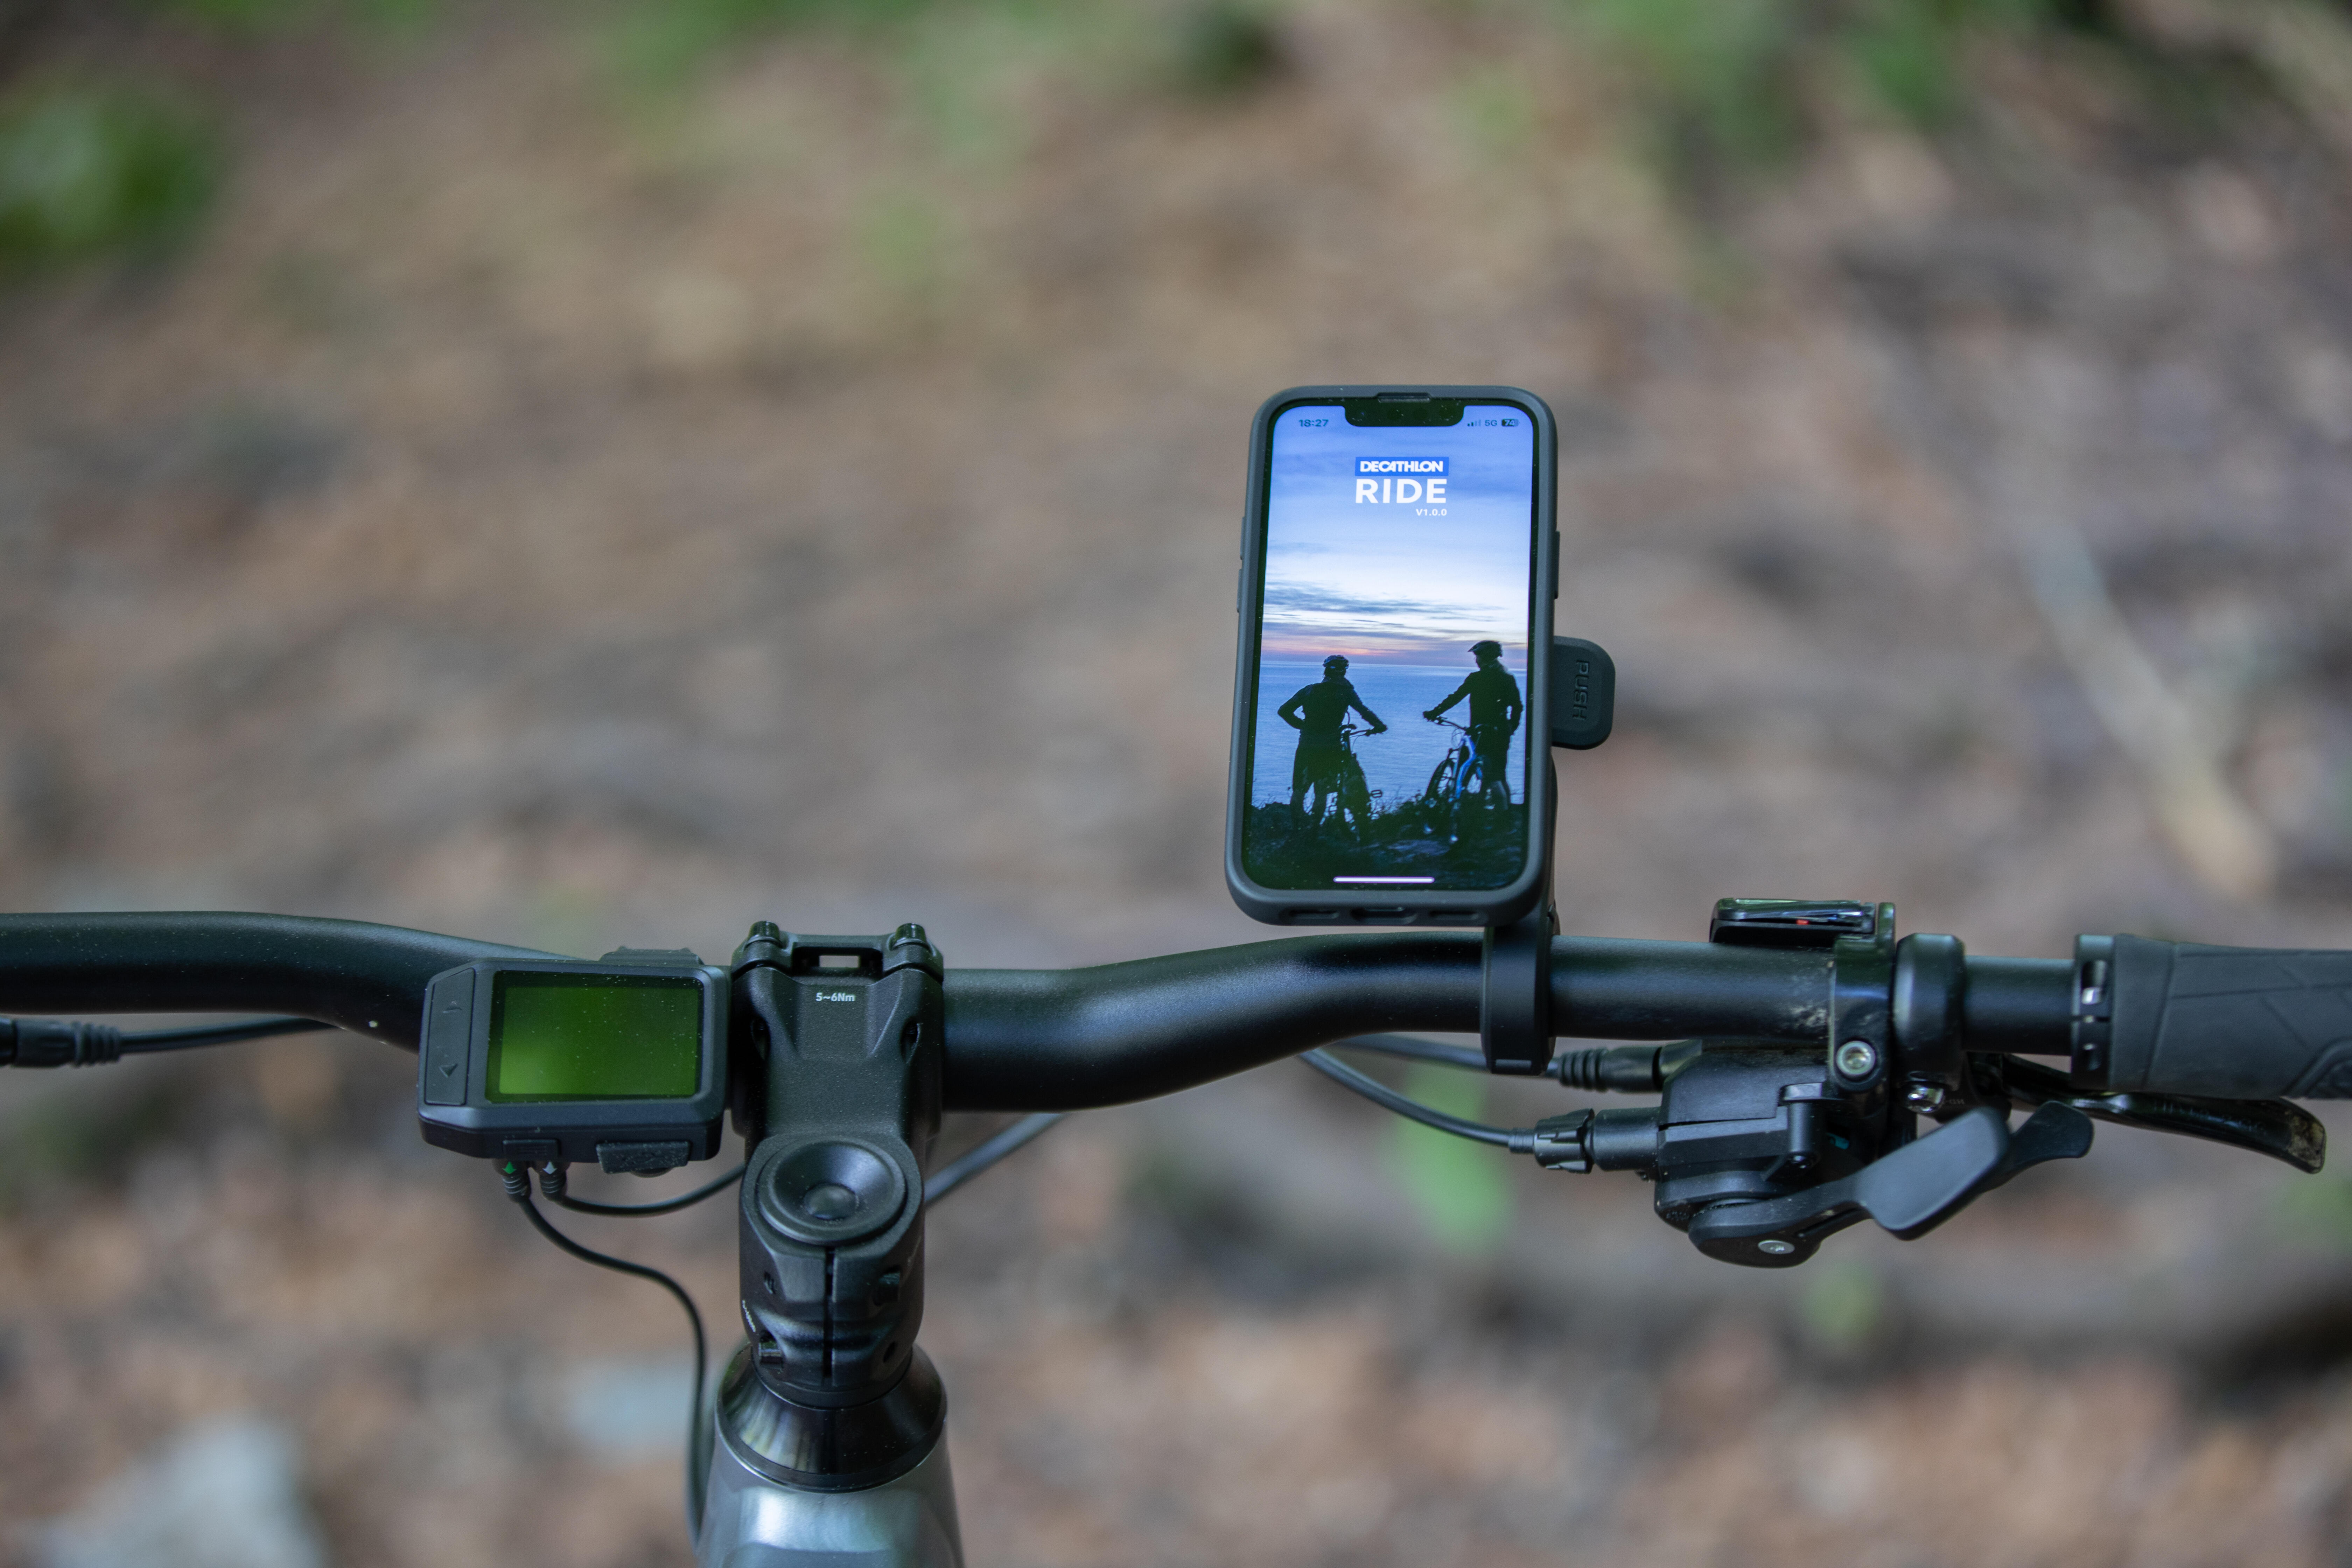
The screen connects to your phone via Bluetooth: Find all the information you need about the connectivity of your AE MTB above.

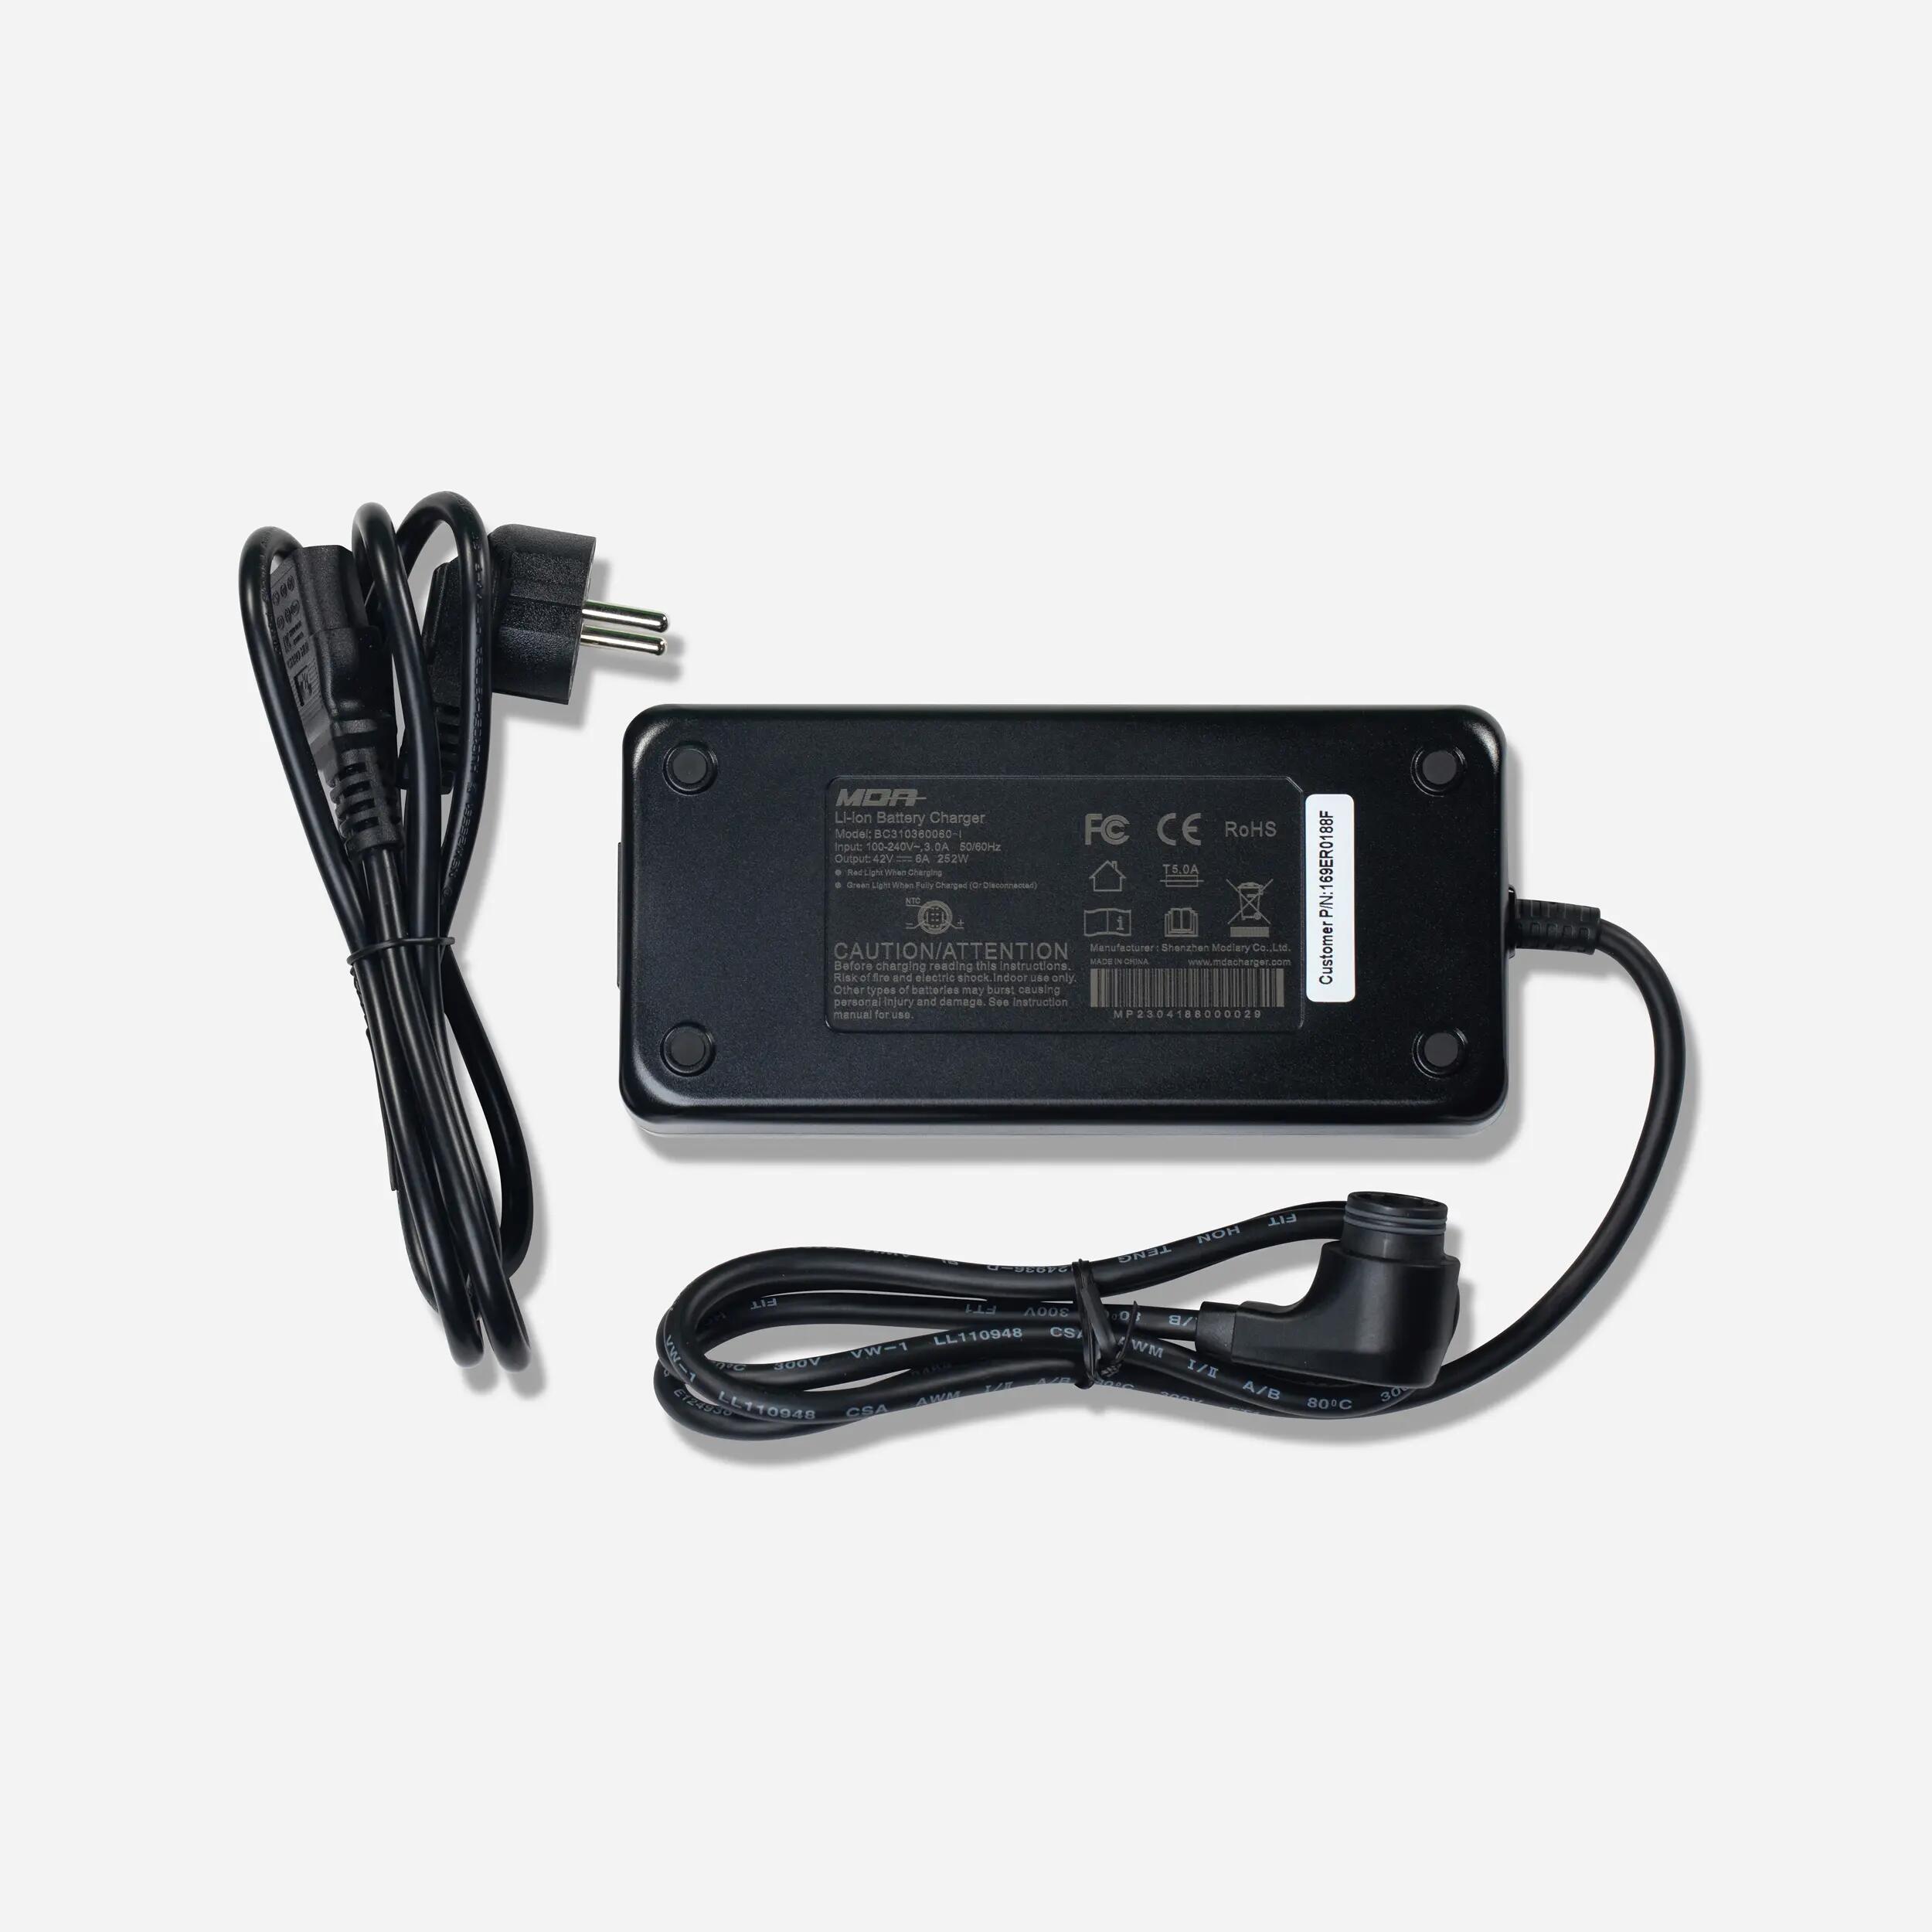
To find out more, consult the electrical manual for your AE MTB!

Questions about your battery? 

HOW LONG DOES IT TAKE THE BATTERY TO CHARGE?

With the original charger (2A), it takes 3.5 hours to charge your battery to 50% and 7.5 hours to charge it to 100%

A rapid charger (6A) is available for purchase on our website, enabling you to fully charge your bike in 3 hours!

HOW LONG DOES IT TAKE THE BATTERY TO CHARGE?
CAN YOU RIDE WHEN YOUR BATTERY IS FLAT?

It's an electric-assist bike. That means it's entirely possible to ride without this assistance.
However, you may well notice the additional weight of the assistance system.

CAN YOU LEAVE YOUR CHARGER CONNECTED TO THE BATTERY EVEN AFTER IT HAS FINISHED CHARGING?

To avoid any electrical hazards, we advise against leaving your bike/battery plugged into the mains for more than 24 hours.
When the battery is fully charged, the charger stops charging. You can spot it by the charger's indicator LED turning green and the bike's display shutting off.

SHOULD YOU WAIT UNTIL YOUR BATTERY IS COMPLETELY FLAT BEFORE CHARGING IT?

No. Lithium-ion batteries have no memory effect. So they can be charged at any time.
We recommend charging your battery after each ride to keep it working well.

DOES THE BATTERY CHARGE WHILE CYCLING?

No, it doesn't have a dynamo. Some systems let you charge the battery as you ride or brake, but this doesn't generate much power.

WHAT SHOULD YOU DO WITH THE BATTERY WHEN IT WEARS OUT?

When your battery wears out, take it to your local Decathlon store, which will send it to a specialist facility to be recycled.

HOW SHOULD YOU STORE YOUR BATTERY?

You must store and charge your battery in a cool (between 10°C and 25°C), dry place, out of direct sunlight.
To avoid deep discharge, which may cause it to malfunction, do not put the battery away when less than 10% charged.
Ideally, charge it to 60% and remember to charge the battery (even if it's not being used) at least once a year to prevent deep discharge and loss of the battery's capacity.

WHERE CAN YOU BUY A REPLACEMENT BATTERY?

You can buy a new battery from your local Decathlon workshop.
Contact your nearest workshop to check on availability and order times.

Your bike is also compatible with our 360 Wh battery extender.

WHERE CAN YOU BUY A REPLACEMENT BATTERY?
WHAT IS THE LIFETIME OF YOUR BATTERY?

The warranty on your battery is for 2 years or 500 cycles (1 cycle = 1 full charge + 1 full discharge, or two 50% charges + two 50% discharges). After those 500 cycles, we guarantee that the battery life will remain greater than 80% of that of a new battery. 

equipment-mountain-bike-st520-rockrider

THE RIGHT EQUIPMENT IN CASE OF A HICCUP

You need to have the right equipment with you when you're out and about so that you can take care of a puncture, a broken chain or any other type of setback. Here's a selection of products that can get you out of a tight spot or two.

HAVE A PROBLEM?

> ELECTRICAL

YOUR BATTERY WON'T CHARGE

1. CHECK THE BATTERY > CHARGER > MAINS SOCKET CONNECTION
Make sure the charger you are using is an original one provided by Decathlon.
Connect the charger to the battery and to a mains socket.
Charger light is red: the battery is charging.
Charger light is green: the battery has finished charging.
Flashing red charger light= the battery or charger has a problem.

2. CHECK THAT THERE IS NO DIRT PREVENTING CHARGING
The charger's and the battery's connectors should be clean. There should be no dirt preventing contact between the battery and its charger.

3. THE LED INDICATORS ON THE BATTERY MAY BE FAULTY
Visit your Decathlon workshop to have them repaired.

ONE OR MORE LEDS ON YOUR BATTERY IS/ARE FLASHING

THE FIRST LED IS FLASHING.
Your battery is almost flat and needs to be charged. Plug your battery into the charger.

THE 3RD LED IS FLASHING
Your battery has tripped because the temperature is too high.


 THE 4TH LED IS FLASHING
Your battery has tripped due to a short-circuit.

THE LAST LED IS FLASHING
Your battery has suffered an abnormal event which has caused it to malfunction. This malfunction may be temporary or permanent. Please visit a Decathlon workshop to have your battery and bike diagnosed.

default
THE SCREEN IS SHOWING AN ERROR CODE

The screen may display an error code.

All defect codes are catalogued in the electrical user guides. Each code has an action to take to solve the problem.

If the problem continues or you are unable to perform the action, please visit one of our Decathlon workshops for a repair.

LOW OR REDUCED RANGE

1. Make sure you are following the recommendations for using and storing your bike.
Your electric bike's range depends on a number of factors:
> THE LOAD ON THE BIKE: The range will be reduced if the bike is carrying too much weight.
> THE TYPE OF ROUTE: The range is reduced on climbs.
> THE TYRE PRESSURE: The battery will last longer with tyres that are correctly inflated.
> THE OUTDOOR TEMPERATURE: The range is reduced in colder weather (up to -50%).
> THE BOOST MODE USED: It is advisable to reduce the power assistance mode when the battery charge is low.
> FOLLOWING THE INSTRUCTIONS FOR CHARGING AND STORING YOUR BATTERY.

2. An old battery can have reduced performance.
The distance you can travel will therefore be reduced. Visit your Decathlon workshop to give your battery a check-up.

> MECHANICS

YOUR WHEEL IS BUCKLING AFTER SEVERAL RIDES

When you take your new bike out for a ride for the first time, a lot of parts can shift and fall into place.

One such part is the spokes, which can sometimes be heard creaking. This is caused by the residual twist from assembly.

Your wheels should not be buckled in any way at all. Come along to the workshop to straighten it out!

WheelBuckling
YOUR GEARS ARE NOT SHIFTING PROPERLY

IMPORTANT: Before anything else, remember to remove the battery from the bike before repairing or maintaining the drive train.

There are several things you can do to ensure your rear gears shift properly:

1/ Check the position of the cable and housing:
1a. Housing ends that are out of position can obstruct the derailleur cable when it is being pulled and prevent the gears from shifting smoothly. If a housing end is out of position, push it back into place.

1b. If the derailleur is not moving even after you have engaged and disengaged the grip shifter, it probably means that the cable and its housing have seized up. You will need to have the cable and housing replaced.

You can bring your mountain bike into a Decathlon workshop to have the cable and housing replaced, or do it yourself by following this video. The only difference from the video is that there is a single housing that goes from the shifter to the derailleur, passing under the diagonal tube on the frame.

2/ Check the condition of the chain
A worn chain will struggle to change gears and will wear out the cassette and chainring prematurely.

See the section on "checking wear on your chain" below! 

3/ Check that the derailleur dropout is not bent:
A bent hanger causes the derailleur to be out of alignment and therefore unable to function correctly. Stand behind your bike and check the alignment of the derailleur.

If the dropout is twisted or broken, take your bike to a DECATHLON workshop to have it replaced.

NB: If you regularly ride your MTB in wet or muddy conditions, or if you regularly wash your bike with lots of water, then your cables and cable housing will need to be replaced more frequently. Washing your bike using a pressure hose is highly discouraged as it can push dirt and dust into the cable housing.

MAINTAINING YOUR BIKE

Servicing your bike will keep all of its parts working for as long as possible and ensure you have the most fun when riding. Aside from the aesthetic aspect of having a clean bike, failing to service it can lead to problems, and problems lead to accidents, so you must always check for jammed cables, rust, leaks, premature wear, etc.

Good maintenance is good for your performances, while your bike's parts will also last longer, which means a lower environmental impact.

When you start riding your bike, some components will move slightly.

Compatible accessories

ROCKRIDER E-ST 900 MOUNTAIN BIKE
BOTTLE CAGE

You can put a bottle cage on your EAB.

Rockrider e-ST900 Electric Mountain Bike
360 Wh battery extender

Your bike is compatible with the 360 Wh Battery Extender

Rockrider E-ACTV 500: user guide, repairs
ROCKRIDER E-EXPL 700: user guide, repairs

Spare parts

Need to replace a part on your bike? You'll find all our spare parts for the E-ACTV 500 Hybrid EAB right here.

Rockrider e-ST900 Electric Mountain Bike

HAVEN'T BEEN ABLE TO FIX YOUR PROBLEM OR FIND WHAT YOU NEED?

Please contact one of our technicians who will be happy to help

INSTRUCTIONS AND CERTIFICATE OF COMPLIANCE

Rockrider e-ST900 Electric Mountain Bike
instructions diagram

Need the mechanical instructions for your bike?

INSTRUCTIONS AND CERTIFICATE OF COMPLIANCE

Need the certificate of compliance for your bike?

INSTRUCTIONS AND CERTIFICATE OF COMPLIANCE

Need the electrical instructions for your bike?

Rockrider e-ST900 Electric Mountain Bike

Our commitments

Rockrider provides a lifetime warranty on your MTB's frame, handlebar and stem (under normal conditions of use).

All other parts have a 2-year warranty.

Your feedback matters!

Whether it's good or bad, we want to know. Here's why your feedback is so important:

  • Rockrider e-ST900 Electric Mountain Bike

    To have your say at any
    time

    Your feedback tells us how you feel about the quality of our products!

  • Your feedback matters!

    to help other sports users

    Your feedback helps other customers decide which product is right for them!

  • Your feedback matters!

    to help improve our products

    We use your feedback to improve the design of our new products!