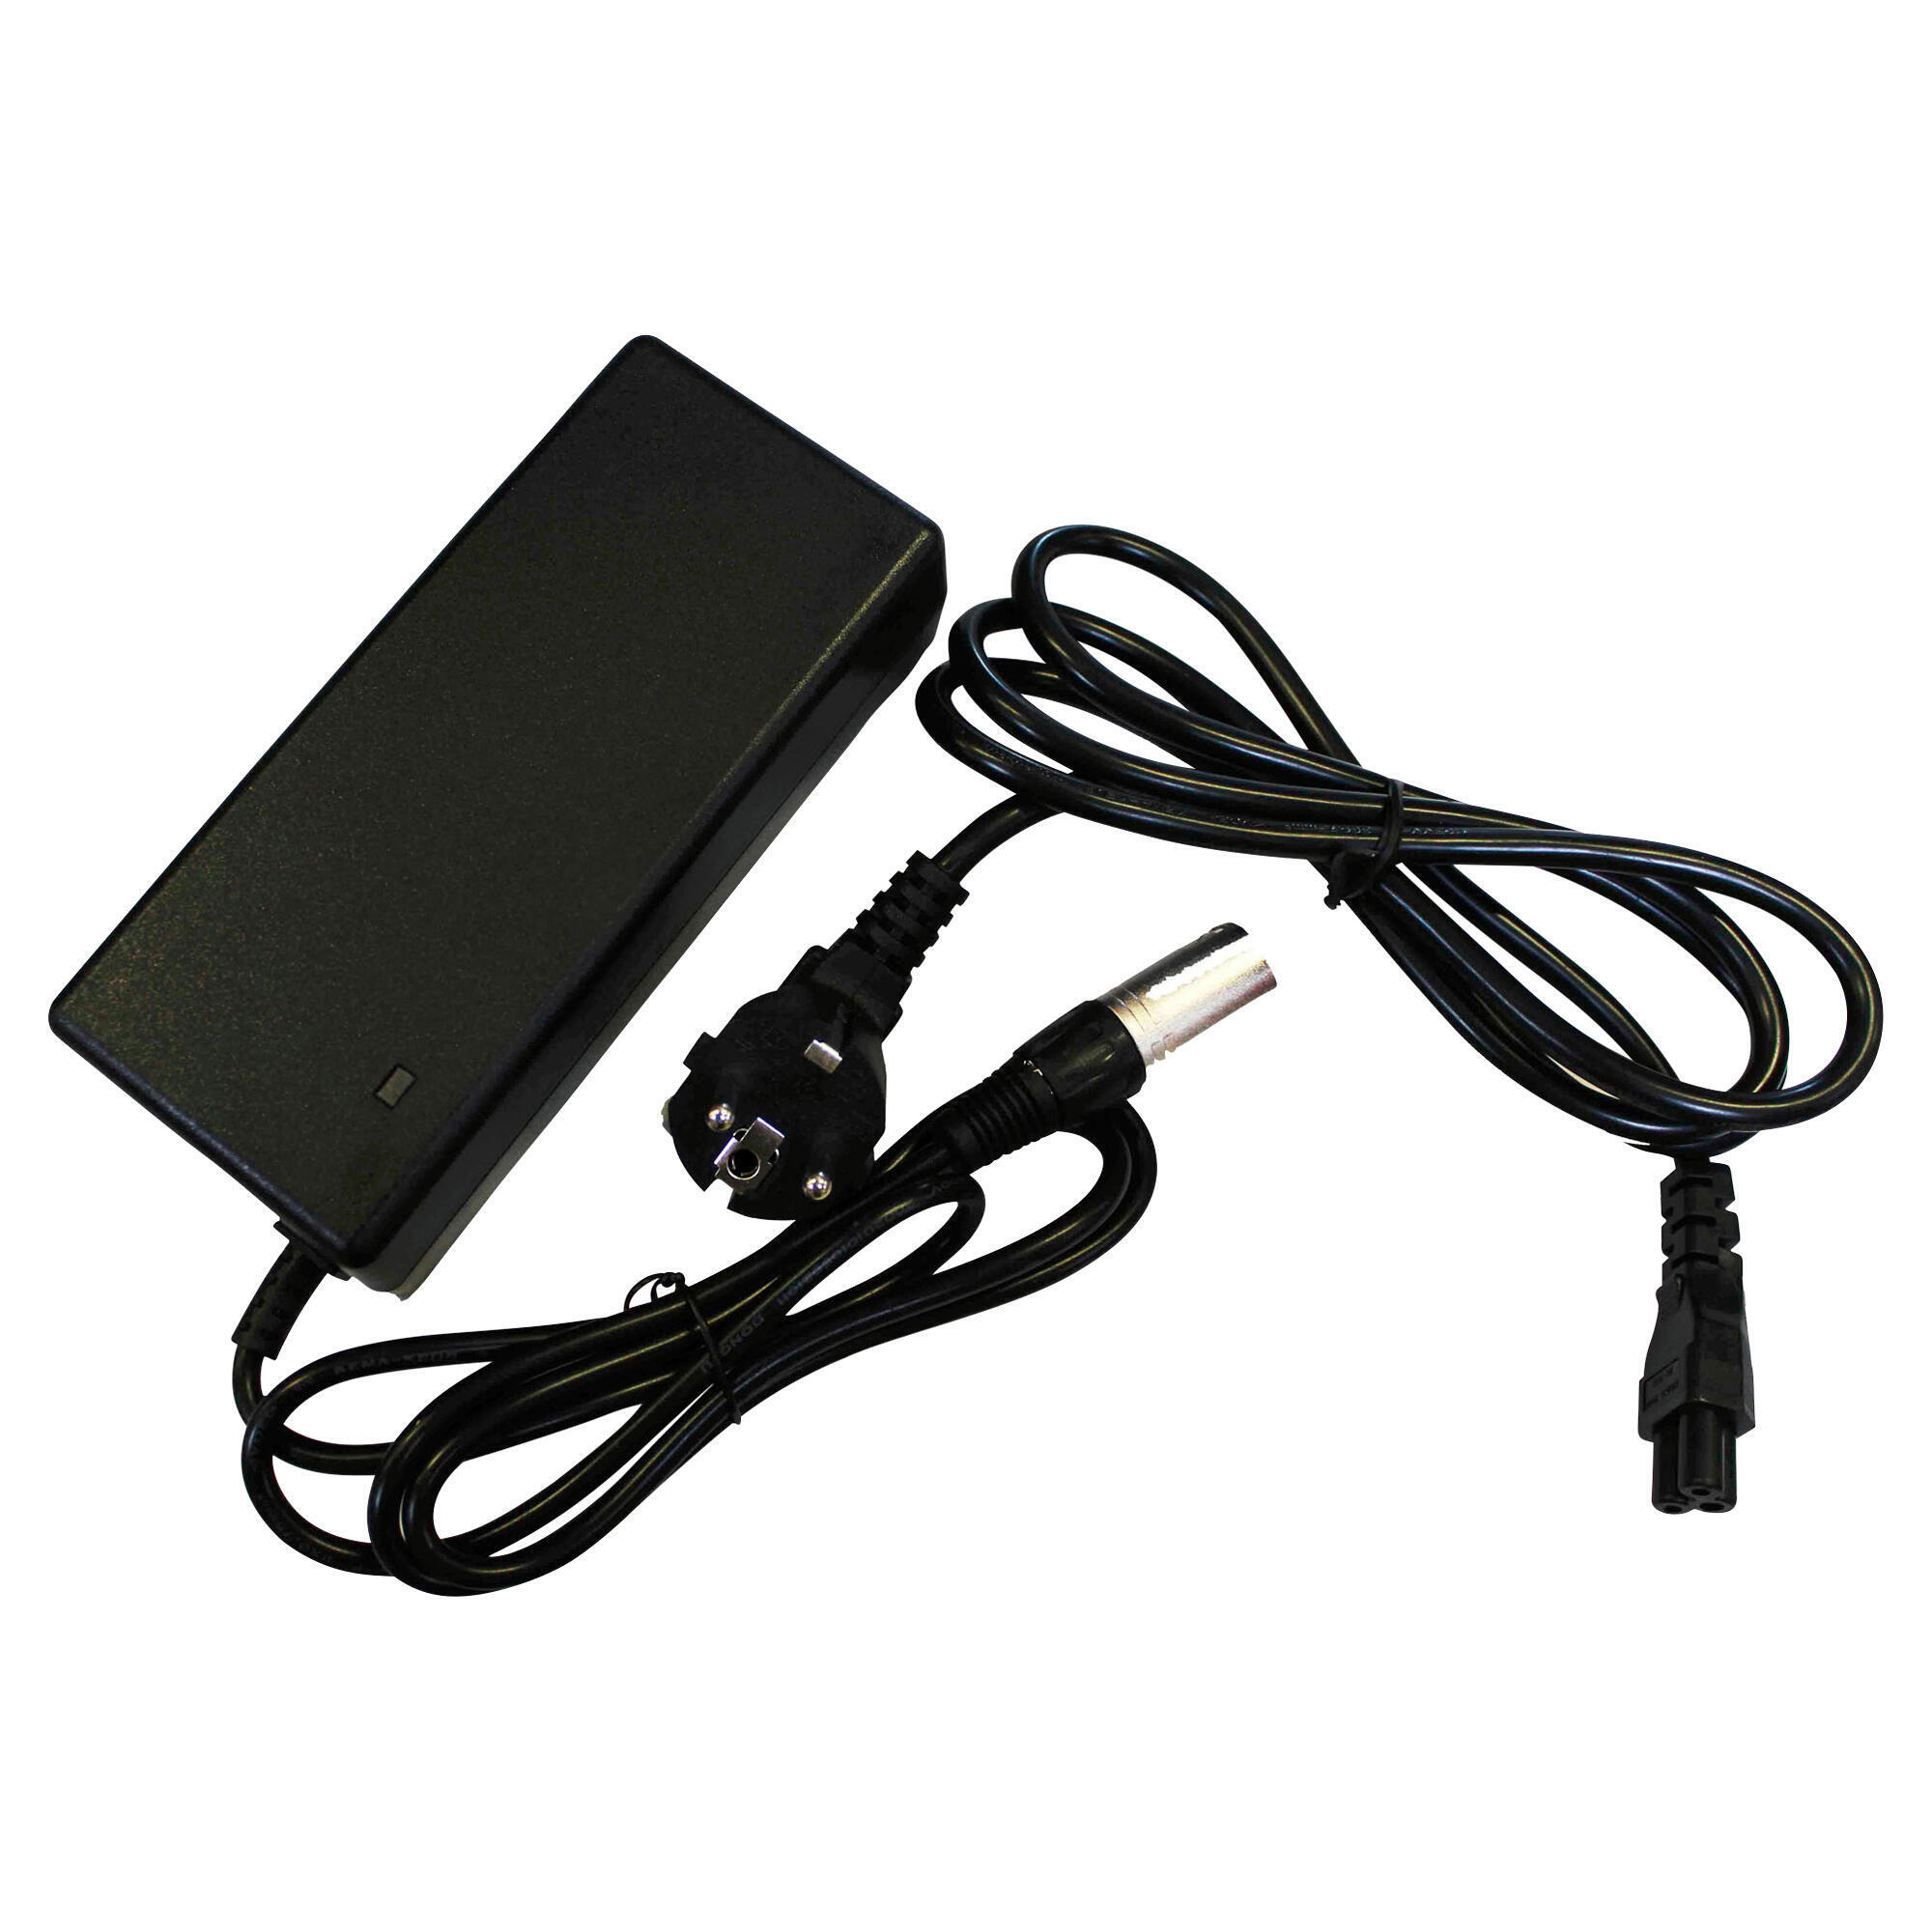
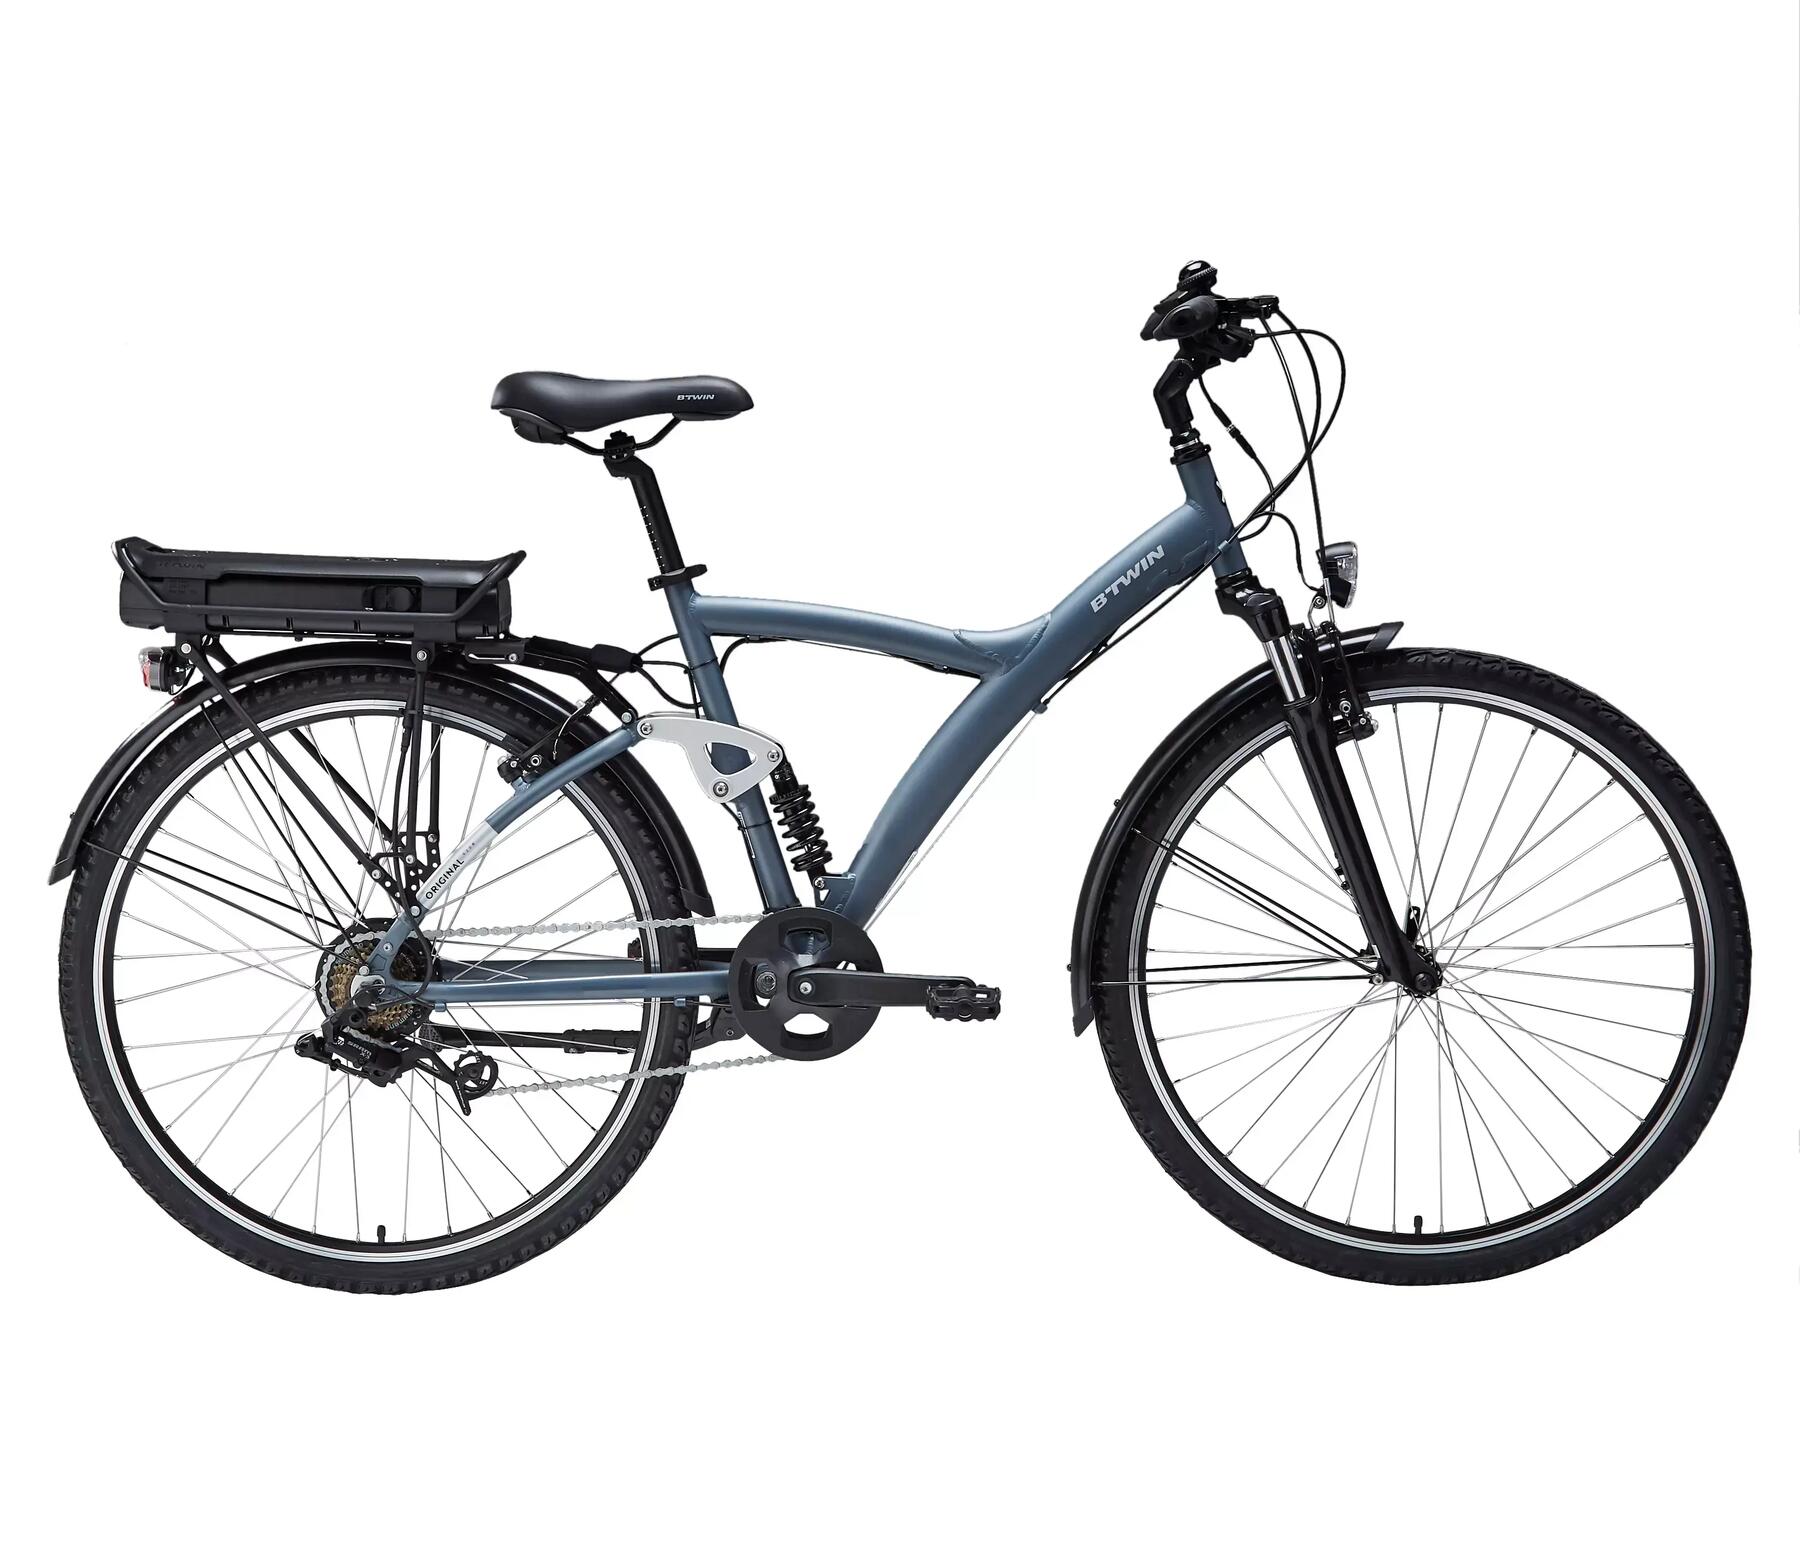
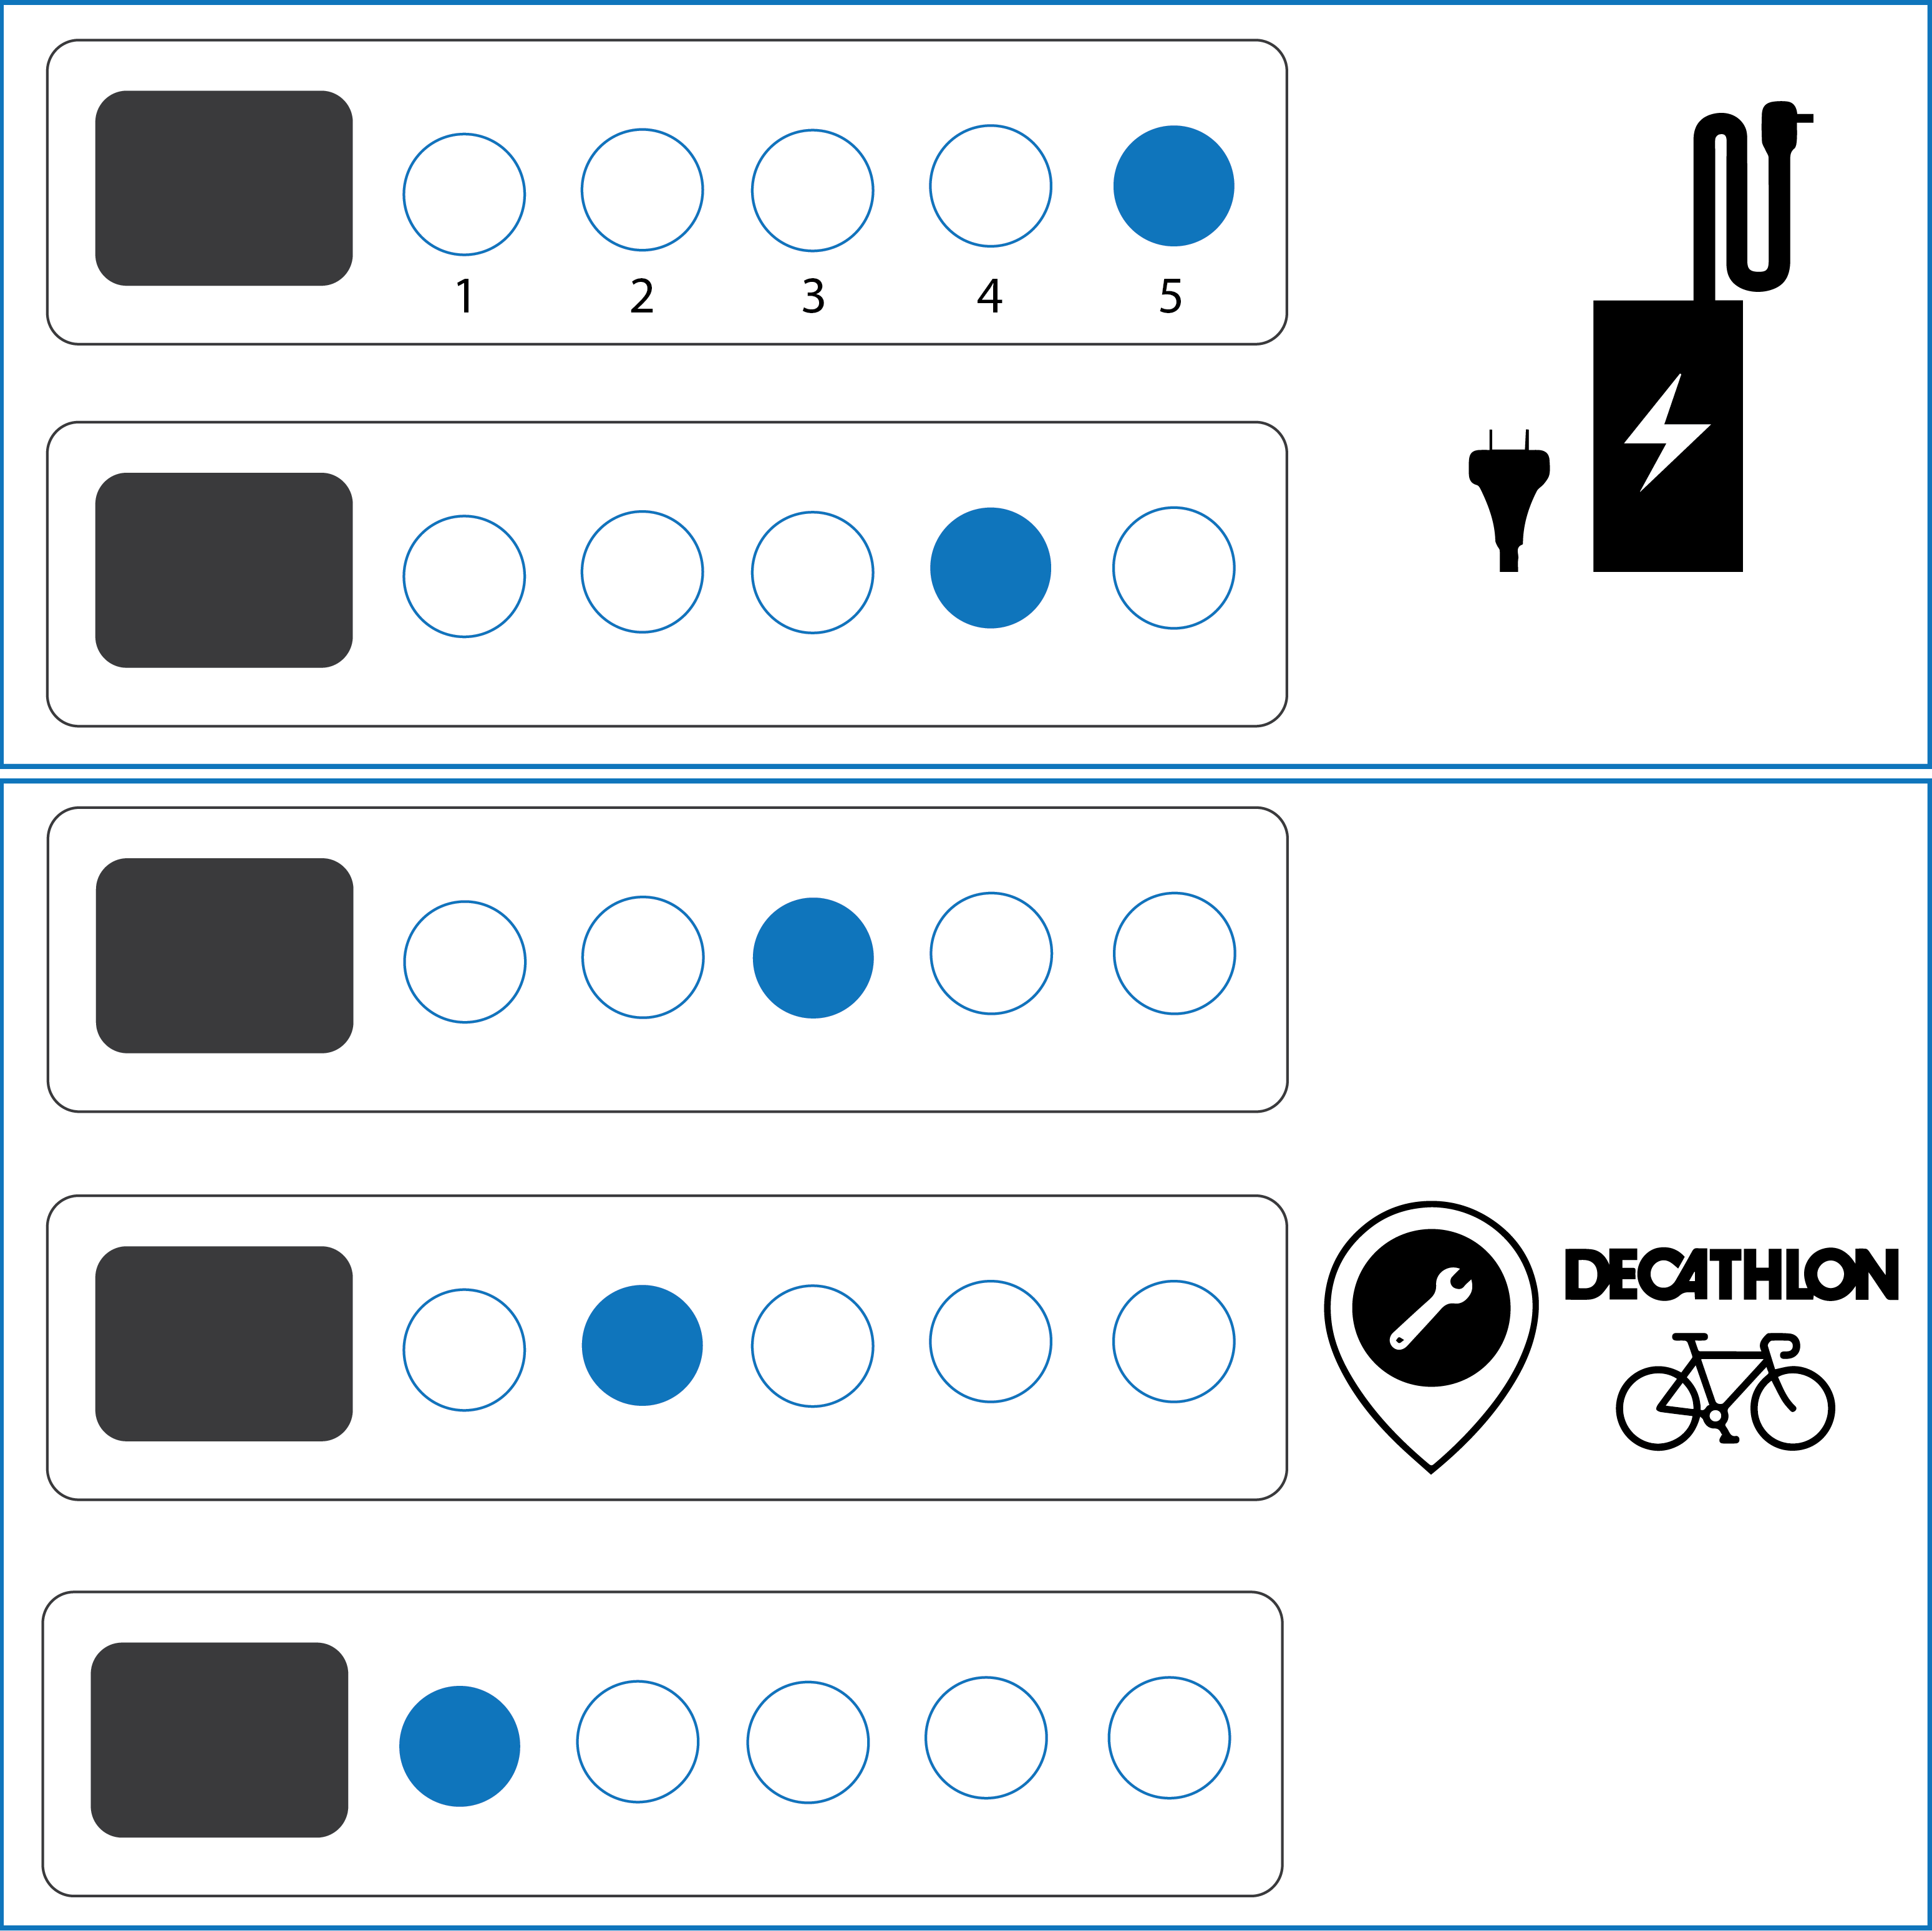
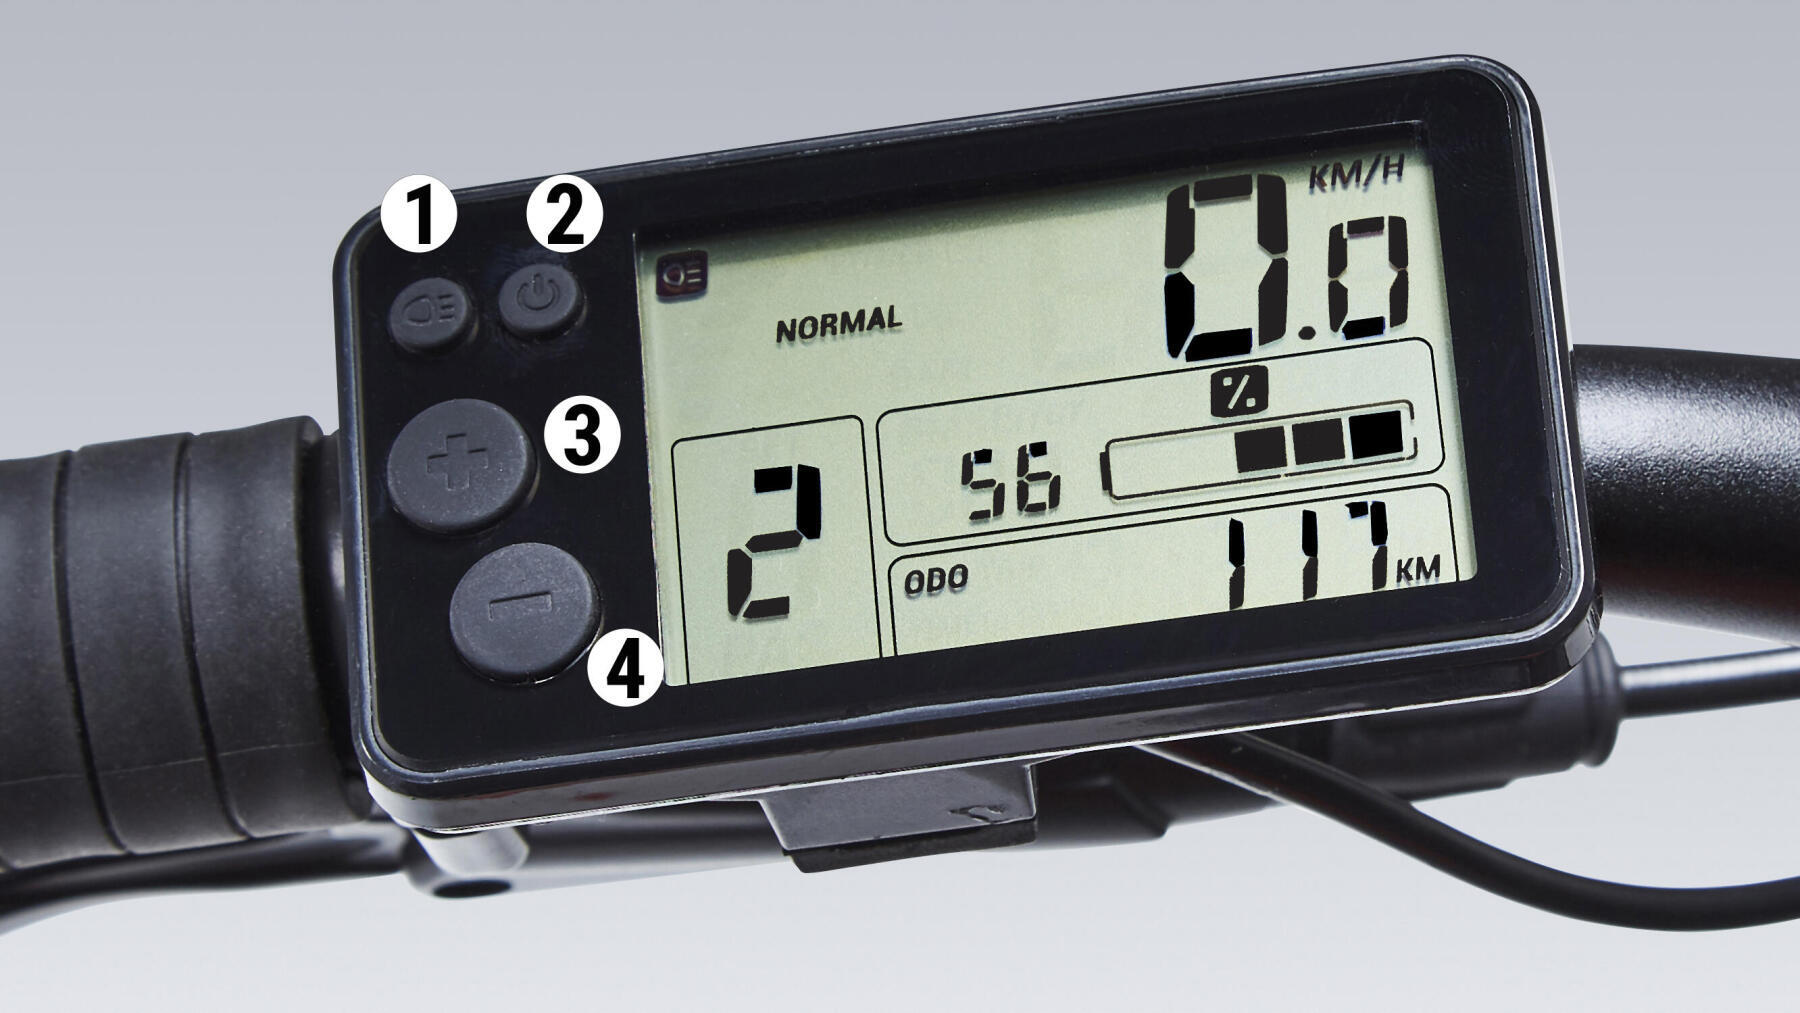
Original 920 E

Ref: 8586865

ORIGINAL 920 E

2020

Ride at your own pace with ease! With electric assist you can augment your pedalling and give yourself that extra little push when you need it, on rides up to 90 km.

Riverside 500e console

First use

1 - "Lights" button

Turn the display backlight, as well as the front and rear lights, on or off.

2 - "ON/OFF" button

- Short press: Change display mode (ODO, TRIP, TripToGo)

- Long press: Turn display on or off

3 - "+" button

- Short press: Set assist mode to the next highest level (up to 3)

- Long press & hold: use "walk mode"

4 - "-" button

- Short press: Set assist mode to the next lowest level

- Long press (for 5 seconds): Reset the trip distance counter to zero.

Screens and functions

What happens if you forget to switch off your bike?

The bike turns off automatically after a few minutes if it isn't being used.

What is pedestrian mode?

With some climbs, there's no option but to get off your bike and push it. Using this mode makes that task less onerous.

Please note that you shouldn't use this mode when riding the bike. It starts, and remains active, while the "+" button is pressed. The mode deactivates when you stop pressing the button.


Do not use Pedestrian mode when you are seated on the bike,as this may damage the motor.

What information is shown on the display?

ODO: Total distance travelled with your Original 920e


TRIP: Partial distance. You can reset this distance counter to zero whenever you like, such as before each ride (reset by pressing and holding the "-" button for 5 seconds.)


TRIP to GO: Estimate remaining battery range (in km or miles depending on the selected unit). This estimate will change depending on your use (incline and pedalling effort) and the selected assist mode.


To switch screens, press the "ON/OFF" button.

How much electric assistance does each boost mode offer?

WALK MODE: Electric assist while walking

MODE 0: Electric assist is off

MODE 1: Electric assist up to 17 km/h; provides up to 90 km of battery range under normal conditions

MODE 2: Electric assist up to 22 km/h; provides up to 70 km of battery range under normal conditions

MODE 3: Electric assist up to 25 km/h; provides up to 50 km of battery range under normal conditions. (IMPORTANT: prolonged use of electric assist will shorten your battery range considerably).


Recharging the battery

How long does it take the battery to charge?

It takes six hours to charge the battery fully (from 0% to 100%).However, it only takes 3 hours to charge the battery from 0% to 80%.

Charger
Can you ride when the battery is empty?

It's an electric-assist bike. There's nothing to stop you riding without that assistance.

You'll feel the weight of the electric system, however.

Can you leave the charger connected to the battery even if it's fully charged?

Yes, the charger is designed to be connected round the clock.

When the battery reaches full charge, the charger switches off. You'll see this indicated by the LED that will change colour (from red, while charging, to green, when fully charged).


Do you have to wait for the battery to be completely empty before it can be recharged?

No, lithium-ion batteries do not have a memory effect and can be charged at any time.

We recommend charging your battery regularly to maintain its performance.

Does the battery charge while cycling?

No, it doesn't have a dynamo. Some systems enable the battery to charge while cycling or braking but performance levels are very low.

Battery life, storage, and range

What should you do with the battery when it wears out?

When your battery is worn out, take it to your DECATHLON store, where it will be collected for recycling.

What is the lifetime of your battery?

The warranty on your battery is for 2 years or 500 cycles (1 cycle = 1 full charge + 1 full discharges, or two 50% charges + two 50% discharges).

How should i store my battery?

You must store and charge your battery in a cool (between 10°C and 25°C), dry place, out of direct sunlight.

Do not store the battery for long periods if it is empty or below 10% charge as this may result in deep discharge and damage the battery.


You should charge the battery (even if it's not being used) at least once every six months to prevent deep discharge and loss of the battery's capacity.

Where to buy a second battery?

New batteries are available for purchase from your local Decathlon workshop.

Contact your nearest workshop to check on availability and order times.

How long can you store your battery before you need to recharge it?

You can store your battery for up to six months without recharging, without degrading battery capacity. If storing it for longer than six months, you must fully charge it.

Why has the battery range on your original 920 e decreased
Battery range

Accessories

  • Rear-view mirror

    Rear-view mirror

    Our rear-view mirror is adjustable, effective, and allows you to see behind you safely.  

  • Basket

    Basket

    Attaches to the front of your bike. Your basket is removable, and attaches to your handlebar. Storage capacity: 12 litres, 5 kg max.

  • Charger

    Extra charger

    Lighten your load! Buy a second charger and keep it at your workplace so you'll always be able to charge your bike without having to carry a charger with you.

Mechanical problems?

  • WheelBuckling

    A wheel is buckling after a few rides

    When you take your new bike out for a ride for the first time, a lot of parts naturally move around and fall into place.   You'll hear the spokes on your wheels creak because of the residual torsion in them. Your wheels should not buckle or be twisted in any way. If this does happen, use the free check-up available to you within six months of purchase and call in at one of our Decathlon workshops to have your wheel repaired free of charge.  

  • DerailleurRiverside500e

    Gears don't shift properly

    After a new bike has been ridden for a few weeks, it can happen that the gears don't shift as well. This is because the cables tend to stretch, and this can prevent the gears from shifting smoothly. If this happens, please visit a Decathlon workshop to have your derailleur adjusted as part of the free maintenance check-up available within six months of your purchase.

  • Key

    Lost key

    You can have a new key cut at a heel bar/locksmith. If you lose both keys, go to your nearest DECATHLON workshop to have the lock changed. We will provide you with a new pair of keys for the new lock.    

Electrical problems

The battery is not charging

1. CHECK THE BATTERY, CHARGER AND MAINS CONNECTION


Make sure the charger you're using is the original charger provided by Decathlon.

Connect the charger to the battery and a mains socket.

Solid red LED light = the battery is charging.

Solid green LED light = the battery is charged.

Flashing LED light = there is a problem with the battery or charger.

It takes six hours for an empty battery to fully recharge.


2. CHECK THAT THERE IS NO RESIDUE ON THE CONNECTORS

The charger and battery connectors must be clean. Make sure there is no residue preventing the charger from connecting with the battery.


3. THE LED INDICATOR LIGHTS ON THE BATTERY MAY BE DEFECTIVE

Drop in at one of our Decathlon workshops to have them checked and repaired.

One or more leds on your battery is/are flashing

THE LAST LED (furthest from the battery button) IS FLASHING.

Your battery is nearly empty and needs to be charged. Connect your battery to the charger.


THE FOURTH LED IS FLASHING

Your battery voltage is too low, and it has not been recharged for a long time. Plug your charger into the mains and connect it to the battery straightaway. If you do not, your battery may go into "deep sleep" and become unusable.


ANOTHER LED IS FLASHING 

Your battery has suffered an abnormal event which has caused it to malfunction. This malfunction may be temporary or permanent. Please visit any Decathlon workshop to have a diagnostics run on your battery and bike.

LED battery
There's an error code on your screen

ERROR 10/12 = BATTERY LOW VOLTAGE / FULLY DISCHARGED

Charge the battery. If the error persists, please bring the battery and charger to a workshop to perform a diagnostics.


ERROR 11 = BATTERY LOW VOLTAGE

Turn the bike off and back on. If the error persists, please bring the battery and charger to a workshop to perform a diagnostics.


ERROR 20 = ELECTRICAL MALFUNCTION

Turn the bike off and on. If the problem persists, please bring your bike in to our workshop for a diagnostics check.


ERROR 21 / 23 = TEMPERATURE SENSOR ERROR

Turn the bike off and on. If the error persists, please bring your bike to a workshop for a diagnostics check. 


ERROR 24 = ELECTRIC SYSTEM VOLTAGE ERROR

Turn the bike off, check the connections, and make sure that the wires are in good condition and connected. Turn the bike back on. If the error persists, please bring your bike in for a diagnostics check. 


ERROR 25 = MOTOR VOLTAGE MEASUREMENT ERROR

Turn the bike off and on. If the problem persists, please bring your bike in to our workshop for a diagnostics check.


ERROR 26 = MULTIPLE ELECTRICAL MALFUNCTIONS DETECTED

The battery may not be correctly in place or locked, causing tiny power cuts while riding and producing this error code.

Make sure your battery is locked in place. If the battery still moves around, take your bike to a Decathlon workshop to have this corrected.


ERROR 31 = LIGHTS MALFUNCTION

One of the lights may be short-circuited. Check that the bike's lights are properly connected and that none of the lighting cables are damaged.

Reconnect the lights properly. If the error persists, have the cables repaired at your local Decathlon workshop.


ERROR 40 / 41 / 45 = SYSTEM VOLTAGE TOO LOW

Turn the bike off and on. If the problem persists, please bring your bike in to our workshop for a diagnostics check.


ERROR 42 = MOTOR DISCONNECTED

Check the connection to the motor, which is most likely disconnected or improperly connected. Plug the motor connector in properly and turn the bike back on.


ERROR 43 = MOTOR SHORT-CIRCUIT

Turn the bike off and on. If the error persists, please bring your bike in for a diagnostics check.  


ERROR 44 = MOTOR OVERHEATED

Let the system cool down. Reduce use of the motor by pedalling less and/or putting it on a lower power setting. Turn the bike off and on. If the problem persists, please bring your bike in to our workshop for a diagnostics check.


ERROR 46 = MOTOR BLOCKED

Turn the bike off and on. If the problem persists, please bring your bike in to our workshop for a diagnostics check.


ERROR 60 = ERROR COMMUNICATING WITH CONSOLE

Check that the console connector is correctly plugged in and not damaged. Also check the display cable.

Turn the bike off and on. If the problem persists, please bring your bike in to our workshop for a diagnostics check.


ERROR 70 / 71 / 72 / 73 / 75 / 200 / 201 / 202 = CADENCE SENSOR ERROR

Turn the bike off and back on. If the problem persists, please bring your bike in to our workshop for a diagnostics check.


ERROR 80 / 82 / 83 / 84 = INCORRECT CONTROLLER SETTINGS

Turn the bike off and back on. If the problem persists, please bring your bike in to our workshop for a diagnostics check. A software update may resolve this issue. 


ERROR 81 = UNKNOWN SPEED INFORMATION

Turn the bike off and back on. If the problem persists, please bring your bike in to our workshop for a diagnostics check.


ERROR 203 / 204 / 205 / 206 = MOTOR ERROR

Check that the motor is not disconnected and that the motor connector is not damaged.


ERROR 207 / 208 / 209 = CONTROLLER ERROR

Check the sensor and display connectors. Turn the bike off and back on. If the problem persists, please bring your bike in to our workshop for a diagnostics check.


Electric-assist is intermittent

1- Check that the battery is charged.

If the battery is almost empty and the bike is set to a high assist mode, this can produce a jerky effect before the battery goes completely flat.

> Remove the battery from the bike.

> Press the battery button.

> Check that at least one LED lights up.

> If none of the LEDs light up, or the last LED blinks, recharge the battery.

2- CHECK THAT THE BATTERY IS CLEAN, PROPERLY ATTACHED, AND LOCKED IN PLACE

> Check that the battery connectors and housing are clean and in good condition.

> The battery should be correctly inserted into its slot. (Make sure that the lock is in the open position)

3- CHECK THAT THE MOTOR CONNECTOR IS PLUGGED IN CORRECTLY

> The motor connector, located at the rear stay on the left side of the frame, may be slightly damaged. 

Simply push it in so that it is properly in place (none of the grooves of the male connector should stick out) to eliminate judder and/or motor noises.


If the problem persists, please contact us via the help form, or visit one of our Decathlon workshops.

Display does not turn on

1- CHECK THAT THE DISPLAY CONSOLE IS PROPERLY PLUGGED IN

> Check the console connector located in the front of the handlebar.

> Loosen the two dials and pull to disconnect the display and the connector cable.

> Check that none of the plugs are bent.

> Reconnect the display; take care to orient the connectors correctly to avoid bending a plug! Use the two arrows etched into each side of the connectors to check the orientation. These two arrows must be lined up face-to-face before plugging them in.

2- CHECK THAT THE BATTERY IS PROPERLY CHARGED

If the battery is almost empty and the bike is set to a high electric-assist mode, this can result in intermittent power cuts (causing the bike to judder) while riding before the battery goes completely flat.

> Remove the battery from the bike.

> Press the battery button.

> Check that at least one LED lights up.

> If none of the LEDs light up, or the last LED blinks, recharge the battery.

3- CHECK THAT THE BATTERY IS CLEAN, PROPERLY PLUGGED IN, AND LOCKED IN PLACE

> Check that the battery connectors and battery housing are clean.

> The battery must be correctly inserted into the lower slot and the handle must be fully down (you should hear it "click" into place) to confirm that it's in correctly.

4- LET THE SYSTEM COOL DOWN

In high temperatures, or after a long ride, the electric system may overheat. Allow the bike to cool down by not using the electric assist for several minutes before turning it back on.


If the problem persists, please contact us via the help form, or visit one of our Decathlon workshops.

The electric assist is cutting off

1- Check that the battery is charged.

If the battery is almost empty and the bike is set to a high assist mode, this can produce a jerky effect before the battery goes completely flat.

> Remove the battery from the bike.

> Press the battery button.

> Check that at least one LED lights up.

> If none of the LEDs light up, or the last LED blinks, recharge the battery.

2- CHECK THAT THE BATTERY IS CLEAN, PROPERLY ATTACHED, AND LOCKED IN PLACE

> Check that the battery connectors and housing are clean and in good condition.

> The battery should be correctly inserted into its slot. (Take care to put the lock in the open position)

3- LET THE SYSTEM COOL DOWN

In case of high temperatures or after a long ride, the electric system may overheat. Allow the bike to cool down by not using the electric assist for several minutes before turning it back on.


If the problem persists, please contact us via the help form, or visit one of our Decathlon workshops.

The electric-assist doesn't engage

1- SELECT AN ASSIST MODE OTHER THAN ZERO.

If the mode displayed on the screen is 0, the motor will not deliver any electrical assistance.

Select assistance modes 1, 2 or 3.

Once the mode is selected, start pedalling, pressing firmly on the pedals. Select a higher assistance mode (3 is the highest) if you find it too difficult to pedal hard enough to engage the electric-assist.

2- CHECK THAT THE BATTERY IS CHARGED

If the battery is almost empty and the bike is set to a high assist mode, this can cause the bike to judder before the battery goes completely flat.

> Remove the battery from the bike.

> Press the battery button.

> Check that at least one LED lights up.

> If none of the LEDs light up, or the last LED blinks, recharge the battery.

3- CHECK THAT THE BATTERY IS CLEAN, PROPERLY ATTACHED, AND LOCKED IN PLACE

> Check that the battery connectors and housing are clean and in good condition.

> The battery must be correctly inserted into the lower slot and the handle must be fully down (you should hear it "click" into place) to confirm that it's in correctly.

4- LET THE SYSTEM COOL DOWN

In high temperatures, or after a long ride, the electric system may overheat. Allow the bike to cool down by not using the electric assist for several minutes before turning it back on.

5- CHECK THAT THE MOTOR CONNECTOR IS PLUGGED IN CORRECTLY

The motor plug, which is located at the rear stay on the left of the frame, may be slightly bent.

Simply push it in so that it is properly in place (none of the grooves of the male connector should stick out) to eliminate the shaking effect and/or motor noises.


If the problem persists, please contact us via the help form, or visit one of our Decathlon workshops.

The electric-assist isn't very effective

1- CHECK THE TYRE PRESSURE

 > The tyre pressure determines how efficiently the electric assist works. Before each ride, make sure your tyres are inflated to between 3 and 4.5 bars.

2- CHECK THAT THE BATTERY IS CHARGED

If the battery charge level is low, the motor won't receive enough power to deliver the desired assist level. In this case, switch to a lower electric-assist mode.

3- CHECK THAT THE BATTERY IS CORRECTLY PLUGGED IN

If the motor seems to judder, check that the connector to the motor is fully and securely plugged in.

The motor connector, which is located at the rear stay on the left side of the frame, may be slightly bent. 

Simply push it in so that it is fully in place (none of the grooves of the male connector should stick out) to eliminate judder and/or motor noises.

4- BE CAREFUL NOT TO OVERCHARGE THE BIKE


If the problem persists, please contact us via the contact form, or visit your local Decathlon workshop.

Care, maintenance, and spare parts

How to clean your original 920 e

When cleaning your Original 920 E, leave the battery CONNECTED to the bike. This will help prevent water from getting into the controller.


Do not use a pressure hose as water could get into the ball bearings and permanently damage the electrical components.


Use a standard hose and a sponge to clean your bike. You'll also find cleaning kits at Decathlon.

Use a cloth to dry the bike.

Lubricate the chain with a suitable lubricant.

How to properly store your original 920 e

> Store your bike in a place that is cool and sheltered.

> Clean your bike before storing to remove mud or sand that could corrode your bike.

> Lubricate the chain: spray lubricant along the full length of the chain to protect it from corrosion.

> Shift the derailleur to the smallest cog.

> Fully charge the battery at least once every six months (more often is better).

What pressure should your tyres be inflated to?

Having the right tyre pressure is particularly important on an electric bike, The wheels have a lot of weight on them because of the combination of the motor and bike.

To reduce the risk of punctures and ensure you get the greatest battery range possible, we recommend you inflate your tyres to a pressure of between 3 and 4.5 bar.

Can you replace your chainring?

You will find a chainring with 38 teeth available for sale at our Decathlon workshops (item code: 8520832)

Spare parts

Spare parts

NEED SPARE PARTS FOR YOUR RIVERSIDE TOURING 920?

Original 920 E

Haven't been able to fix your problem or find what you need?

Please contact one of our technicians who will be happy to help

Original 920 E

Warranty

Riverside guarantees your bike's frame, handlebar and stem for life (under normal conditions of use).

The warranty on your bike's other components is for two years (other than normal wear).

As soon as your child starts using the bike, some components will move slightly. This is why we offer a free maintenance check and tune-up of your Riverside bike within six months of purchase.