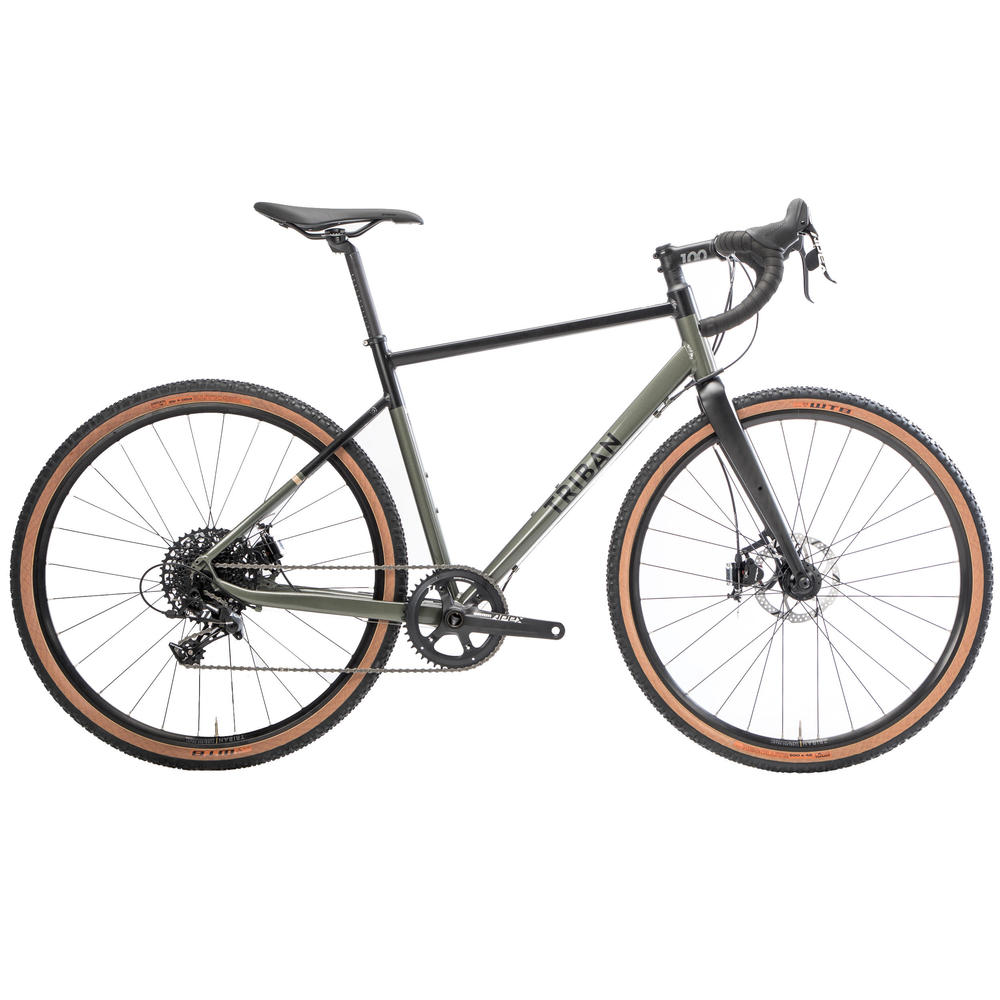
Triban RC520 Gravel Limited 2

Ref: 8588678

TRIBAN RC520 GRAVEL LIMITED 2

2020

Need help assembling, maintaining or repairing your bike?

Find all our tips, tutorials and videos as well as user guides and spare parts for your RC520 GRAVEL LIMITED 2 right here!

1 / Assembling your bike

Watch our tutorial video and find out how to assemble your bike.

When mounting the stem, the screws that hold the handlebar to the stem should be tightened to 6 Nm in an "X" pattern.

When using the bike for the first time, you should take time to bed the brakes in. This video will show you how to do it:
Triban RC520 Gravel LTD2 (2020)

Brakes in : bedding them in is essential

When using the bike for the first time, you should take time to bed the brakes in. This video will show you how to do it:

3 / Maintenance

Find all the info you need to keep your bike in good shape

Essential tools for your workshop.

To maintain your bike correctly, you need to have the right tools.

Cleaning your bike properly

Step 1: Apply degreaser

Step 2: Wash and rinse

Step 3: Apply fresh lubricant

For more information, click on the link below:

How to correctly remove/replace your rear wheel

When removing/replacing your rear wheel, be gentle so as not to damage your equipment.

Triban RC520 Gravel LTD2 (2020)

Tyre: changing a tube-type tyre

Your tyre might be quite stiff if it's old, so you may need to use some force to get it off.

You'll find the right tyres in the link below.

Triban RC520 Gravel LTD2 (2020)

Tightening the seat post

To set your saddle correctly it needs to be securely in place. A loose seat post can slip when you're out and about on your bike. Conversely, if it's too tight, you run the risk of crushing the seat post and damaging your bike.

The best way to tighten a seat post is to use a torque wrench. We recommend you tighten it to between 6 and 7 Nm.

Take care not to exceed the maximum height indicated on the seat post.

Fitting your tubeless tyres

Before you get started, make sure you have compatible tubeless-ready tyres. 

Our tutorial video shows you how to fit your tubeless tyres.

Triban RC520 Gravel LTD2 (2020)

When to change your tyres

Riding around with worn tyres brings the following risks with it:

Loss of grip.

Greater exposure to punctures.

In this article, we'll tell you how to spot a worn tyre:

When to change your chain

The chain is an essential part of your bike's drive train. It is important because it connects the chainset and the cassette. It transmits the energy that drives you forward on your bike so it's vital that it's in good condition and proper working order. This article explains how to recognise and replace a worn chain:

When to change your brake pads

To find out if your pads are worn, check the thickness of the brake lining on the pad. To avoid losing braking efficiency, you'll need to change the pads if the lining is less than 0.5mm thick.
Be sure to adjust your brakes once you've replaced the pads.

When to bleed your brakes

Over time, braking fluid degrades and air bubbles may form in the braking system. Therefore, it's recommended to bleed your brakes every 2 years. For this, you'll need a bleeding kit adapted to your brakes and the right kind of fluid, either DOT or mineral oil.

4 / Repairs

You're sure to find the answer to your questions in the FAQs

Changing your pedals

Are your pedals broken? Do you want to change your pedals for clipless ones? Here's our advice.

NB: please note that the screw thread on the left pedal is inverted and that the pedal thus screws on in an anti-clockwise direction. The right pedal has a standard screw thread. 

Please use the correct tool to take your pedals off as force needs to be exerted to unscrew them.

Triban RC520 Gravel LTD2 (2020)

Changing your tyre or inner tube

If you have a puncture or worn tyre, follow our tutorial.

Changing your handlebar tape

The tape on your handlebar will wear over time and you'll need to change it occasionally.

Your disc brakes are making a noise

If your disc makes noise:

- Check that your wheel is properly centred. To do this, loosen the wheel and tighten it up again.

- Check that your calliper is correctly adjusted and that the brake cables are set at the right tension.

- Check that the disc is straight.

- Clean the entire brake system with water. If necessary, clean the discs with some water and soap.

The brakes might make a noise if they haven't been bedded in properly. In this case, follow the bedding-in procedure.
If you've been braking very hard over a long period (for example, when going down a steep hill), your brake pads might have glazed over and/or your disc could have overheated. In this case, replace your brake pads and discs.

Your bike isn't braking very well

There are several things you can do if your brakes aren't working as well as they used to:

- Clean your bike, discs and brakes with soapy water

- Check your brake pads for wear.

- Check that the cable is properly tensioned.    
                                                                                  
- Check that the calliper is properly centred.

Changing your brake pads

It's important to change your brake pads before they become too worn. It makes for safe riding.

Changing your housings and brake cable

Need to change your brake cables and/or housings?Watch our tutorial.

Your gears are skipping

If your gears are slipping, you need to check the following: 

- Wear on your drive train.

- The tension of the cables.

- The derailleur, to see if it's twisted.

You then need to adjust the derailleur.

The derailleur hanger is broken or bent

If your derailleur hanger is broken or bent, you need to change it. 

Changing your chain

Here's some useful advice on how to change your chain correctly.

Changing your bike cassette

Is your drive train worn? Do you need to change the number of cogs on your cassette? Watch our tutorial to find out how to change your cassette.

Please note: the maximum cassette size for this bike is 11 - 34.

Changing your chainring

Is your chainring worn? It's easy to change your chainring. All you need to do is use an Allen key to unscrew the screws holding the chainring in place. You can then fit the new chainring.

Changing your derailleur housings and cable

Need to change your derailleur cables and/or housings?Watch our tutorial.

6 / Workshop services

You can do all of the procedures described below yourself or you can get your local Decathlon workshop to do them for you. For more information about the services the workshop offers, please click the link below.

7 / Instructions

8 / Guarantees

  • Our commitment

    TRIBAN provides a lifetime warranty on the frame, handlebar and stem (under normal conditions of use).

    The warranty on other parts is two years.


    When you start using your bike, some of the components may move a little. That's why we offer a free check-up of your bike in the first six months following the date of purchase.


    The table shows the main bike components, the types of wear that aren't covered by warranties, and the warranty length within the European Union.

Triban RC520 Gravel LTD2  (2020)

Haven't been able to fix your problem or find what you need?

Please contact one of our technicians who will be happy to help