Repair the trilugik sledge brake
To change your trilugik brake, just order the part online and follow the steps below or the video.
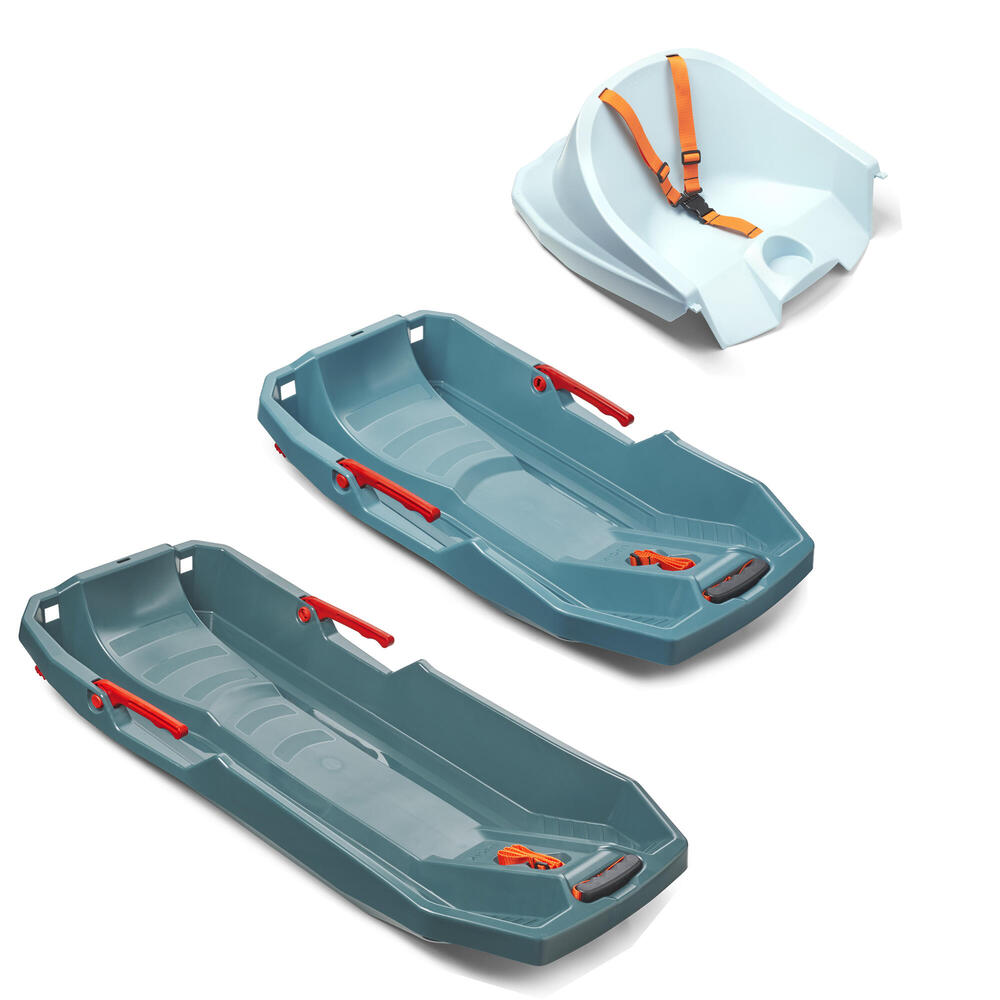
The TRILUGIK brake is sold separately and can be fitted on the right or left on the junior or adult Trilugik.
REF: 8553500, 8546700, 8546705
HAVE YOU BROKEN YOUR SLEDGE? DON'T THROW IT AWAY!
Did the brakes not withstand the descent? Is the strap damaged or lost after your last winter holiday? DECATHLON SLEDGE gives you the option of repairing your sledge with available spare parts and help from tutorials. Why throw away the entire sledge when it's easy to repair it?
DECATHLON SLEDGE encourages sledge repair as part of its ecological approach. With help from step by step videos and texts, you will rediscover your sledge in a new light ready to descend the snowy slopes.
You’ll have everything you need for sledge repair with the sledge tutorials.
Our TRILUGIK sledges comes with a 5 year guarantee so you can return the product to us if it’s faulty or broken. However, if you like a bit of DIY (or not), the brake, the strap, or any other sledge spare parts are available to anyone. Our spare parts are available online at www.decathlon.co.uk.
The TRILUGIK brake is sold separately and can be fitted on the right or left on the junior or adult Trilugik.
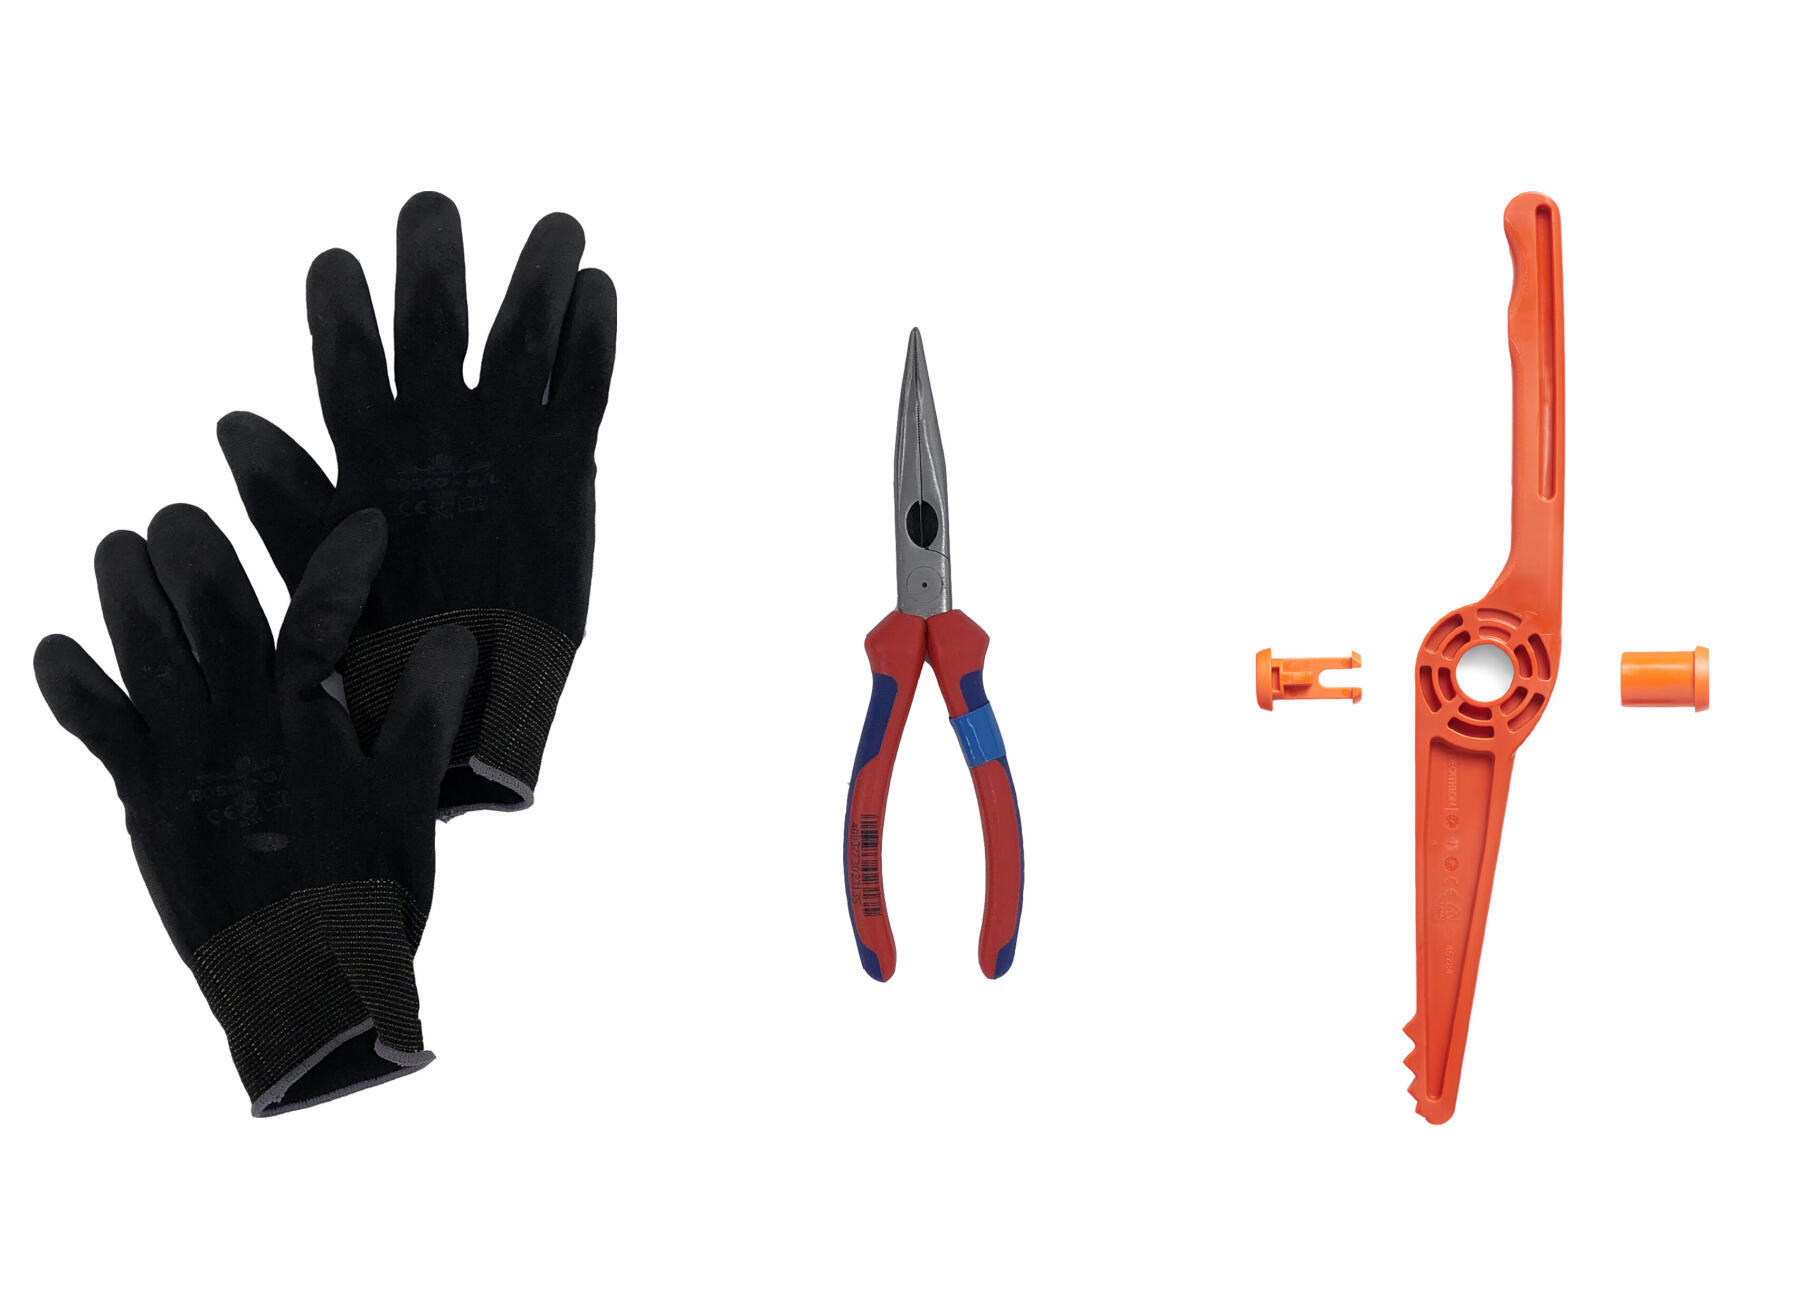
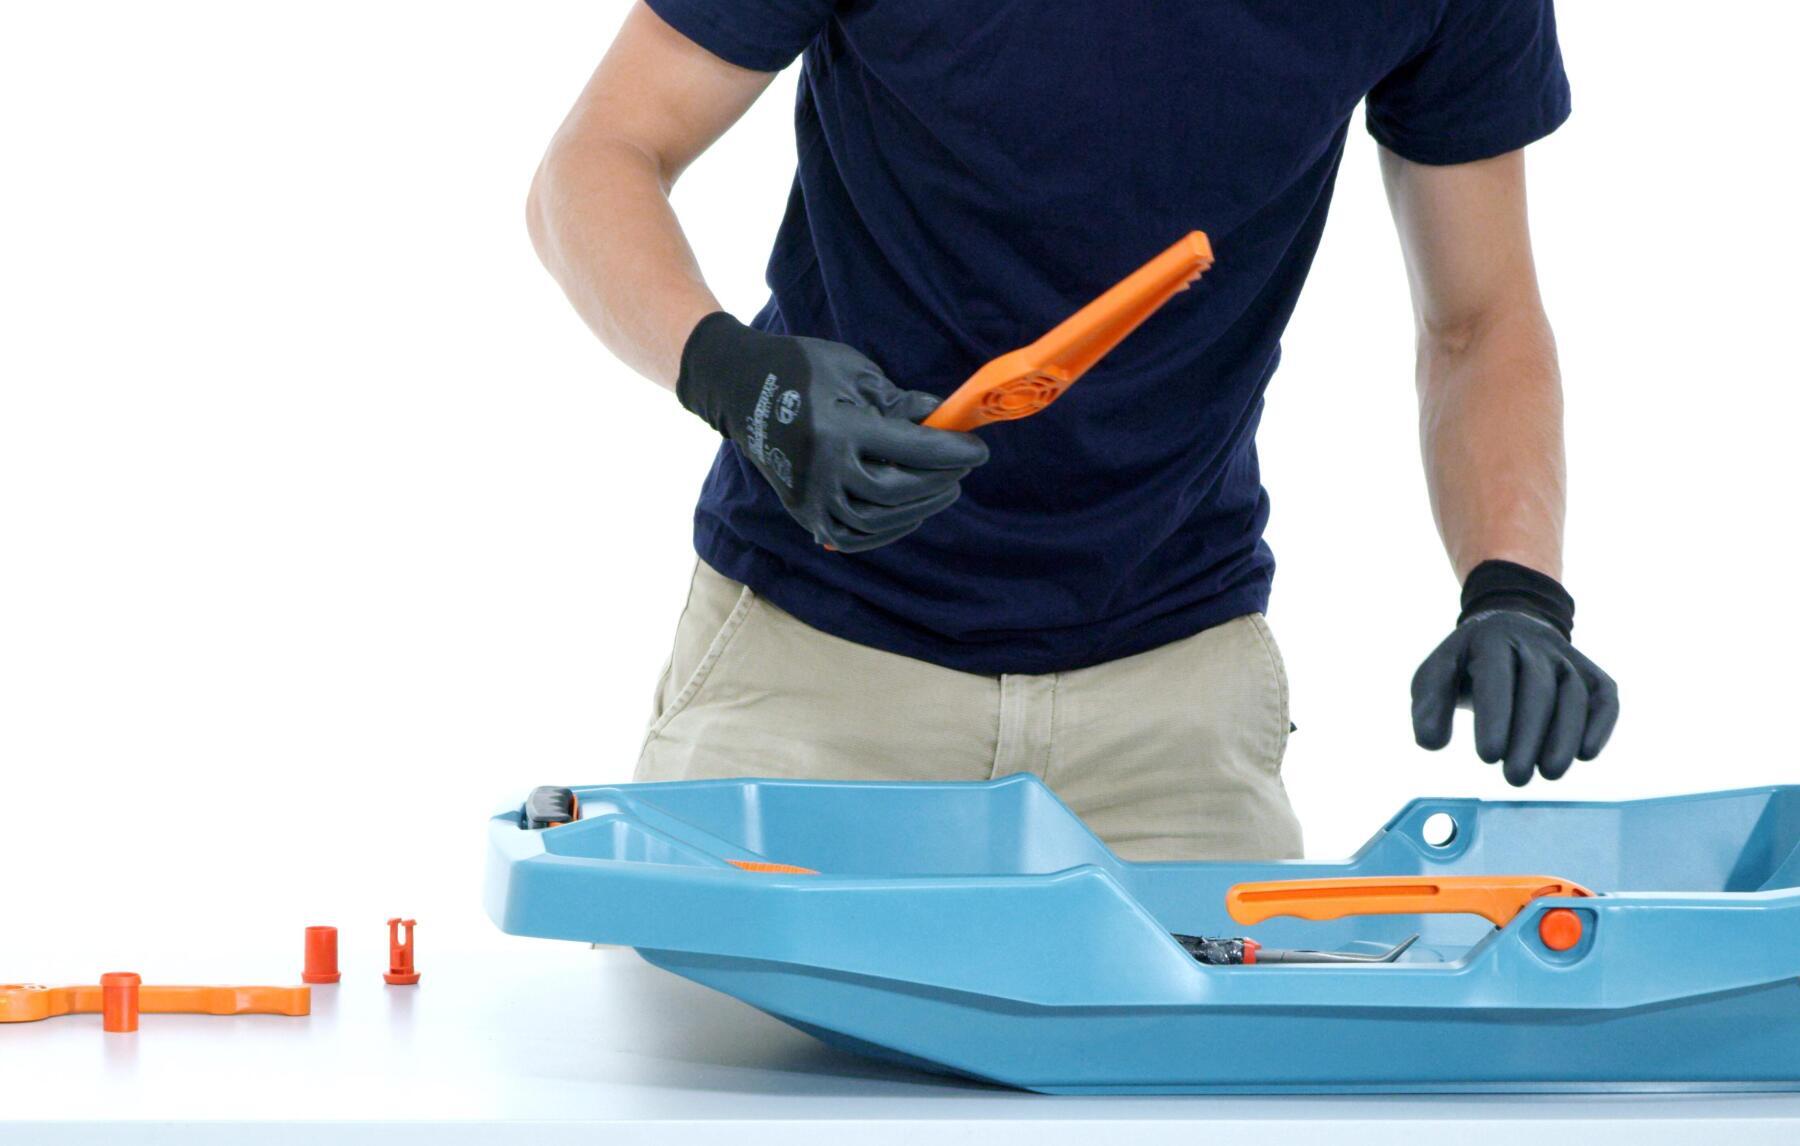
You will need the items below:
- Protective gloves
- Flat nose pliers
- Replacement brake
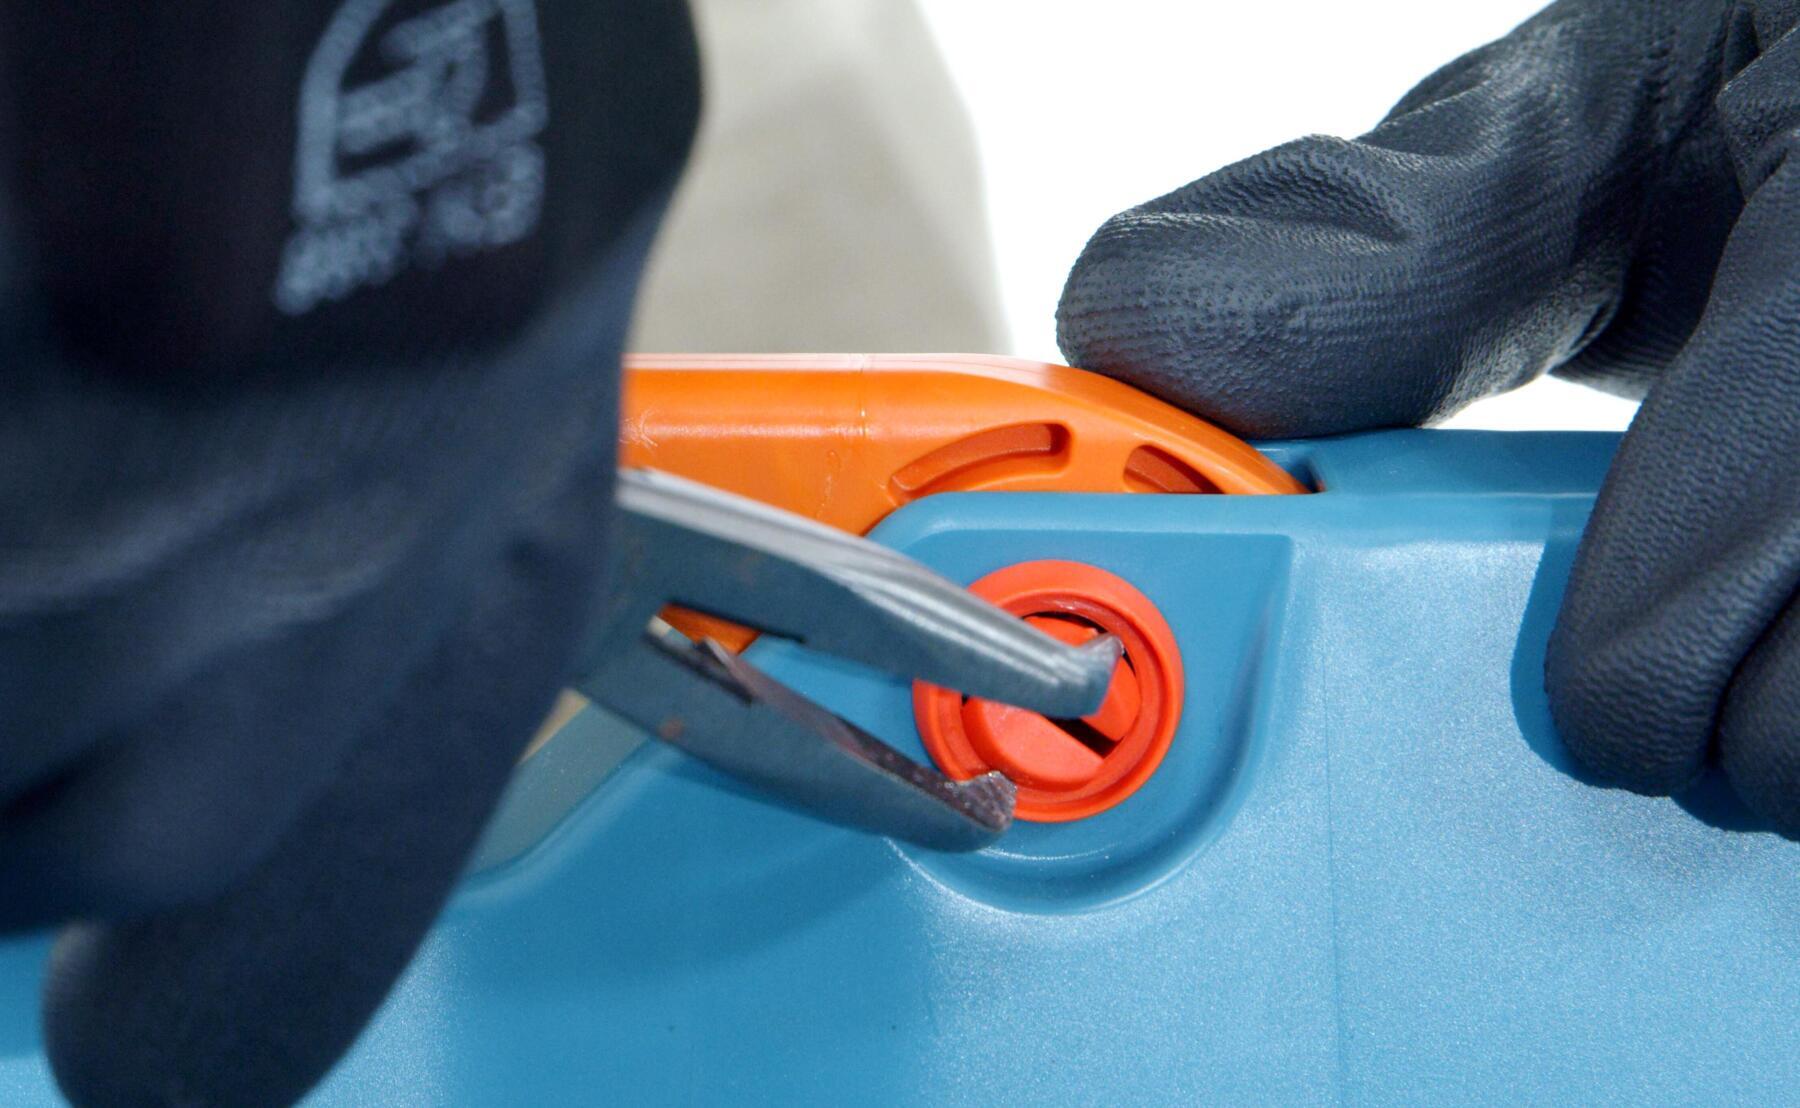
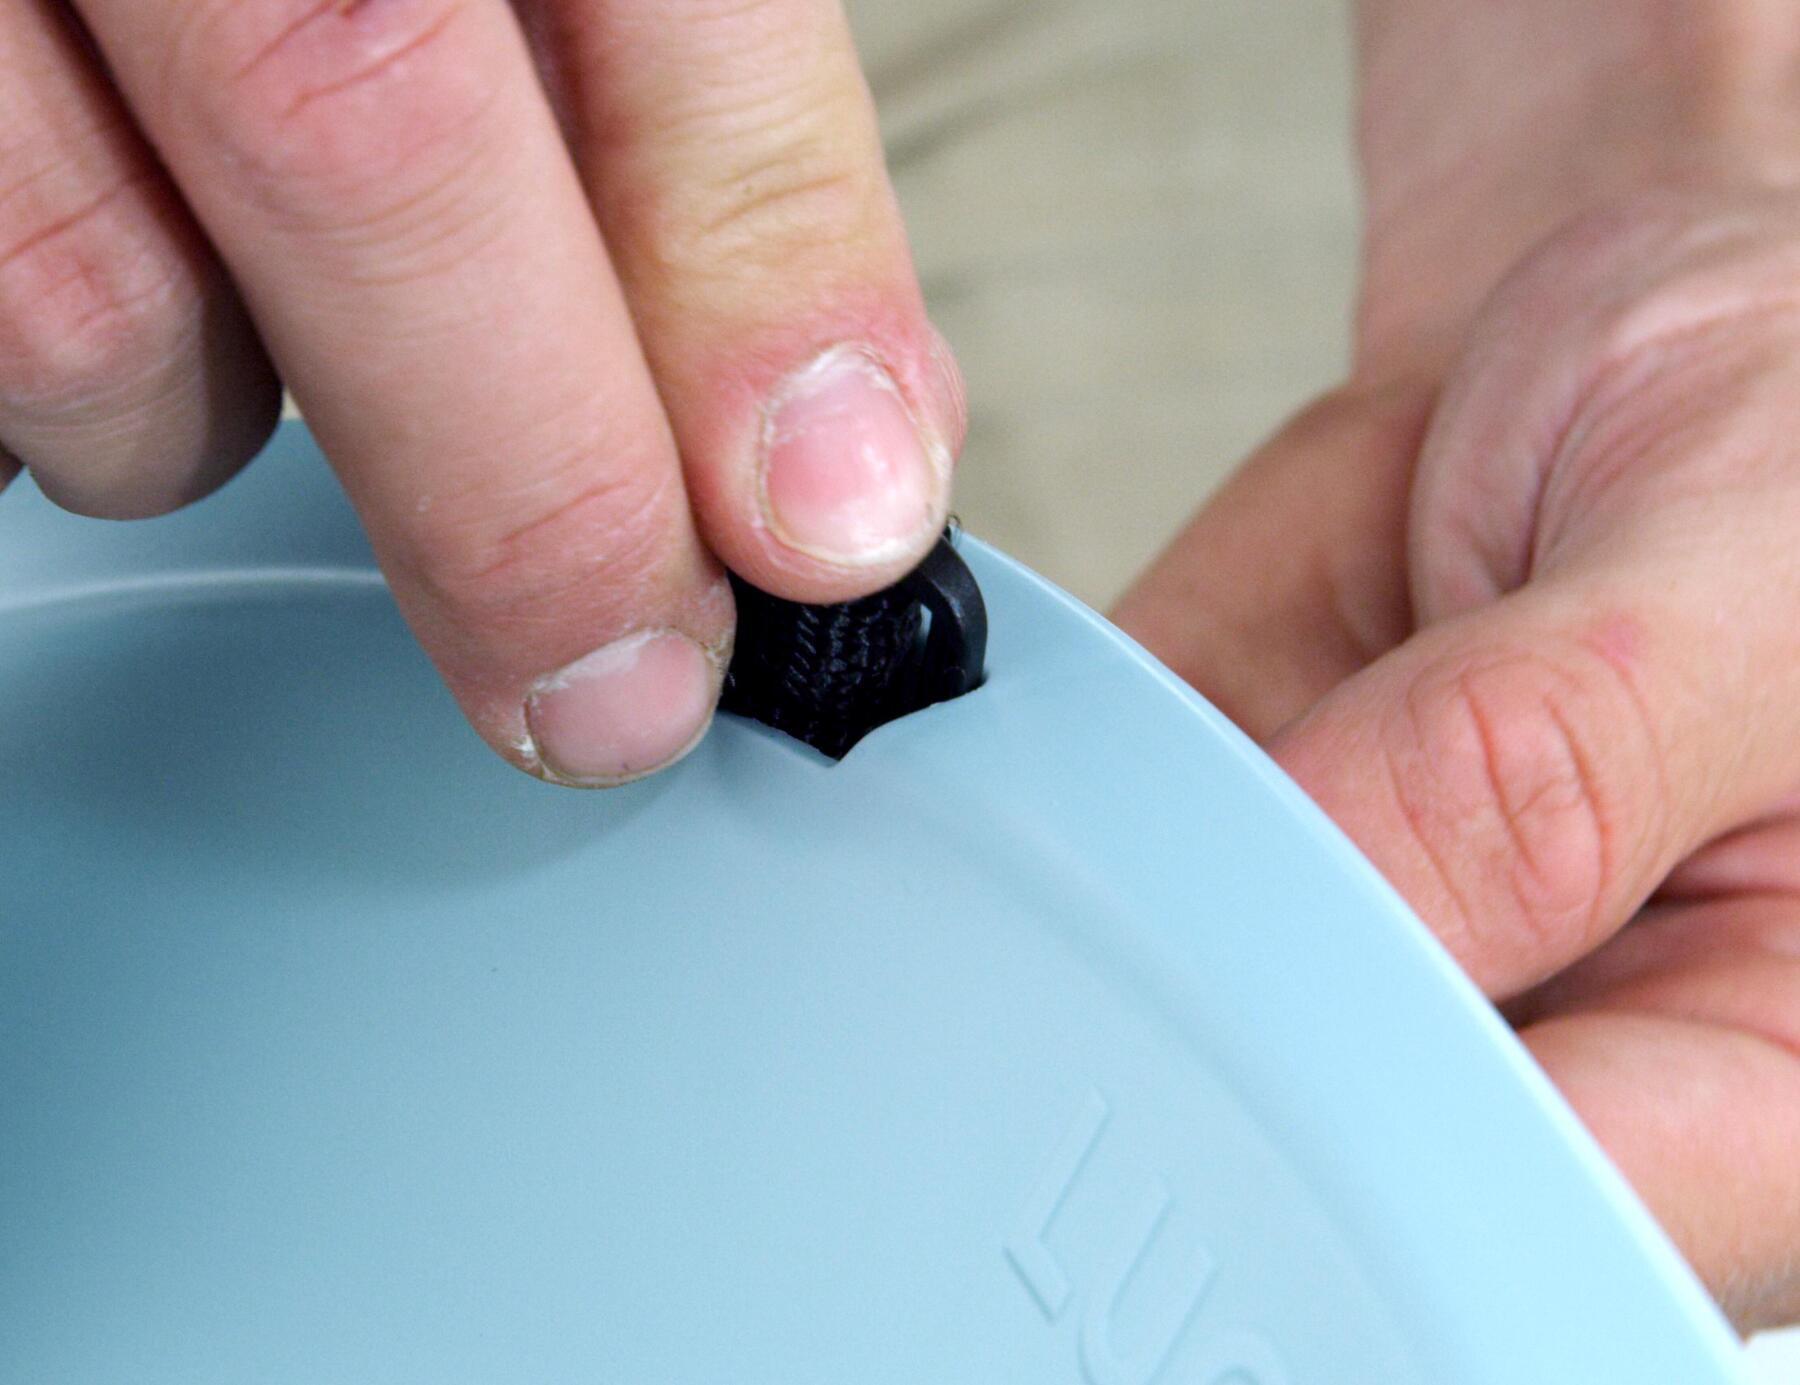
Using the pliers, pinch the end (see photo) until it comes out the other side.
Remove the cylinder, then the brake.
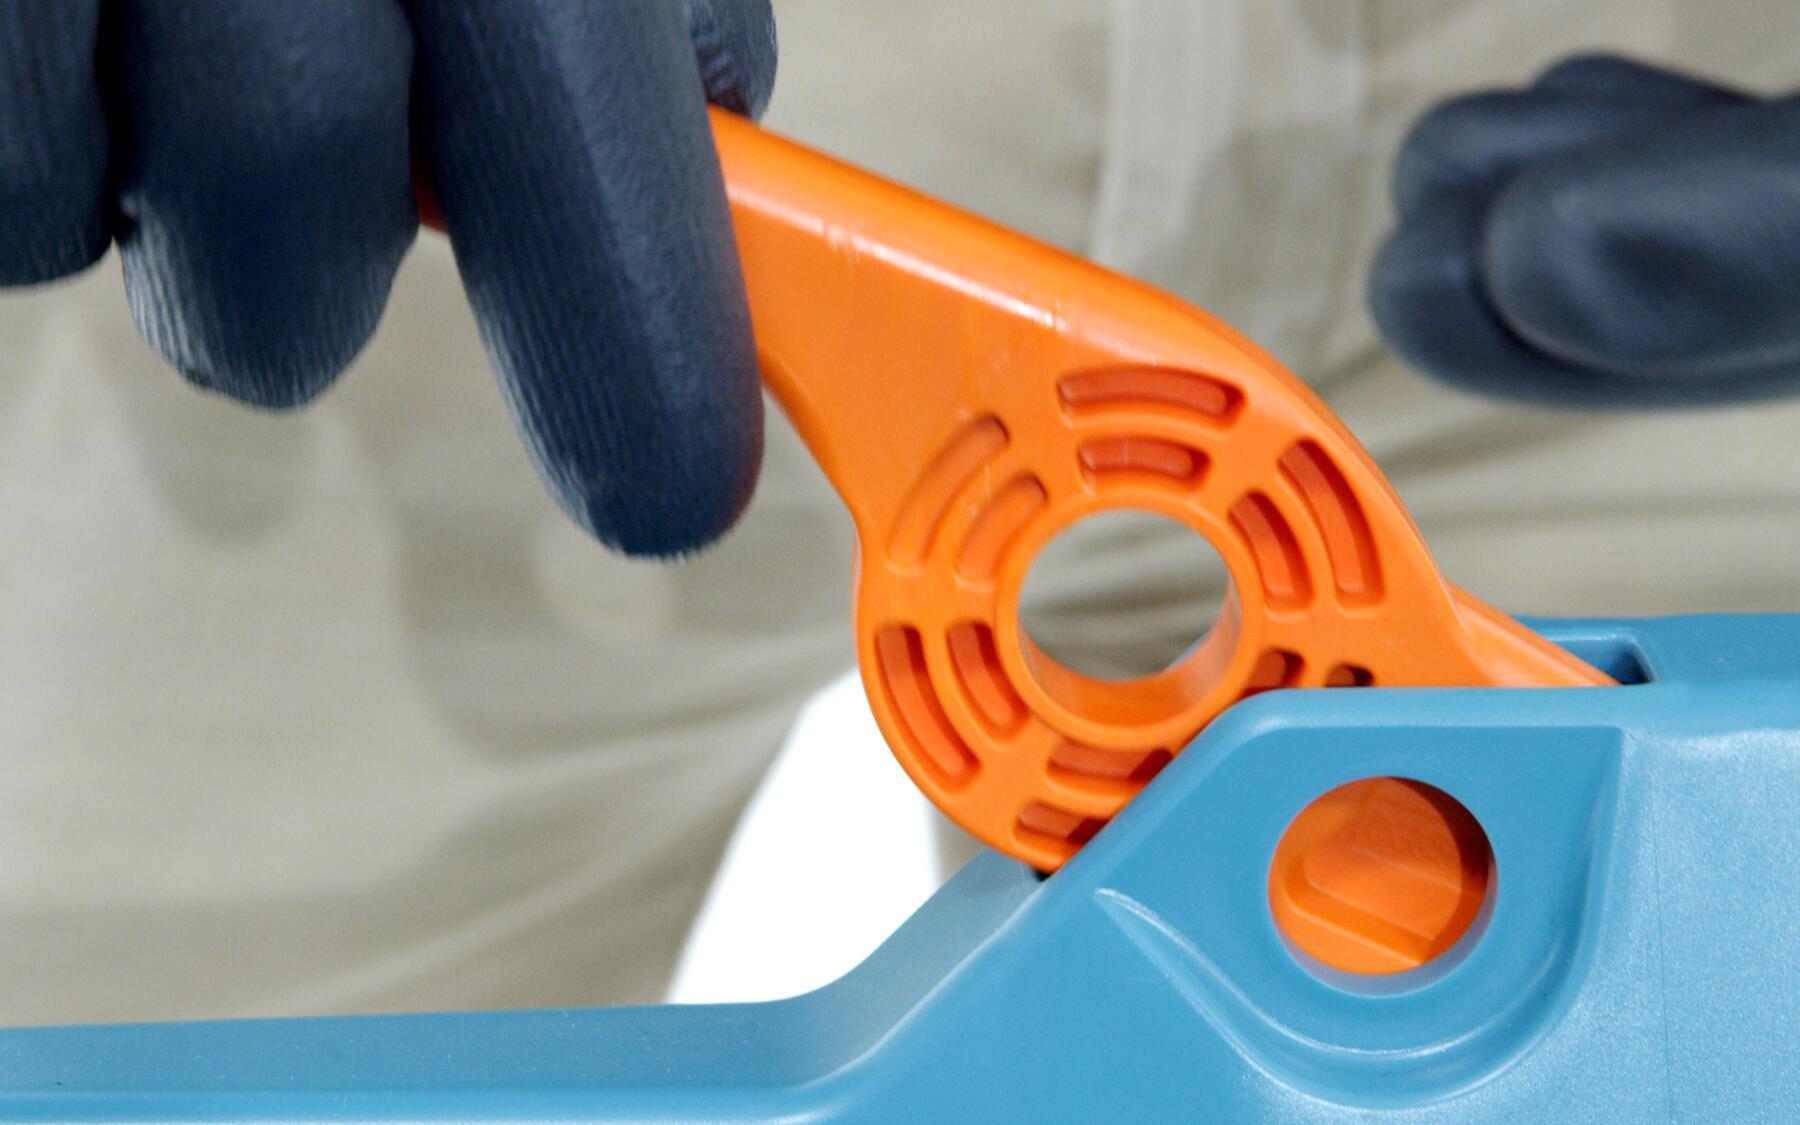
Replace the damaged brake with the new one, the brake can be fitted on the right or left side of the sledge.
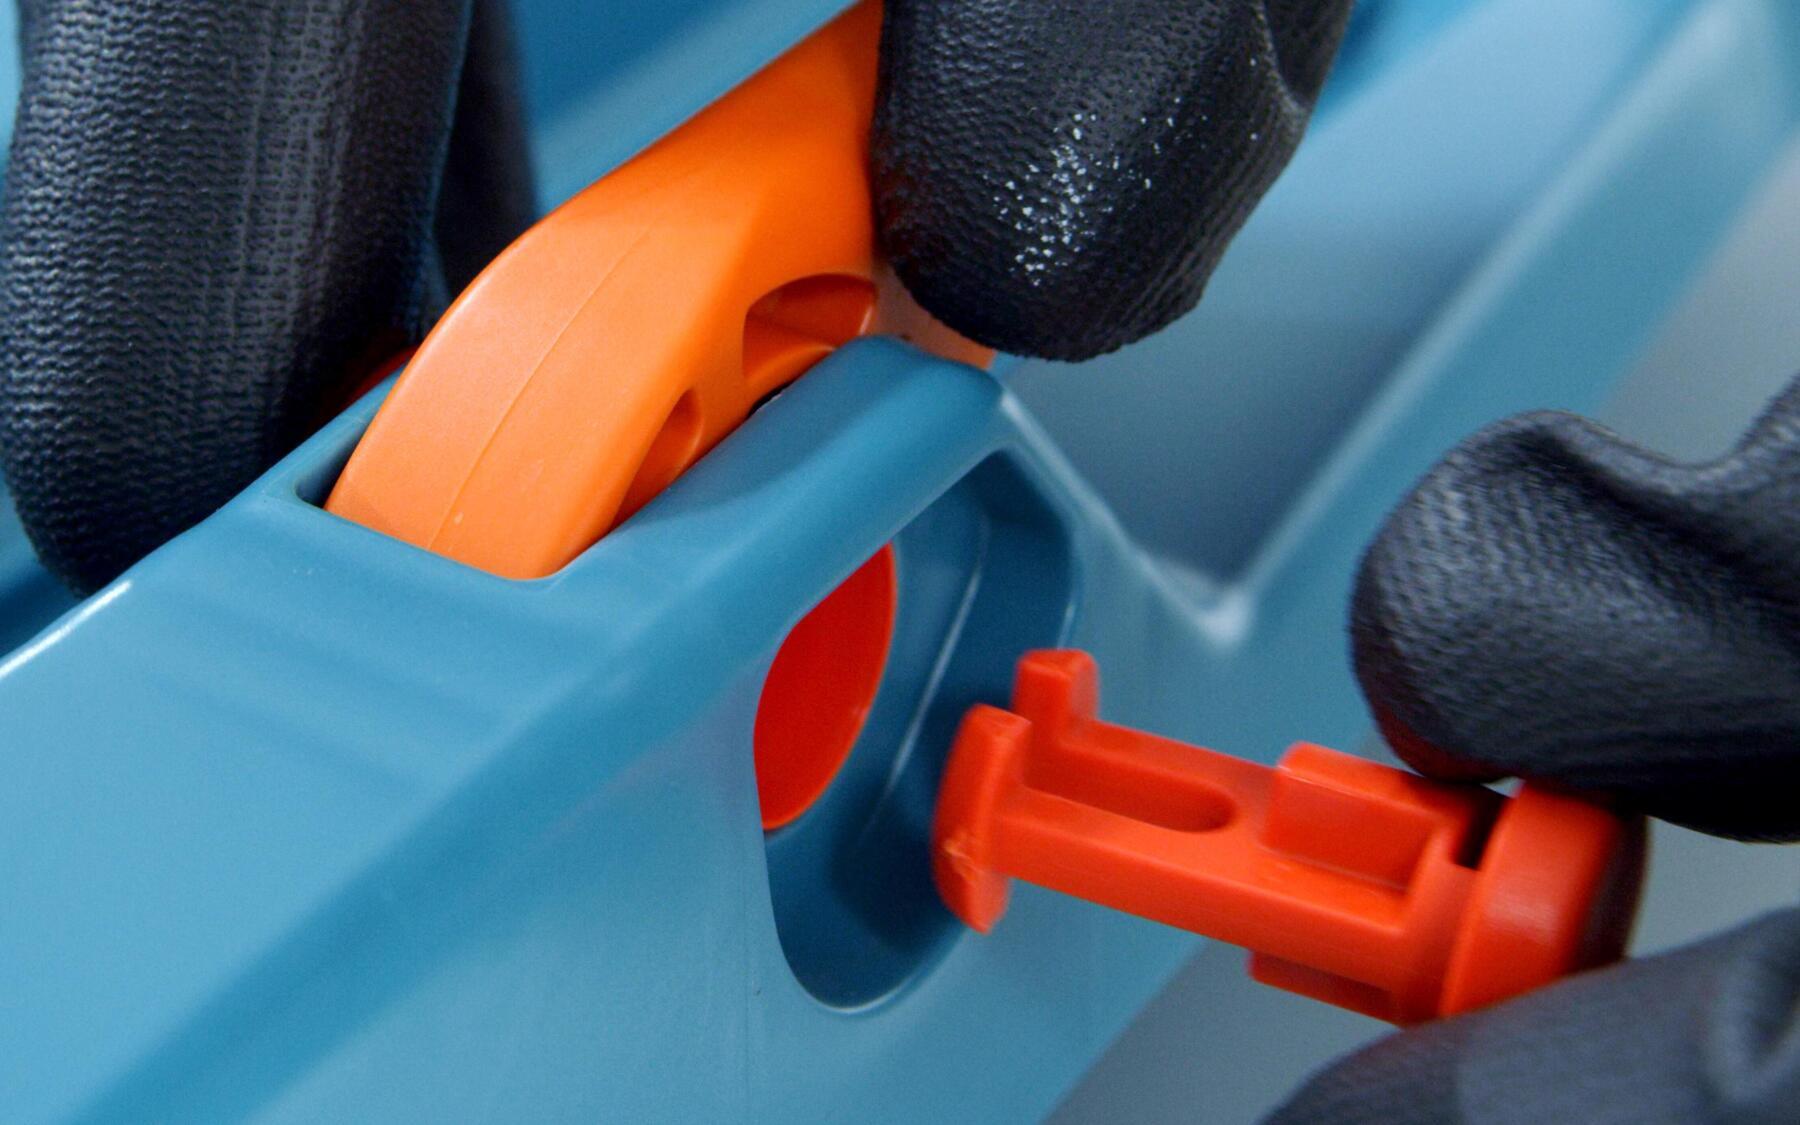
Insert the new inner cylinder as well as the outer end until you hear it clip.
Your brake is like new and you can hit the sledge slopes again this winter.
Trilugik Sledge
Trilugik Sledge
The TRILUGIK handle and/or strap can be fitted on the Trilugik junior or adult sledge. The TRILUGIK strap is sold separately. For greater comfort, a handle (also available separately) can be fitted on the strap.
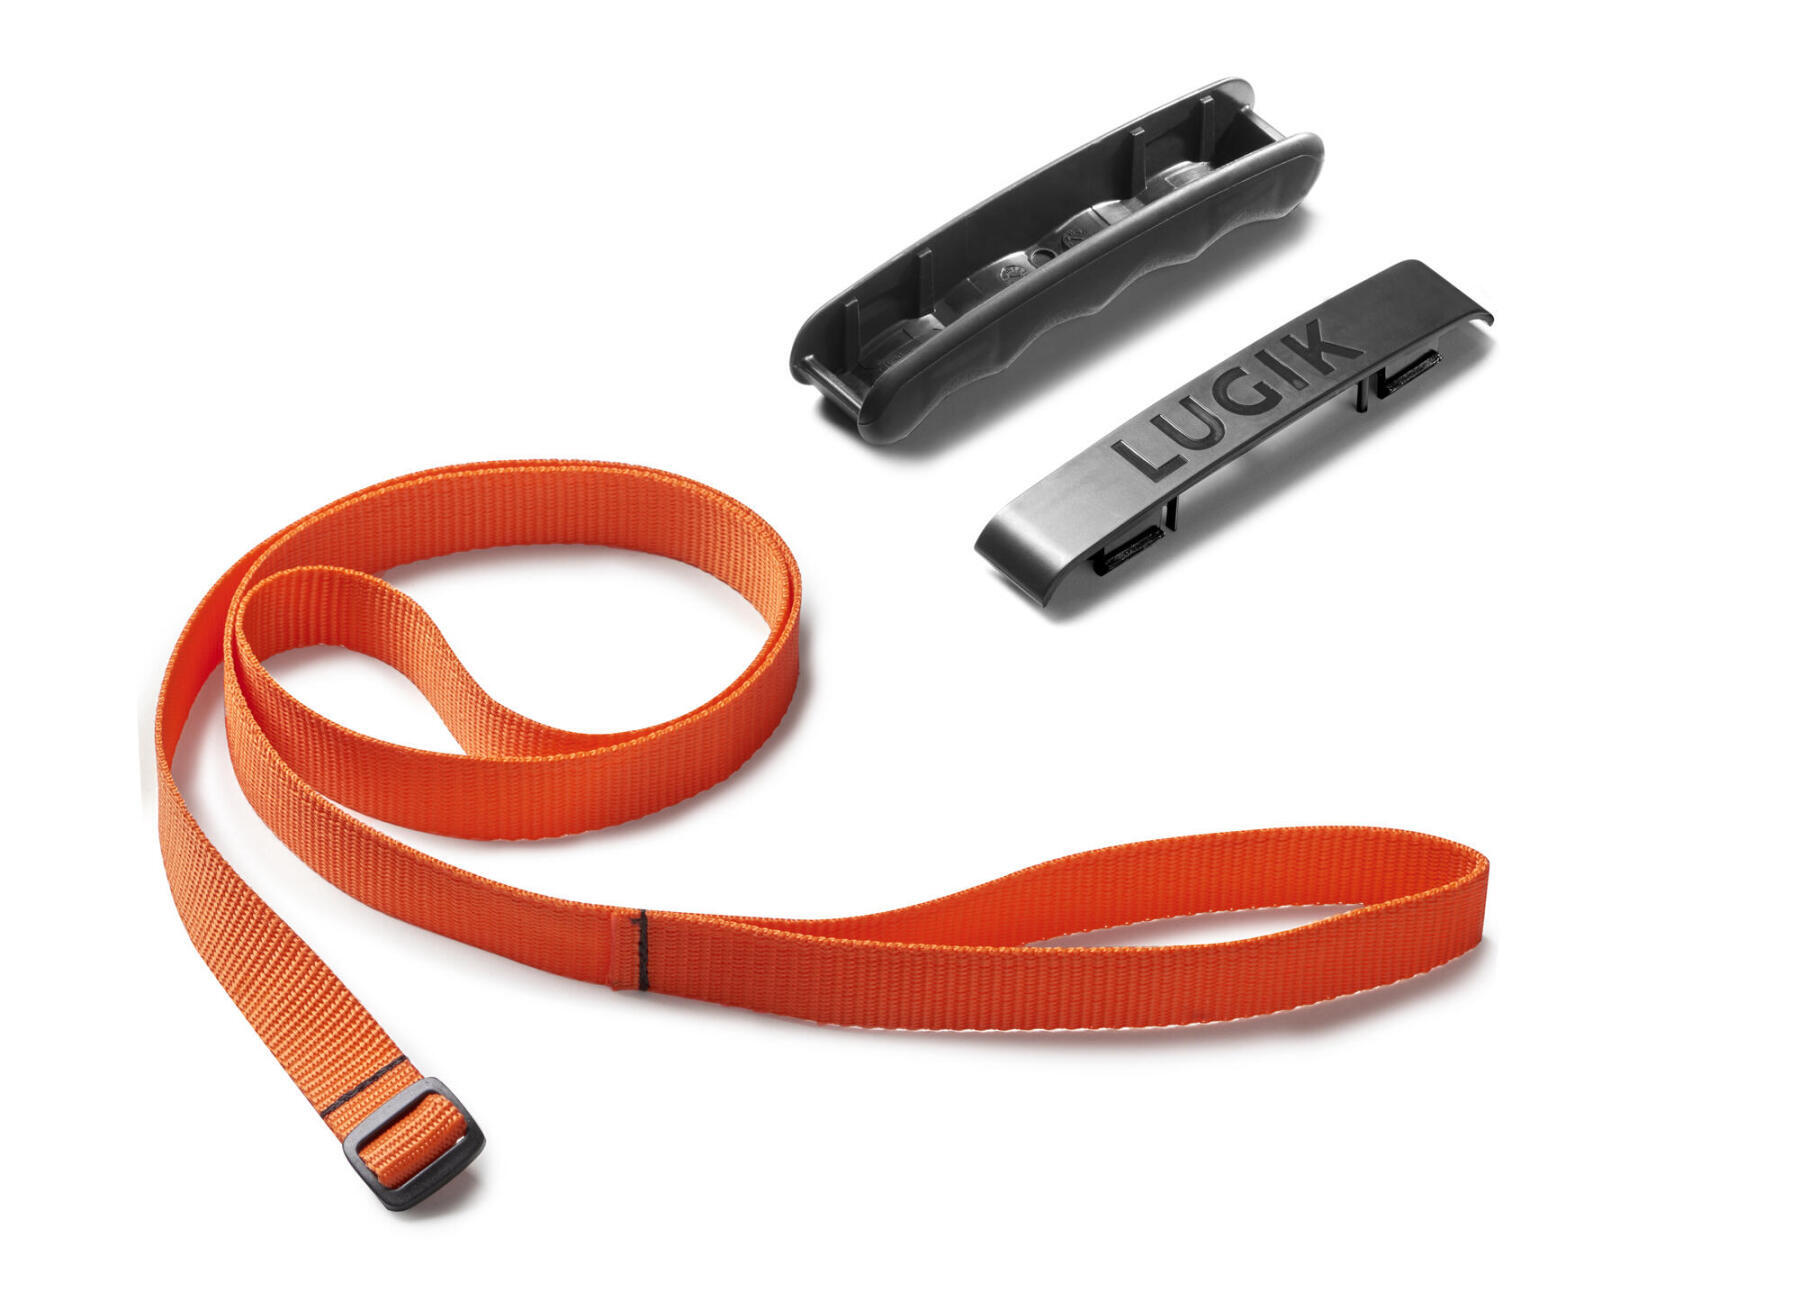
Opposite: Spare parts (strap and handle) sold separately.
Unclip the handle easily by pulling the strap on the side marked LUGIK.
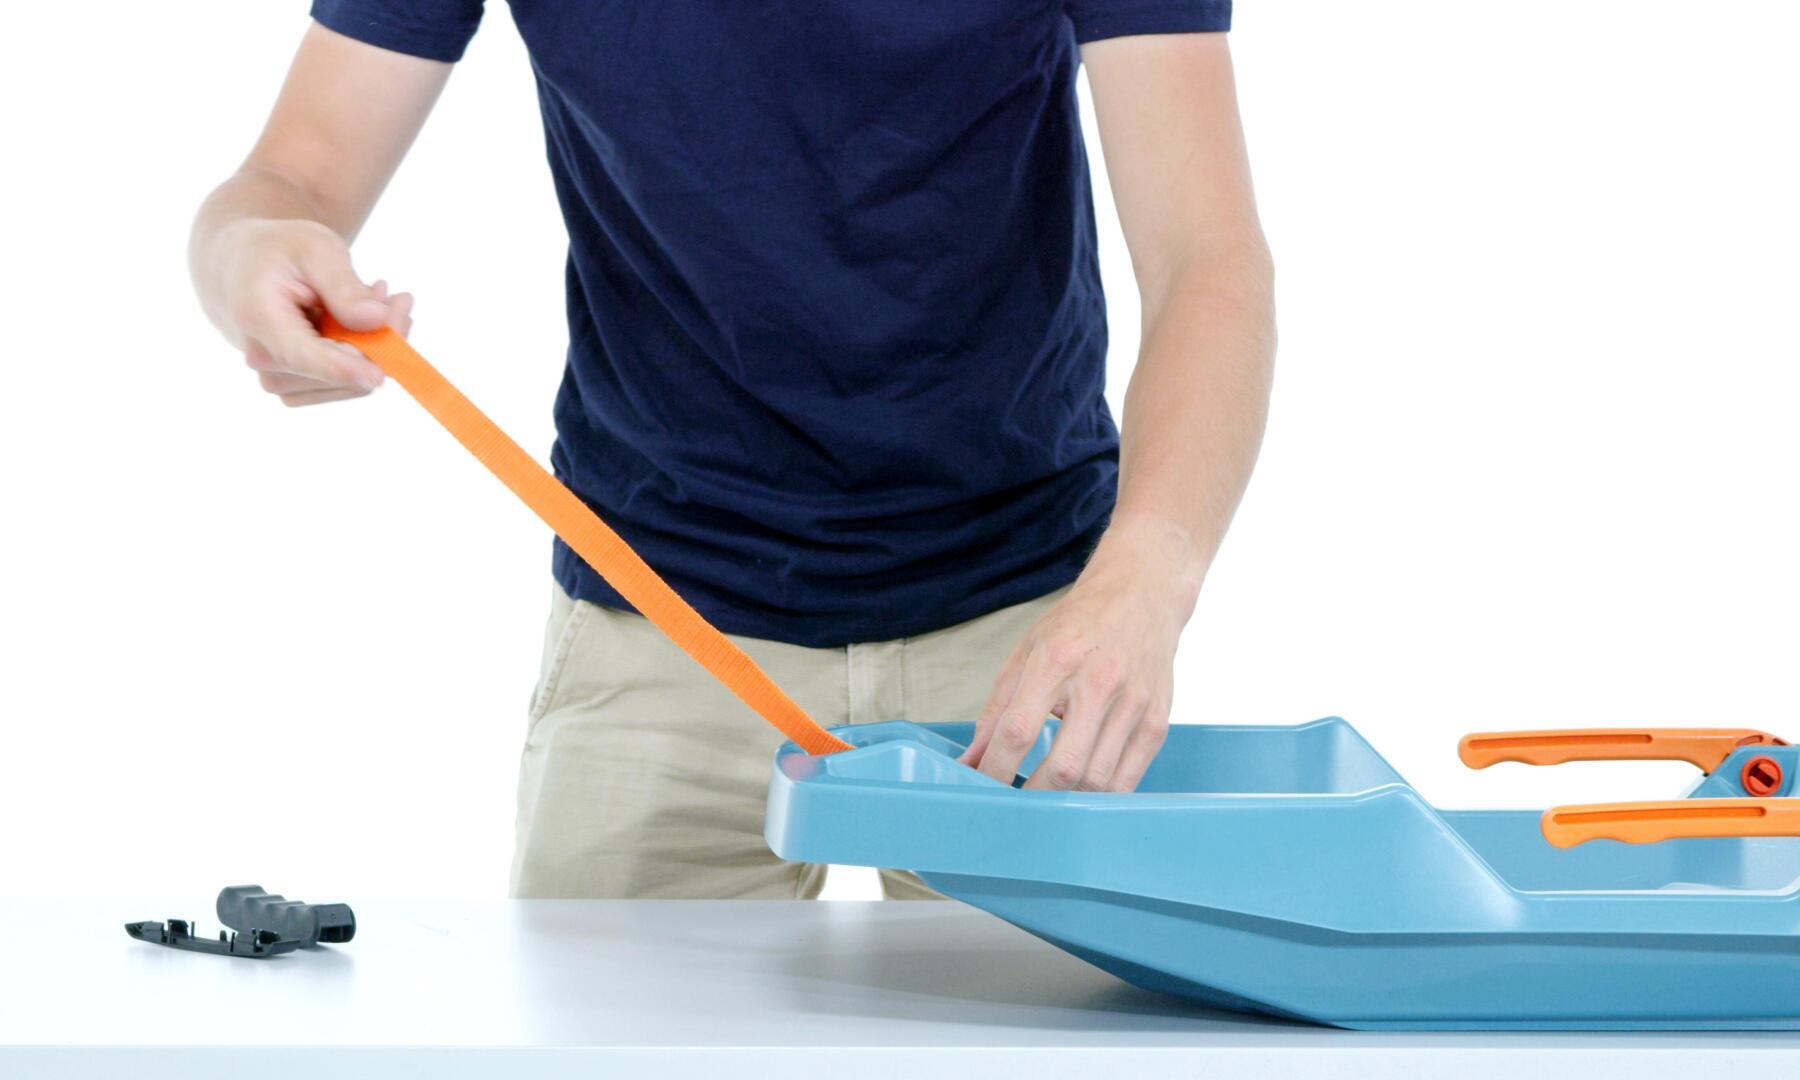
Pull the strap from inside the sledge to remove it completely.

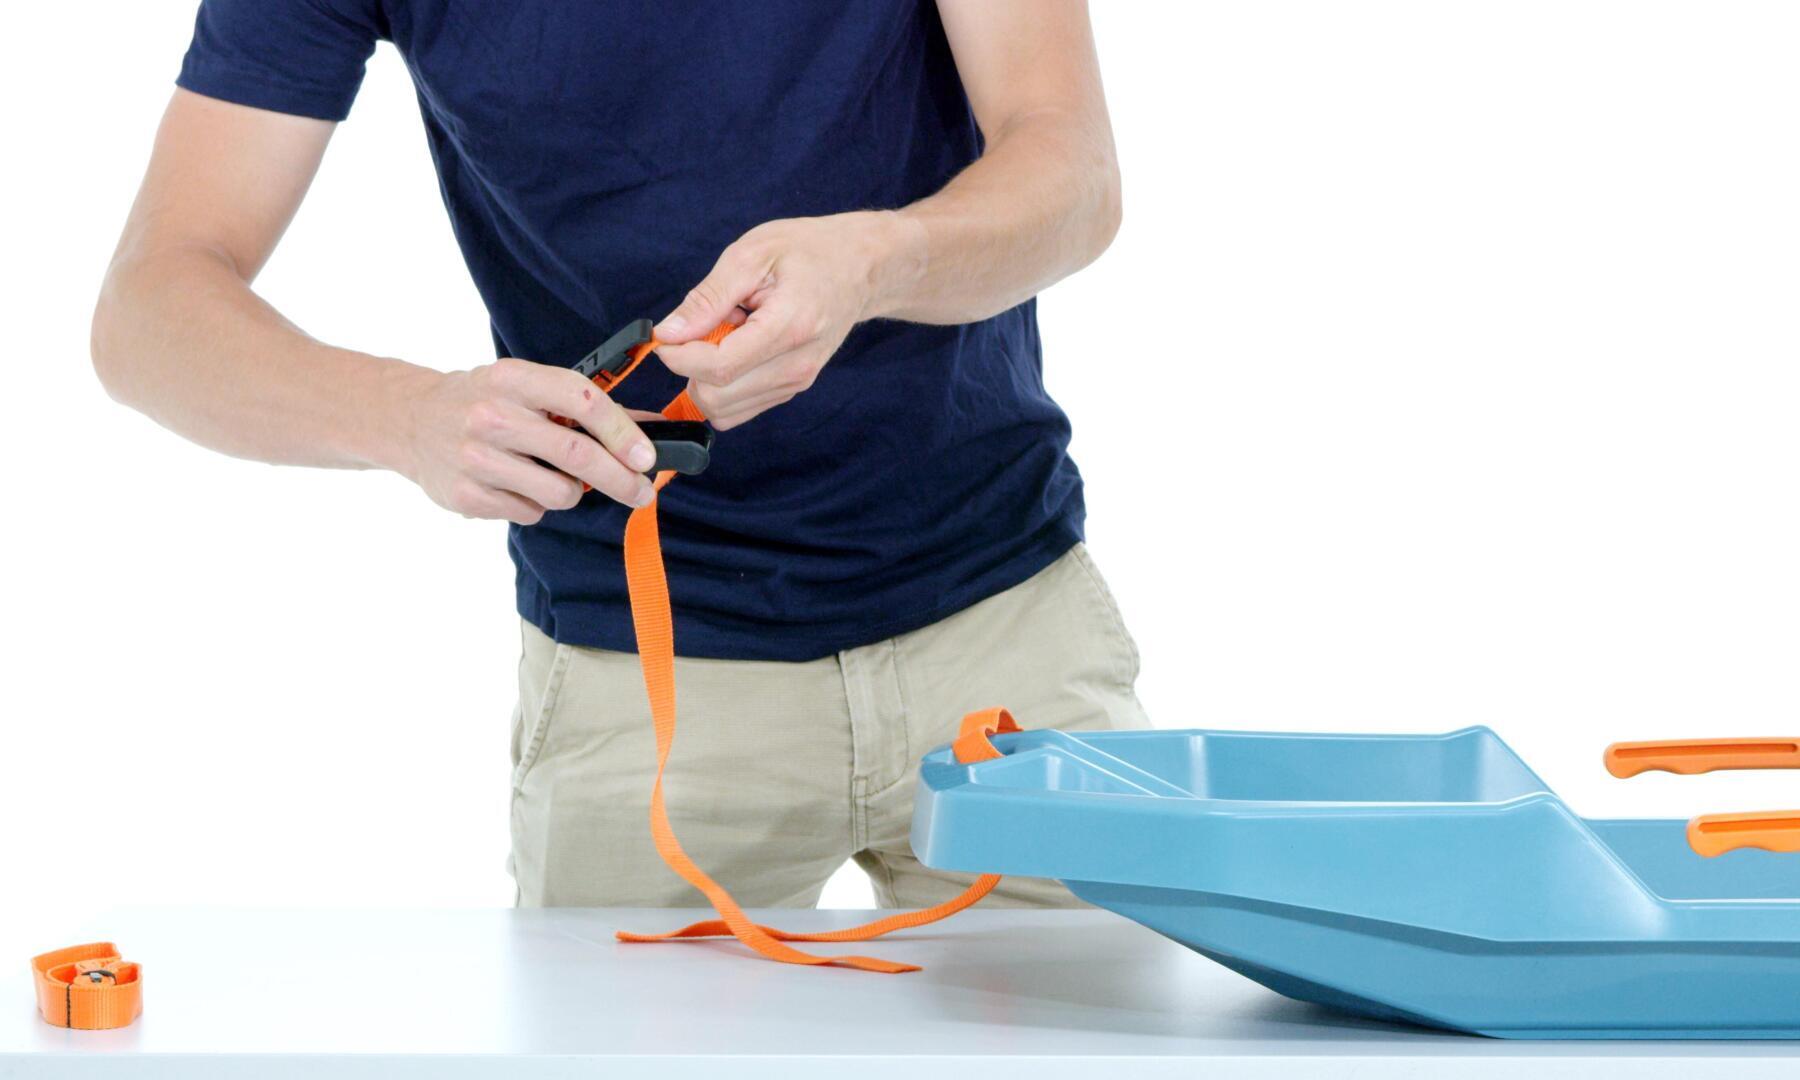
Remove the new strap from its packaging and insert it (buckle side) in the two slots from inside to outside.
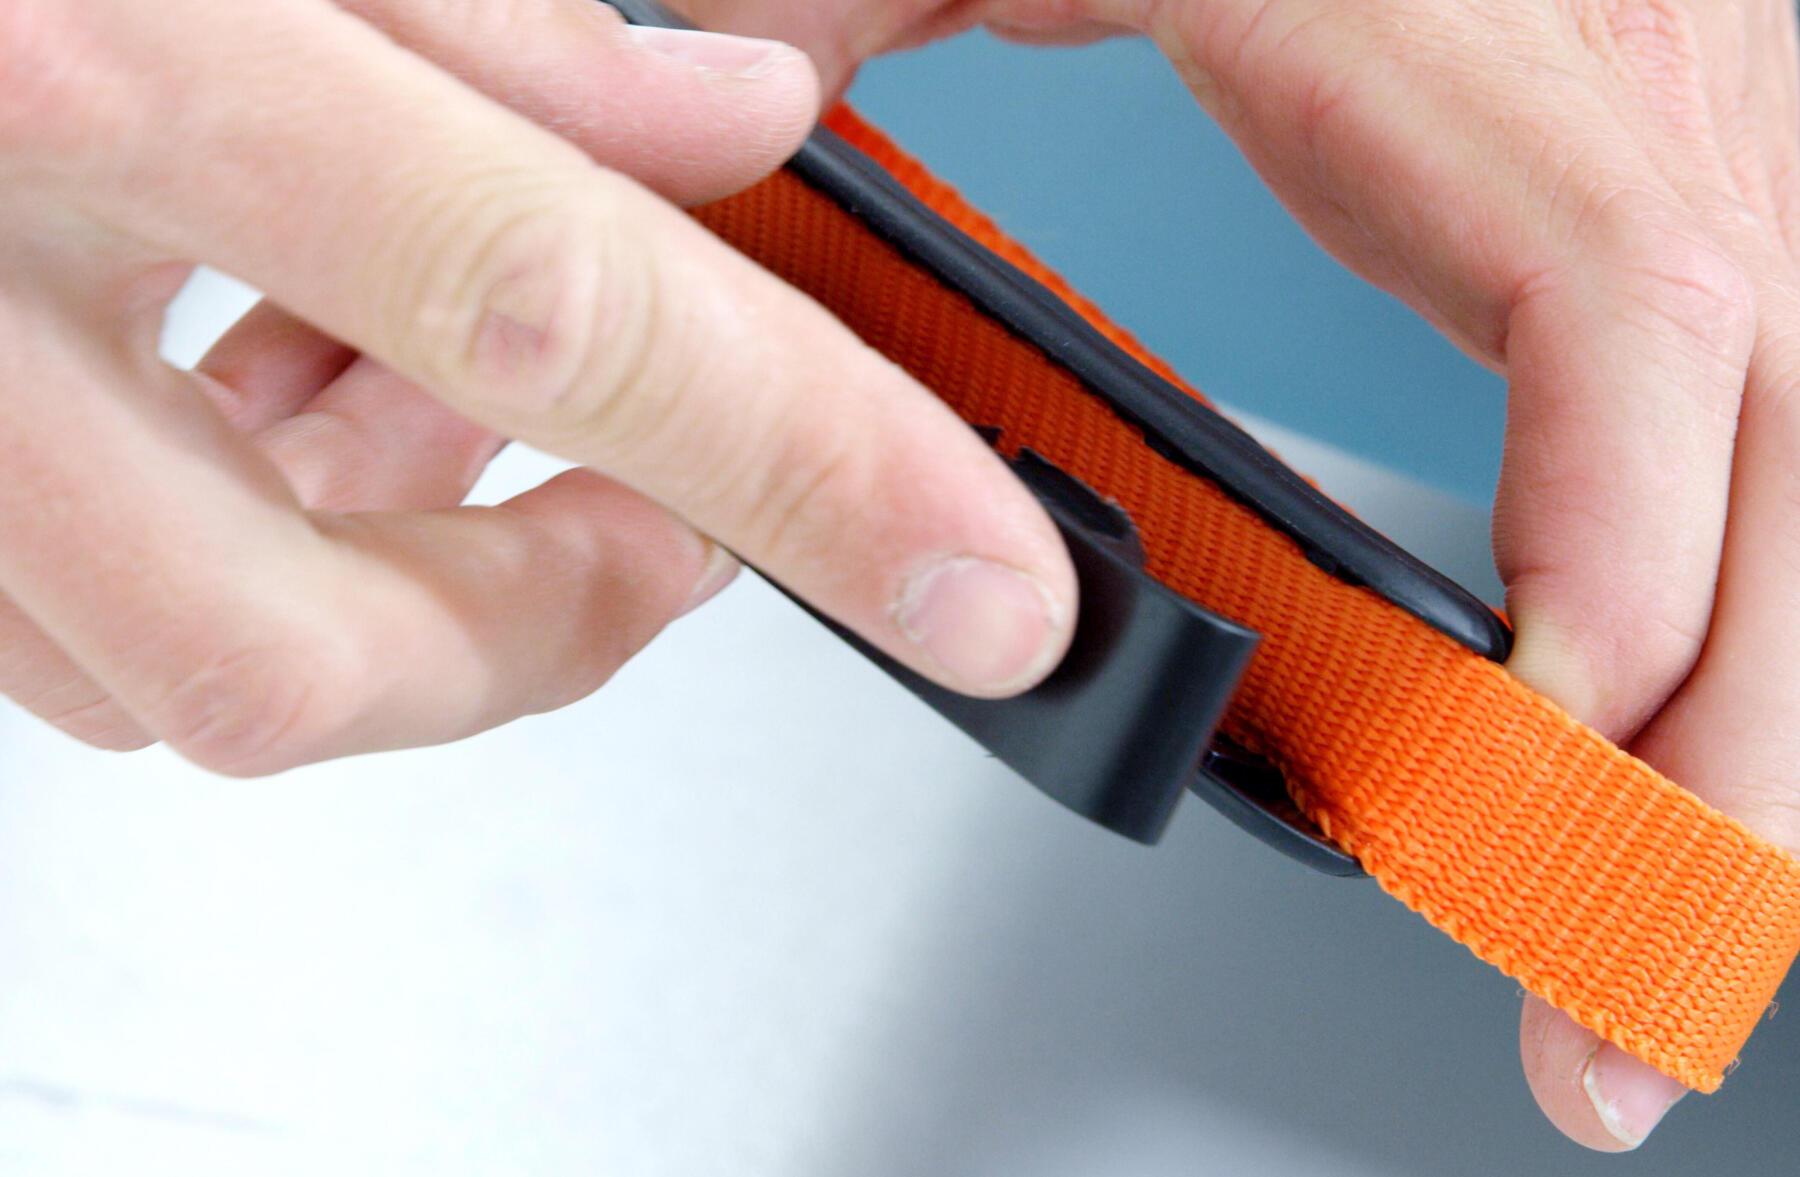
Place the new handle on the new strap until you hear it "clip", then pull on the strap.
Now you're ready to descend the snowy slopes!
Trilugik Sledge
Trilugik Sledge
The TRILUGIK harness fits on the adjustable seat to secure your kid on sledge runs. The harness colour is not representative on the photos or video.
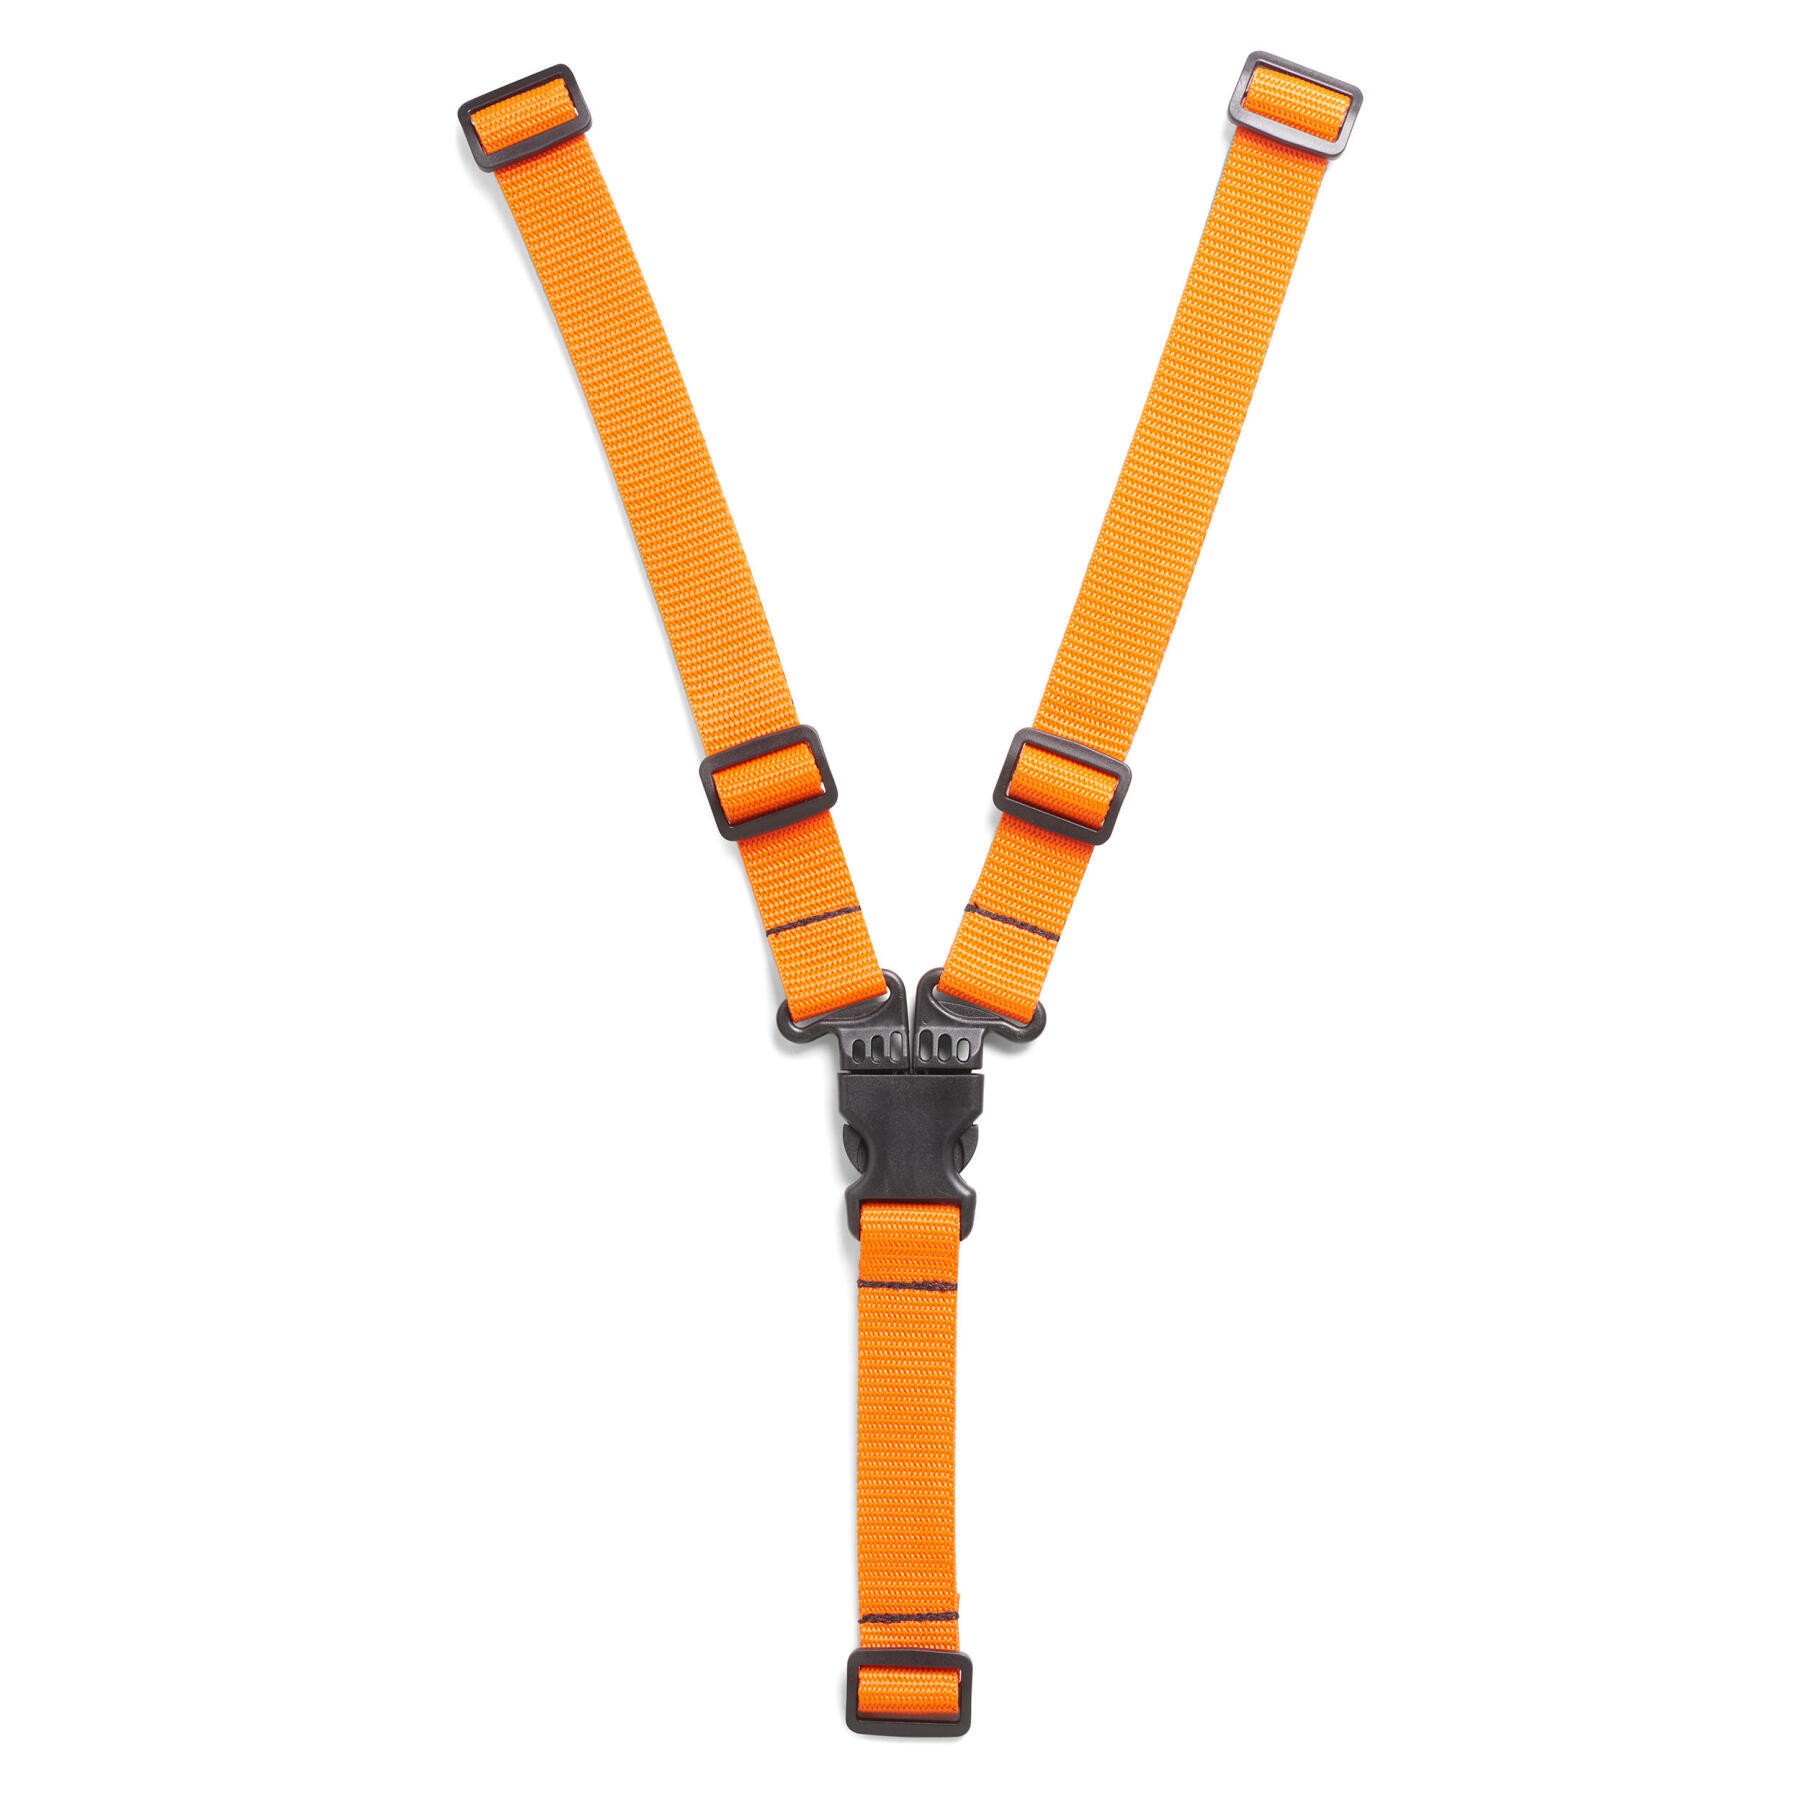
Opposite: The Trilugik adjustable seat harness.
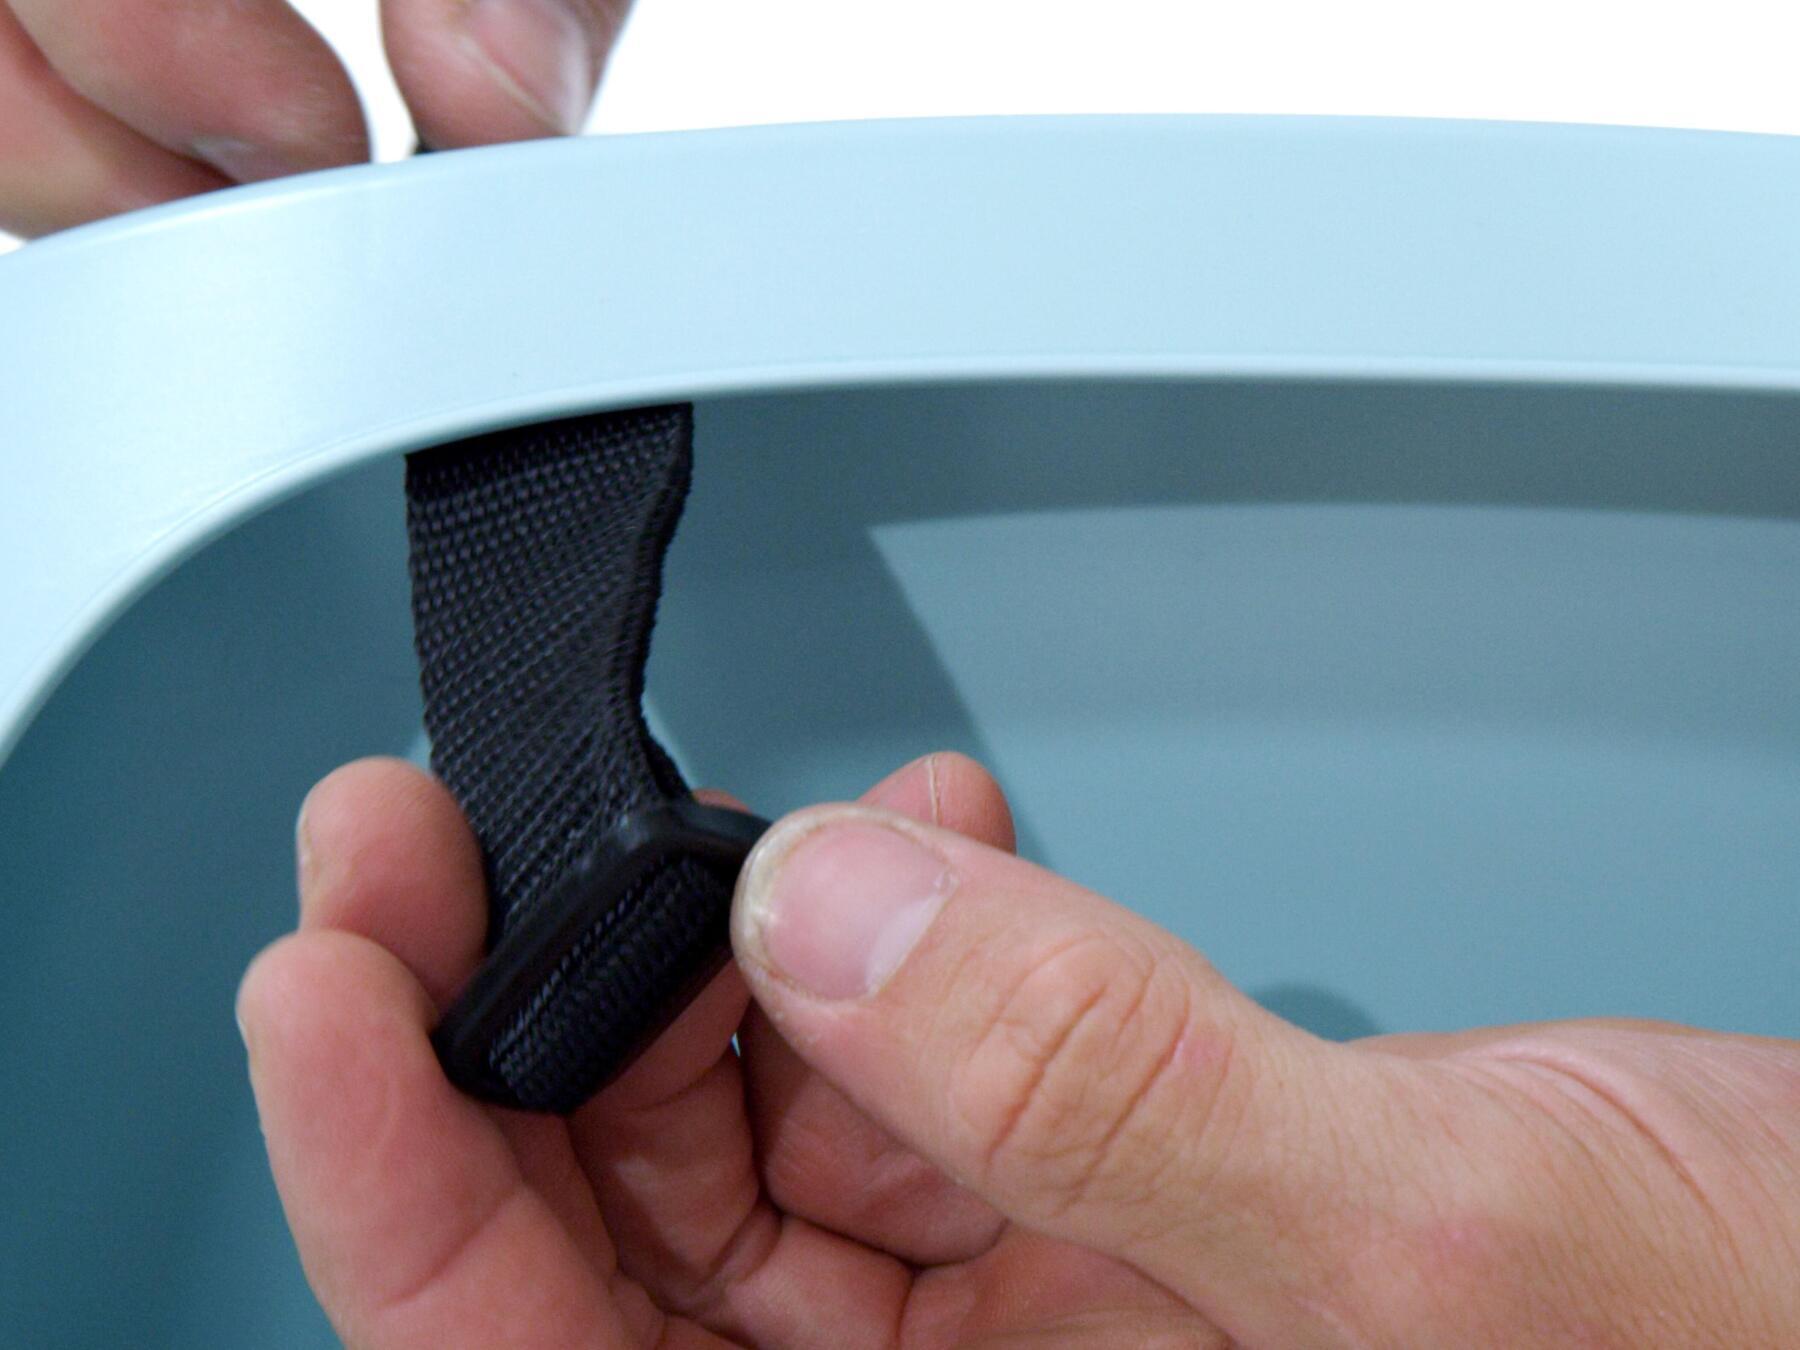
Turn the end of the strap so you can remove it from the seat. repeat three time to completely remove the harness from the seat.
Remove the new harness from its packaging. Insert the ends into the slots then pull the strap to make sure it's well placed.
Now your baby is ready to make the most of outings in the snow in completely safety!
Trilugik Sledge
Trilugik Sledge