Batteries regulations
Find out more about the E-GRVL AF MD batteries regulations.

REF: 8796289, 8654849
2024
Welcome to the support page for the E-GRVL AF MD gravel bike.
On this page you'll find all the user guides and our tips on how to assemble, maintain and repair your bike.
You can also obtain your bike's CE Certificate of Conformity.

Instructions for use

BRAKES USER GUIDE

Certificate of conformity

Find out more about the E-GRVL AF MD batteries regulations.
Press the button on the top of the display for 3 seconds to switch on the bike.

When your bike is switched on, simply press the button on the top of the display for 3 seconds.

The bike has 4 motor assistance modes:
OFF: no assistance
ECO: low assistance. (save battery power)
TOUR: medium assistance.
SPORT: strong assistance.
TURBO: very strong assistance (recommended only for difficult sections, high battery consumption).
Assistance will automatically cut out when speed exceeds 25 km/h.

Press and hold the right-hand E-shifter to activate “pedestrian mode”. The motor will engage to assist you in pushing the bike while walking alongside it.

Yes, the electrical assistance is only activated if the user pedals.
The bike is fitted with a cadence sensor.This transmits pedalling speed information to the bike's on-board computer, which then activates the motor.
The level of assistance provided can then be adjusted according to the assistance mode chosen (ECO, SPORT or TURBO). In mode ECO, the pedalling force required to reach the same speed is greater than in mode TURBO.
Using the buttons on the gearshift levers:
- right button:raise the assistance (0->ECO->TOUR->SPORT->TURBO)
- left button: lower the assistance (TURBO->SPORT->TOUR->ECO->0).

The level of assistance used is shown directly on the display.

Pressing briefly on the button at the bottom left of the display turns the lights on and off.
If you press the button for too long, the settings menu will appear.

The ideal recommended pressure is 3 bars.
For greater comfort and grip, you can lower your tyre pressure to 2.5 bars.
The minimum pressure is 1.5 bars, the maximum 3.5 bars.
When your bike is brand new, the performance of the brakes is reduced because the pads and discs are new. Continuous heavy braking when first used (e.g. downhill) can lead to overheating and brake pad "glazing".
To avoid this phenomenon, which renders the brakes unusable, we recommend that you run in the brakes. The brakes are run in after about ten brake applications per brake. Braking means decelerating sharply from 25 to 5 km/h, but without locking the wheel, using just one brake at a time.
If you can see a thin, shiny layer on the top of your brake pads, this probably means that they're glazed. To avoid having to throw them away, you can deglaze them by sanding them lightly with some relatively fine sandpaper (P120). Remember to wear gloves and a mask when sanding your brake pads. Then simply remount your brake pads and bed them in again.
RIVERSIDE E-gravel 500: user guide, repairs
Yes, the battery is designed to be used in the rain, but it must not be immersed or washed with a high-pressure jet.
The same applies to the display or other electrical components and cables.
Nevertheless, we recommend sheltering your bike as much as possible when you're not riding it.
The bike switches itself off after a few minutes when not in use.
With your security key, you can unlock your battery.
All you have to do is remove it and connect it using your power cable. When charging the battery, ensure that it is protected from moisture and that your bike is stored in a well-ventilated area (+10°C to 40°C).
Before replacing the battery, check that there is no dirt inside the frame. Simply insert the battery in the correct direction, i.e. with the key notch facing upwards. You need to hear a "click" when you insert it. It is essential to lock your battery with the key to prevent it from coming loose while moving.

You will find the socket for inserting the charger plug above the motor (bottom bracket).
Simply remove the protective cover and then come and charge your bike.
When you are charging your bike, it needs to be stored in a dry place.

When charging the battery outside of the bike, simply press the button located at the bottom of the charging socket. The number of LEDs that light up mean:
- 1 LED : 20%
- 2 LED: 40%
- 3 LED: 60%
- 4 LED: 80%
- 5 LED: 100%

The cycle computer indicates the battery level in %:
- 3/3: 71-100%
- 2/3 : 41-70%
- 1/3 : 11-40%
- 0/3 : 4-10%
- When the battery logo has a line through it, this means there is less than 3% charge remaining. In this case, the bike's motor cuts out automatically.

With both charging options, the battery charges in 4 hours.
Charging time may vary according to temperature, so we recommend that you charge your battery between 10°C and 40°C degrees.
You can travel up to 150 km with the electrical assistance in ECO mode, but various factors can influence the distance:
> LOADS: The range will be reduced if the bike is carrying too much weight.
> TYPE OF ROUTE: Range is reduced when climbing or on uneven terrain
> TYRE PRESSURE: Tyres inflated to a minimum of 3 bar and a maximum of 3.5 bar will give you greater range.
> OUTSIDE TEMPERATURE: Range is reduced in cold weather.
> THE POWER ASSIST MODE: It is advisable to reduce the power assistance mode when the battery charge is low.
> FOLLOWING THE INSTRUCTIONS FOR CHARGING AND STORING YOUR BATTERY
You should store your battery somewhere cool (between 10°C and 25°C) and dry, out of direct sunlight.
You should charge the battery (even if it's not being used) at least once every three months to prevent deep discharge and loss of the battery's capacity.
Thanks to intelligent management (BMS), Decathlon's lithium-ion batteries have a long life expectancy of over 500 full recharge cycles (1 cycle = 1 100% charge + 1 100% discharge).
No. Lithium-ion batteries have no memory effect and can therefore be charged at any time.
We recommend charging your battery regularly to keep it working well.
We strongly recommend against leaving your battery plugged in when unattended, for example overnight.
For your information: once the battery is fully charged, the charger will automatically shut itself off (the LED indicator on the charger stays on).
No, it doesn't have a dynamo.
Some systems let you charge the battery as you ride or brake, but this doesn't generate much power. You'd have to ride several dozen kilometres to generate 1 km of additional power.
It's an electrically-assisted bike, so it's perfectly possible to ride without the assistance.
When your battery wears out, take it to your local Decathlon store, which will send it to a specialist facility to be recycled.
You can store your battery for up to six months without charging, without degrading battery capacity. If storing it for longer than six months, you must fully charge it.
The electric assistance is only activated when your cycle computer is switched on.
To switch on the bike, press and hold the button at the top of the screen for 3 seconds.

You can choose between 5 different displays. Use the A and B buttons to navigate between them.
C: Time
D: Distribution of power delivered by the motor and the cyclist
E: Battery level
F: Speed
G: Assistance level
H: Speed
I: Remaining range with the current battery level and selected assistance mode
J: Journey distance
K: Average speed
L: Maximum speed
M: Journey duration
N: Main battery level
O: Battery level of the range extender (optional)
P: Remaining range with the current battery level and selected assistance mode
Q: Current power produced by the motor
R: Current power produced by the cyclist
S: Calories burned

Press the centre button, then confirm the reset by pressing it a second time.

A: Long press: Turn on/turn off the electric bike
B and C: Navigate through the settings menu, increase/decrease values in the settings menu, or navigate between activity screens during a session.
D: Resets the values (short press, followed by confirmation) or confirms your choices in the settings menu.
E: Switch the bike lights on/off (short press) or access the settings menu (long press).
F: USB-C charging port that can be used to charge your smartphone or GPS during your session.

Enjoy a real-time display to track your speed, check your remaining battery life, and even assess the elevation gain. After each outing, review your statistics to analyse your performance. The basic features are free, but for those who want even more, we offer a premium package that includes a navigation pack. With Decathlon Mobility, take your bike rides to a whole new level!
Using the link below, download the Decathlon Mobility app, available on Android and iOS.
1. Choose your bike model from the list. If you're not sure what model your bike is, check the top of your bike's screen.
2. Switch on your phone's Bluetooth and accept the authorisation requests in the app.
3. Press and hold the left e-shifter for 6 seconds to pair your phone and your bike console.

When you take your new bike out for a ride for the first time, a lot of parts can shift and fall into place.
You'll hear the spokes on your wheels creak because of the residual torsion in them from the assembly process; this is normal.
Your wheels should not buckle or be twisted in any way. If this is the case, make an appointment in one of our DECATHLON workshops to have this slight bucking readjusted.

There could be several reasons why your gears (cogs) are not shifting correctly.
1. Check the position of the cable housing end caps (tips). Incorrectly positioned cable housing caps can hinder the pulling action on the derailleur cable and cause the shifting of the gears to be off. If a housing end is out of position, push it back into place.
2. The cable and housing might be jammed. If you can't shift into the smallest gears (onto the smallest cogs), and if the derailleur doesn't move even when the gear shifter is operated, then the cable and the housing have probably jammed up. In this case, the cable and housing need to be replaced.
3- Take your bike to a Decathlon workshop to have your derailleur adjusted.
4. Also check that the derailleur hanger is not bent. If it is, check the "DERAILLEUR HANGER IS BROKEN" section.
NB: If you regularly ride your bike in wet or muddy conditions, or if you regularly wash your bike with a lot of water, then your cables and cable housing will need to be replaced more frequently. Washing your bike using a pressure hose is highly discouraged as it can push dirt and dust into the cable housing.

A bent hanger causes the derailleur to be out of alignment and therefore unable to function correctly.
Stand behind your bike and check the alignment of the derailleur.
If the hanger is twisted or broken, take your bike to a Decathlon workshop to have it replaced.
In the event of a front puncture, simply remove the wheel from the fork using the through axle. However, for the rear wheel, you must first disconnect the motor and loosen the rear wheel bolts using either an 8mm Allen key or a 17mm open-end spanner.
We therefore recommend that you always take such a key with you when you go for a ride.
New batteries are carefully stored so that they won't be drained to begin with.
The first time you use your bike, you must connect your battery to its charger and plug it into a socket to "wake it up", if the store has not already done so.
If the problem persists and the battery still doesn't turn on, submit a support request or visit a Decathlon workshop.
1. Check that there isn't any dirt in the way of the connection
Your battery charger's connectors should be clean and there should be no dirt preventing contact between the battery and its connector.
2. Check the battery > charger > mains socket connection
> Make sure the charger you are using is the one provided by Decathlon
> Connect the charger to the battery and a mains socket.
A completely drained battery will take 4 hours to charge fully.
If the problem persists, please contact us through the contact form, or visit a Decathlon workshop.
1. Make sure you are using and storing it as recommended
Your electric bike's battery life depends on various things:
> LOADS: The range will be reduced if the bike is carrying too much weight.
> TYPE OF ROUTE: The range is reduced on climbs.
> TYRE PRESSURE: The battery life will be better with tyres inflated to between 1.5 and 3.5 bars.
> OUTDOOR TEMPERATURE: The range is reduced in colder weather (by up to 50%).
> POWER ASSIST MODE: We recommend reducing the assistance mode when the battery is running low.
> YOUR PEDALLING POWER: You have to pedal in order to move.
An e-bike is still a bike, so you'll need to pick the gear best suited to how you ride it.
2. An old battery may lose some performance
Its battery range will therefore be shorter. Visit your Decathlon workshop to give your battery a check-up.
You still need to take the bike back to the workshop to have it serviced.
If an error code appears on your computer, here are the associated numbers and solutions:
10 Low voltage protector
12 Battery completely flat.
Always charge the battery, if one of these codes appears: Battery diagnostic > Out of service > Change the battery.
20 Current measure error
21 Temperature sensor error
23 Temperature sensor error
Restart the bike. > Test with a new motor
24 Abnormal peripheral voltage
Check motor connectors. > Check lighting connectors.> Change lighting. > Change motor.
25 Abnormal current in the motor
Charge the battery. > Battery diagnostic > Out of service > Change the battery. > Change motor.
26 Error restarting the programme
Check the clearance between the battery and the power cable. Check the power cable connection. Change the power cable.
31 Lighting error
Check lighting connectors. > Test new lighting > Test new lighting cable
40 /41 Motor voltage too high
Battery diagnostic > If battery OK = change motor
42 Motor functioning error
43 Motor short circuit
Check motor connectors. > Restart the bike. > Change motor.
44 Motor overheating
Allow the motor to rest by reducing the assistance mode.
45 Error rectified when the bike is in use
Restart the bike. > Check motor connectors. > Change motor.
60 No communication from the display to the motor.
Check screen connectors. > Check motor connectors. >Test with another screen. > Test with a new screen cable. >Test with another motor.
70 Force applied to the pedal outside the usual range.
71 Pedalling not detected72 Force applied to the pedal not detected.
73 Torque sensor error
Motor diagnostic (Brose service tool) > Motor update >Replace motor
74 Restart error
Turn off / restart the bike. > Motor update > motor diagnostic >Replace motor
80 Incorrect motorised unit settings
Motor diagnostic (Brose service tool) > Motor update >Replace motor
81 Speed information not recognised
Check the positioning of the speed sensor magnet attached to one of the rear wheel spokes.
82 Programme handling
83 Motorised unit programme error
84 Motor settings incorrect
Restart the bike. > Complete bike diagnostic.
85 Trigger not detected.
86 Trigger voltage error
Check trigger connectors. > Change the trigger
87 Trigger reset failure
Check nothing prevents the return to the zero position. > Restart the bike. > change the trigger
90 Error in programming
91 / 92 / 93 Error torque sensor
Restart the bike. > Motor update > Change motor
The EPAC brake test requirements have been increased to 120kg, taking into account the total mass: bike + cyclist.
If 2 inserts are used:2kg per side
If 3 inserts are used:4kg per side
The rear of the bike can carry 27kg. However, it is important to ensure that the luggage holder used can withstand this weight.
It is not advisable to use a baby carrier on this bike.
The bike offers IPX4 protection against water splashes.
The minimum width is 28mm and the maximum width is 50mm.

Maintaining your VAN RYSEL E-GRVL MD HD is essential to extend the life of its components and give you more enjoyment from your sport. Failing to maintain your bike can lead to problems such as jammed cables, rust, leaks, premature wear, and more.
Your bike's parts will also last longer, which means a lower environmental impact.
As soon as you start using the bike, some components will move slightly.
That's why we recommend that you check the tightness of the parts in the weeks following the purchase of your bike.
It's a good idea to clean your bike thoroughly from time to time. Here's a step-by-step guide on how to give your bike a deep clean. The more frequently you ride, the more often this type of cleaning is recommended.
Over the course of your bike's lifetime, as you put miles on it, you'll need to replace certain parts for safety reasons and to ensure everything works smoothly.
Every 100 km: Clean the chain and lubricate the drive train.
Every 2000 km: Replace the brake pads. Please visit your local Decathlon workshop to have them replaced, or you can also do it yourself following our tutorial.
Have your tyres replaced, or replace them yourself using our tutorial.
Every 5000 km: Have your chain and rear wheel cogs replaced (visit the nearest Decathlon workshop).
How to degrease your bike chain
In order to properly degrease your chain, it's important to spray a degreasing product on the entire chain and drive train. Then, wipe the chain and the cassette with a clean cloth to remove grease and dirt. Depending on the general condition of your chain, be sure to clean any particularly dirty parts thoroughly!
Lastly, rinse it abundantly until you've removed all the residue. Sometimes, even after spraying with cleaning product, some dirt might still remain.
So finish by letting it sit for a few minutes before wiping your chain down again with a dry cloth to fully remove any remaining residue.
To perform this task more efficiently and for a cleaner chain, we recommend using our chain cleaner.

After replacing your brake pads, we recommend bedding them in so that they don't "seize up" (which would cause weaker braking power).
Riding a bike with worn-down tyres can be problematic, including loss of traction, flat tyres and falls. To reduce the chance of these, here are some tips on how to check the wear on your tyres.

Your tyre might be quite rigid if it is old; it's okay to use some force to get it off.
Simply unscrew the cassette using the lockring tool and chain whip, then screw on the new cassette.
You'll find the lockring tool and chain whip at the link below; for a new cassette, please check the "Spare Parts" section.
To do this, you will need: a chain tool, a new chain, and a quick-link.
Place the chain on the last cog and on the smallest chainring.
Remove the quick-link using the pliers or chain tool, then take the old chain off the drive train.
Place the new chain on the last cog and on the smallest chainring. This will make it easier to determine its optimal length.
IMPORTANT: certain chains only fit in 1 direction, so be sure to check the user guide.
The chain should pass close to the top pulley of the upper jockey wheel on the derailleur.
Once you've determined the correct length, use the chain tool to cut the chain.
Lastly, install the quick-link onto the chain, turn the pedal so as to position the quick-link on the upper part of the chain, and use your hand to apply pressure and ensure it is firmly locked in place.
Need equipment to repair or maintain your bike? Here are the essentials.

Care products

Bike tools
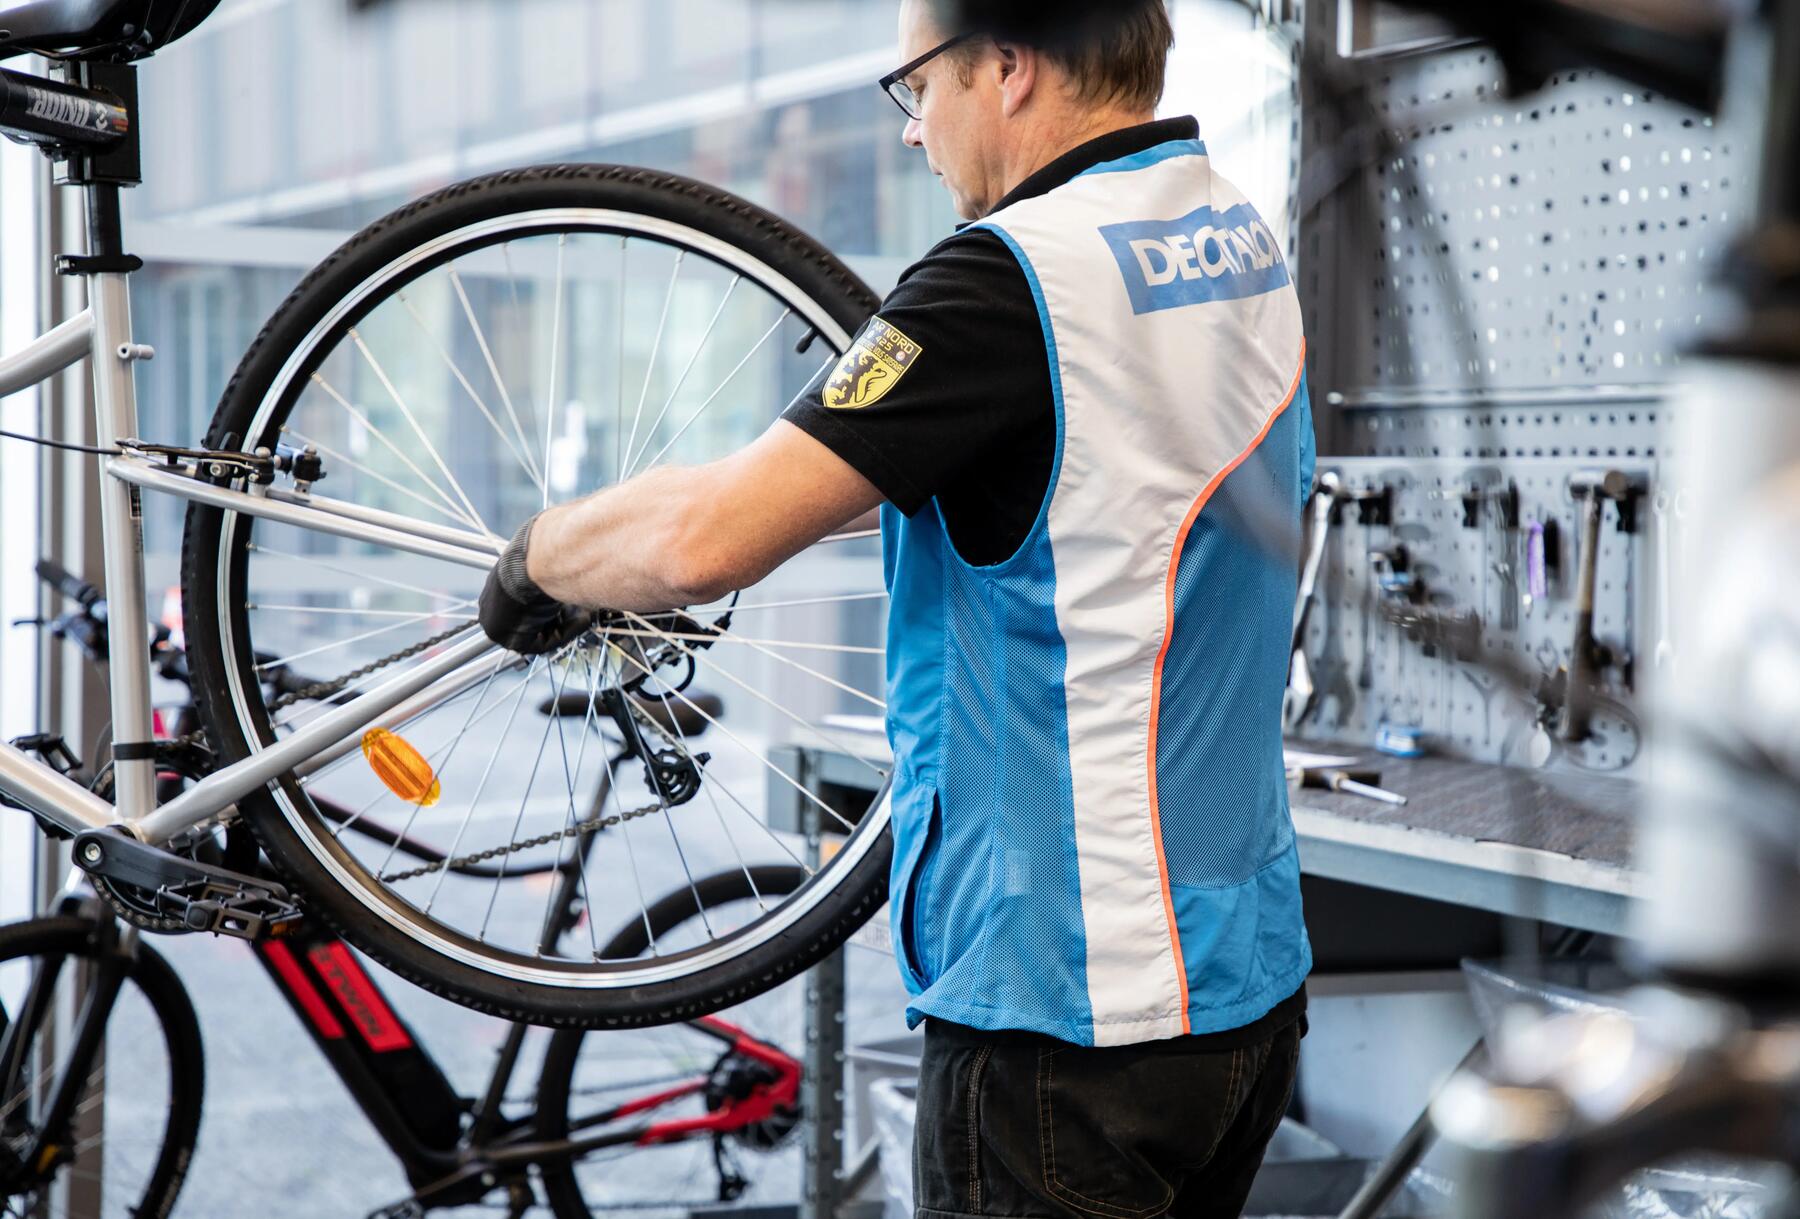
Repair your bike in store or right at home! Our qualified mechanics would be happy to help with your bike.

Decathlon is committed to reducing gas emissions caused by its bicycle manufacturing as much as possible.
Each part is designed to have the lowest carbon footprint possible.
We provide a lifetime warranty on the frame, stem and handlebar.
