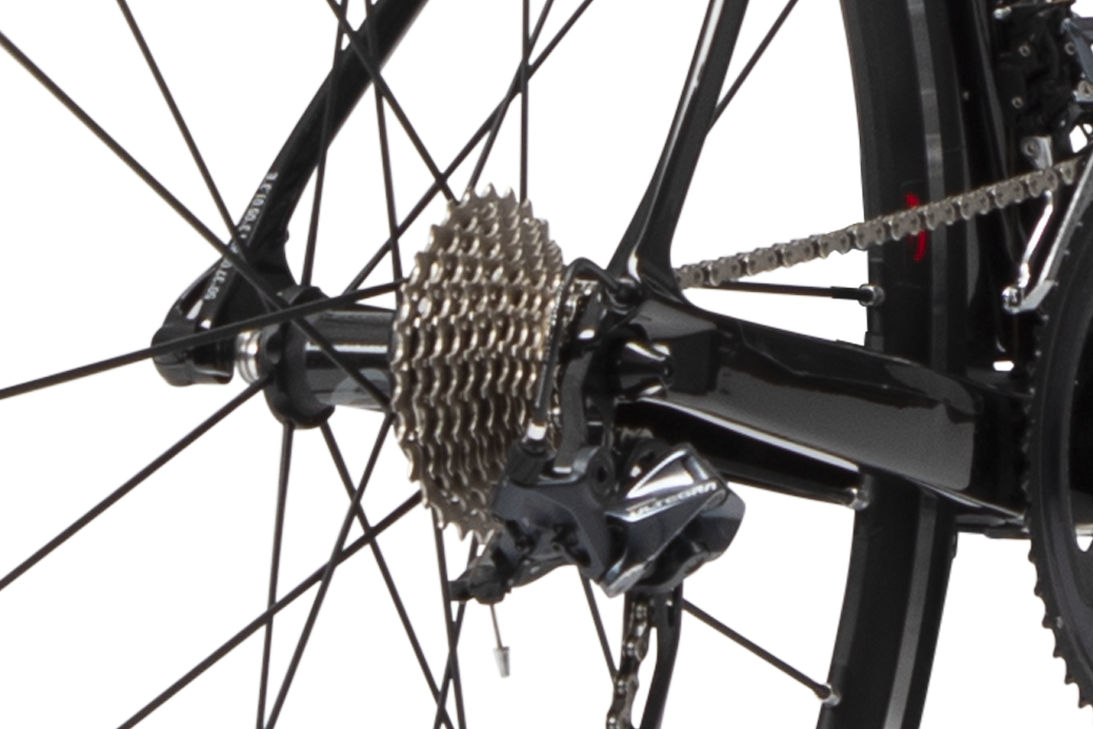
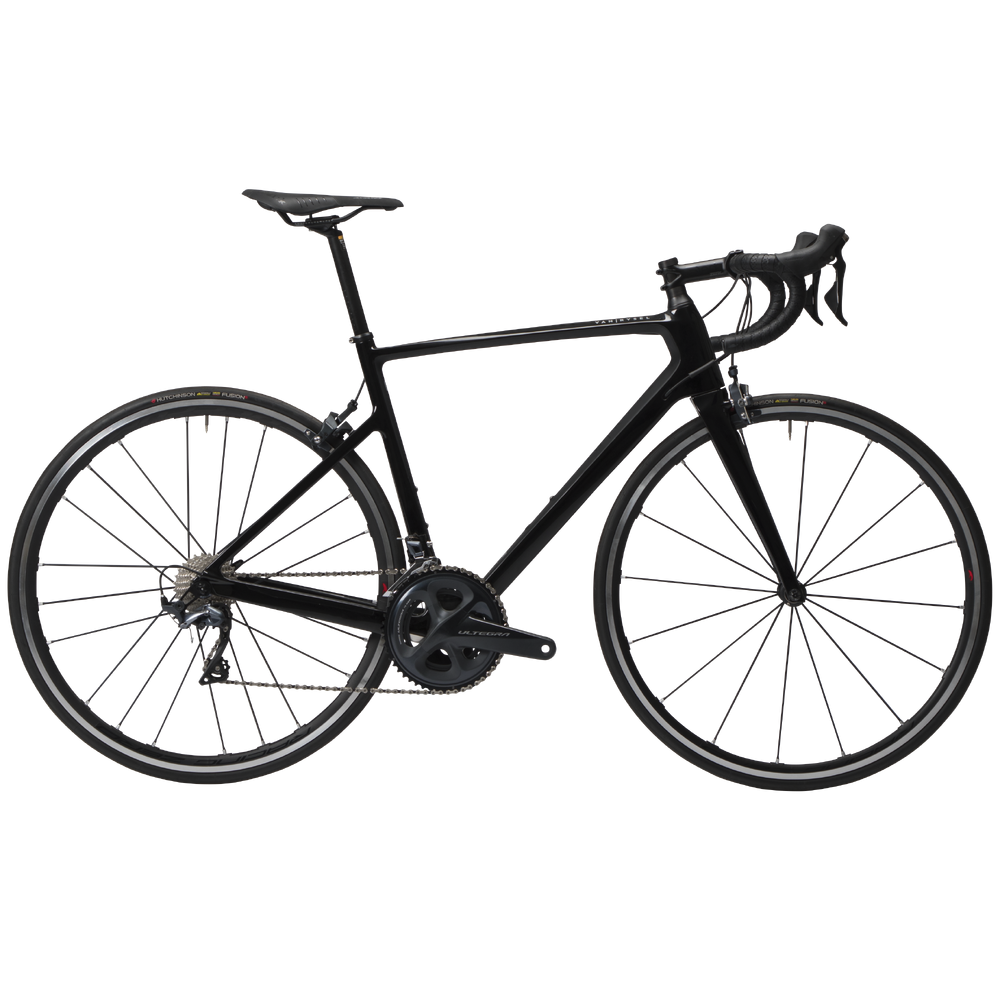
VAN RYSEL EDR CF SHIMANO ULTEGRA BRAKE PADS

REF: 8529321

VAN RYSEL EDR CF RIM ULTEGRA

2021

Welcome to the customer support page for your EDR CF RIM SHIMANO ULTEGRA Black or Red bike.

This bike shares the exact same characteristics as the VAN RYSEL EDR CF DB except for a different set of brakes.

Its frame's chassis and shape was redesigned from the ground up by our engineers to meet your expectations no matter what terrain you ride on. 

This carbon road bike is designed to deliver the performance you need in competition as well as during training.

Check out our tips for taking care of your new racer!

VAN RYSEL EDR CF ULTEGRA (2021): user guide, repairs

1. Assembling your bike

Watch our tutorial video to learn how to assemble your bike.

Take care when fitting the stem. The screws fixing the handlebar to the stem should be tightened in a star pattern and torqued to 6Nm.

Before using the bike, move the lever on the brake callipers down to bring the pads closer together.
3. Maintenance

Find all the info you need to keep your bike in good shape

Essential tools for your workshop.

To maintain your bike correctly, you need to have the right tools.

Cleaning your bike properly

Step 1: Apply degreaser

Step 2: Wash and rinse

Step 3: Apply fresh lubricant

For cleaning products, click on the link below:

What pressure should the tyres on your bike be?

The tyres are the only part of your bike that is in contact with the ground. It's important to minimise the risk of them losing grip, which is why it's important to make sure they are inflated to the right pressure.

Purchase a track style floor pump at the following link:

When to change your tyres

Riding with worn tyres comes with risks:

Loss of grip.

Greater exposure to punctures.

In this article, we'll tell you how to spot a worn tyre:

What should you do if you hear creaking while riding?

Since both the frame and the seat post are made of carbon, you can sometimes hear a creaking sound while riding. 

It is often due to a seat post that isn't greased sufficiently. 

Disassemble the seat post, apply a bit of carbon grease on the seat post, and then reposition it to the correct adjustment.

Tightening the seatpost

To set your saddle correctly it needs to be securely in place. A loose seat post can slip when you're out and about on your bike.
If you tighten it up too much, however, you run the risk of crushing the seatpost and damaging your bike.


The best way to tighten a seat post is to use a torque wrench. We recommend you tighten it to between 6 and 7Nm.


Take care not to exceed the maximum height indicated on the seat post.

Tightening the seatpost
When to change your chain

The chain is a key part of your bike's drive train. 

It is an important part of the drive train, since it connects the bottom bracket and the cassette. 

It transfers energy for efficient movement, so it is fundamental to keep your chain in good condition. 

In this article, you'll find out how to recognise a worn-out chain:

When to change your brake pads?

To check if your brake pads are worn down, measure the thickness of the rubber remaining on the brake pad.

If it's at or past the mark, it needs to be changed.

When to change your cables

There is no special number of kilometres to know when to replace your cables.

It depends on your practice of cycle touring/sport cycling/competition;

But also depends on how delicately you change gears - that is, if you change gears very regularly during your rides or not.

The first signs of wear are:

Is it challenging to change gears?
Even after adjusting them!
That means it might be time to replace your cables before they give out in the middle of a ride.

Also, if you notice that a housing or a cable is fraying, don't wait to replace it

When to change your cables
Your drive train makes noise

If your drive train is too noisy and/or your gears don't shift properly, you certainly need to adjust your derailleurs.

Find out how in the following video:

4. Repairs

You're sure to find the answer to your questions in the FAQs

CHANGING YOUR PEDALS

Are your pedals broken? Do you want to change your pedals for clipless ones? Here's our advice.

NB: please note that the screw thread on the left pedal is inverted and that the pedal thus screws on in an anti-clockwise direction. The right pedal has a standard screw thread. 

Please use the correct tool to take your pedals off as force needs to be exerted to unscrew them.

CHANGING YOUR INNER TUBE

If you pick up a puncture, our tutorial will tell you how to change your inner tube.

CHANGING YOUR HANDLEBAR TAPE

The tape on your handlebar will wear over time and you'll need to change it occasionally.

YOUR BIKE ISN'T BRAKING VERY WELL

If your brakes aren't as effective as they were, here are a couple of things you should do: 

- Clean the rims using a degreasing agent.

- Check your brake pads for wear.

- Check the tension of the cable.

YOUR BIKE ISN'T BRAKING VERY WELL
CHANGING YOUR BRAKE PADS

It's important to change your brake pads before they become too worn. It makes for safe riding.

CHANGING YOUR HOUSINGS AND BRAKE CABLE

Need to change your brake cables and/or housing? 

Follow our tutorial: 

YOUR GEARS ARE SKIPPING

If your gears are slipping, you need to check the following: 

- Wear on your drive train.

- The tension of the cables.

You then need to adjust the derailleur.

CHANGING YOUR DERAILLEUR HOUSINGS AND CABLE

Need to change your derailleur cables and/or housing? 

Follow our tutorial: 

THE DERAILLEUR HANGER IS BROKEN OR BENT

If your derailleur hanger is broken or bent, you need to change it. 

CHANGING YOUR CHAIN

Here's some useful advice on how to change your chain correctly.

CHANGING YOUR BIKE CASSETTE

Is your drive train worn? Changing the number of cogs on your cassette? 

Check out our tutorial to replace your bike cassette.

Please note: the maximum cassette size for this bike is 11 - 34.

CHANGING YOUR BIKE CASSETTE
HOW TO CHANGE YOUR CHAINRINGS

Are your chainrings worn? Do you want to change the number of teeth? 

It's easy to change your chainrings. 

To do so, simply use an Allen key to undo the screws that hold the chainrings on. 
Then fit the new ones. 

Remember that, on this bike, the minimum chainring size is 36T.

How to change your rear derailleur

Find out how in the video below:

VAN RYSEL EDR CF ULTEGRA (2021)

Assistance

Can't find a solution to your problem? Contact our cycling technician for help.

5. Characteristics

Sizes: XS / S / M / L / XL

Colours: Black or Red

Frame: Full carbon 

Fork: Full carbon 

Wheels: Fulcrum Racing 0

Wheel axle: 
Front 9x100
Rear 10X130

Tyres: Hutchinson Fusion 5
Size: 25 mm

Handlebar: DEDA ZERO 2
XS / S - 400mm
M / L / XL - 420mm

Stem: DEDA ZERO 2
XS - 90mm
S - 100mm
M - 110mm
L - 120mm
XL - 130mm

Shifters: SHIMANO R 7000

Saddle: FIZIK ANTARES R3 Black

Seatpost: VR Carbon 27.5
XS - 250mm
S / M / L - 350mm
XL - 400mm

Front derailleur: SHIMANO R 8000

Rear derailleur: SHIMANO R 8000 GS 

Cassette: SHIMANO R 8000

Crank: SHIMANO R 8000 (52/36)
XS / S - 170mm
M - 172.5mm
L / XL - 175mm

Chain: KMX 11s

Front brake calliper: SHIMANO R 8010

Rear brake calliper:  SHIMANO R 8000

Total weight: 7.28 KG

7. WORKSHOP SERVICES

You can do all of the procedures described below yourself or you can get your local Decathlon workshop to do them for you. For more information about the services the workshop offers, please click the link below.

8. INSTRUCTIONS

FRONT DERAILLEUR - SHIMANO ULTEGRA R8000

Download the user guide for the front derailleur on your EDR CF Ultegra:

8. INSTRUCTIONS
REAR DERAILLEUR - SHIMANO ULTEGRA R8000

Download the user guide for the rear derailleur on your EDR CF Ultegra:

8. INSTRUCTIONS
SHIFTERS - SHIMANO ULTEGRA R8000

Download the user guide for the shifters on your EDR CF Ultegra:

8. INSTRUCTIONS
CRANK - SHIMANO ULTEGRA R8000

Download the user guide for the crank on your EDR CF Ultegra:

8. INSTRUCTIONS
BRAKE CALLIPERS - SHIMANO ULTEGRA R8000

Download the user guide for the brake callipers on your EDR CF Ultegra:

8. INSTRUCTIONS
WHEELS - FULCRUM RACING 0
8. INSTRUCTIONS
STEM - DEDA ZERO 2
8. INSTRUCTIONS
HANDLEBAR - DEDA ZERO 2
8. INSTRUCTIONS
SADDLE - FIZIK ANTARES R3
8. INSTRUCTIONS

9 / WARRANTIES

  • Commitment

    The carbon frame on your VAN RYSEL road bike comes with a 5 year warranty (under normal conditions of use).

    All other parts have a 2-year warranty.

    The table shows the main bike components, the types of wear that aren't covered by warranties, and the warranty length within the European Union.